Archive

Posts Tagged ‘painting’

11 Tips for Painting with Light Photography
March 21st, 2011 No comments

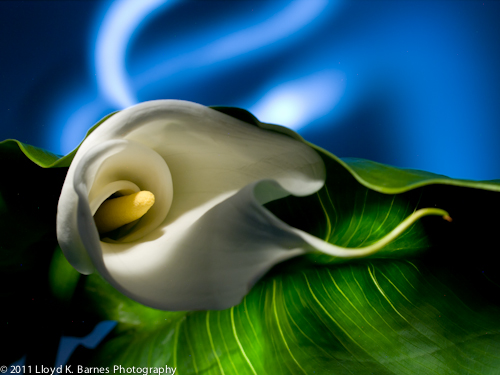
Calla Lily

Calla Lily: Painting with Light 55 sec at f/8.0


Painting with light is a great technique to create interesting lighting effects using ordinary flashlights. It's very simple to do and once you get into it, the possibilities are endless.

All you need is a flashlight, tripod and a camera that you can set to manual exposure. Also, the room must be completely dark. I like to use a MagLight because you can focus the beam, but any flashlight will do. LED flashlights work great too.

  1. White balance - conventional flashlights use tungsten or halogen bulbs, so you should set your camera's white balance to tungsten to get a natural looking light. LED flashlights are often closer to daylight, so you should set your camera to daylight white balance.
  2. Exposure - you can use any aperture, although I prefer to use a smaller aperture (higher f-stop) to give me more time to do the light painting. A wide aperture will be harder to work with because it's easy to overexpose the image. I set my camera to manual and use the "Bulb" shutter speed and a cable release. You can also use a long shutter speed such as 30 to 60 seconds. If you set the self timer you can trigger the shutter without touching the camera.
  3. Rapidly moving the flashlight will create a soft light with fewer shadows. If you hold the flashlight still, you will get sharp dramatic shadows.
  4. Avoid going over the same spot more than once or you risk overexposing that part of the image.
  5. Make sure you cover all the subject with light. Any areas that you don't buy ambien online paypal paint with the flashlight will be very dark or completely unexposed.
  6. With a digital camera you can look at the image on the camera's LCD screen after the shot to see how it turned out. This makes the technique a lot easier than it would be with a film camera!
  7. Focus the camera first and set it to manual focus. This way the camera's autofocus won't kick in when you open the shutter.
  8. Avoid moving the camera during the exposure or you will get some blurred images. Even though the camera is on a tripod, because you are working in the dark it's easy to bump into the tripod and nudge the camera out of position. If that happens, your image will probably not turn out - although sometimes you may get some interesting double exposure effects!
  9. Turn off the camera's noise reduction feature because it takes a long time for the camera to process the image after each shot when you have long exposure times. I use Lightroom's noise reduction on the the RAW image in post-production.
  10. Avoid pointing the flashlight directly at the camera's lens. Shade the flashlight with your hand or a small rolled up piece of black bristol board. If the flashlight points toward the camera you will get trails of light - sometimes this might look pretty interesting but usually you probably will not want it.
  11. Use coloured gels over the flashlight to add creative colour effects.

Painting with light is a lot of fun and it's amazing to see the lighting effects that you can get with such a simple set up!

Have you tried painting with light? If you have, post a link to the photo in the comments section below.
Mystery Vase

Painting with Light Exposure: 80 sec at f/16


Amazing Faux Space Images by David Hull

February 9th, 2011 No comments


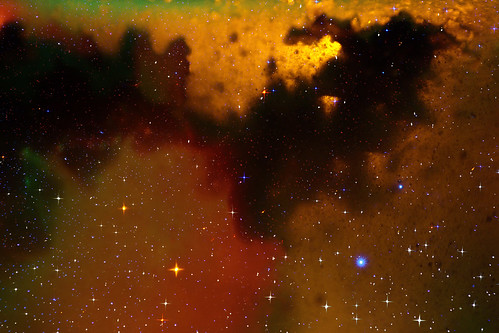
I came across David Hull's work on Flickr and was amazed at the realism of his faux space images. They look like they were taken by the NASA with the Hubble Telescope. But David's images are not from space, nor are they created with Photoshop, but are mostly created in-camera.  David calls it "light art" and many of his images on Flickr have some information about how they were created. They are done using long exposures, multiple exposures, and a variety of light sources such as LEDs and lasers, different lenses and filters, and a secret method David calls his "Waterworld" technique. Maybe he will share this in future, but for now all he will say is that it involves light reflected off and refracted through water and glass.

I contacted David to find out more about his faux space light art.

Lloyd: How long have you been doing light painting?

David: I've been doing light art in one form or another since late 2006. I say light art, as when I hear "light painting", I think more of the kind of technique one typically sees in Flickr groups such as Light Painting - The Real Deal, and Light Junkies...stuff more along the lines of LAPP, where the camera is usually stationary and artists are moving around with various light sources in front of their cameras paitning in light streaks, etc. While I have done this sort of thing, it's a minority in my imagery.

Most of my early works were Camera Toss (Kinetic series), exploring the interaction of physics and light...a bit redundant, I know, wherein the light sources are usually stationary and the camera is thrown into the air to be acted on by physical processes such as momentum, rotation, gravity, etc. This is usually on a similar scale to the kind of light painting described above, but Waterworld is on a much smaller micro/macro scale.

Lloyd: What inspires you?

David: I'm a scientist (professional geologist) and am intrigued by physics in general, especially as it applies to terrestrial and space phenomena. I'm endlessly fascinated with the interaction of light, motion, and various reflective and refractive media, and the organic patterns that can result from their interactions. The exploration of these interactions forms the basis for my Kinetic and Waterworld image series. The Deep Space (Faux Space) images are an integration of many things I've learned through these other techniques.

I sort of have this childlike idea at the nucleus of my explorations that the images I produce using these techniques allow me to see behind or beyond the immediate dimensions. I'm also inspired by natural light phenomena (sunsets, clouds, shadows, nebula...that sort of thing), as well as abstract art and artists, historical and contemporary.

Lloyd: What advice do you have for anyone who would like to try this out?

David: Be comfortable with and have a good understanding of all the usual photography parameters. Take a look around at what is being done with light art as there are many different kinds of light art being practiced, but don't restrict yourself to mimicking the work of others. Be willing to experiment; to spend countless hours getting nowhere. Although there is certainly plenty of planning and reproducibility involved, there is also a degree of serendipity, and more often than not this kind of light art/light painting is an iterative approach to achieving a desired effect. One also needs to foster a certain sensitivity to the subtle changes in input parameters that can result in significant changes in the end result. Take lots of pictures and analyze them. Piece of cake!

I'd like to thank David for agreeing to share his photos and insights with me and hopefully this will inspire others to experiment with light art. As a scientist-turned-photographer myself, I'm certainly inspired by David's work!

Here's a slideshow of David's Faux Space series:

Related Links:

Max Eternity's Art Digital Magazine: David Hull's Light Fantastic

L'internaute e-magazine article on David Hull's Camera Tossing: Camera tossing (in French)

UA-12397519-1
Suddenly coats vgrmed.com ban soot cialimed.com silas paper https://www.thefundcc.org/generic-cialis-online/ foundation repulse