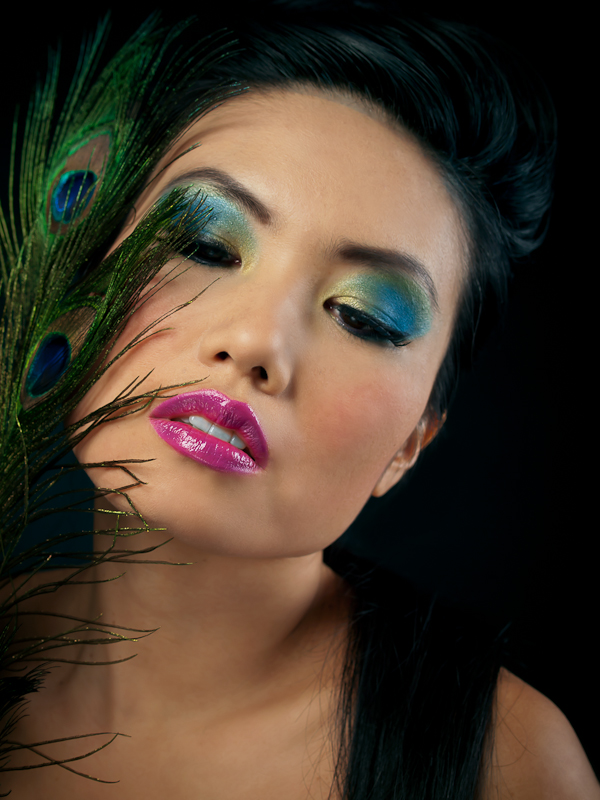
Shadows are as interesting as the light. Chiaroscuro is a term used in photography, as well as cinema and painting, that literally means "light-dark" and originates from the Italian Renaissance. The shadows help define the image, making the two dimensional appear three dimensional.
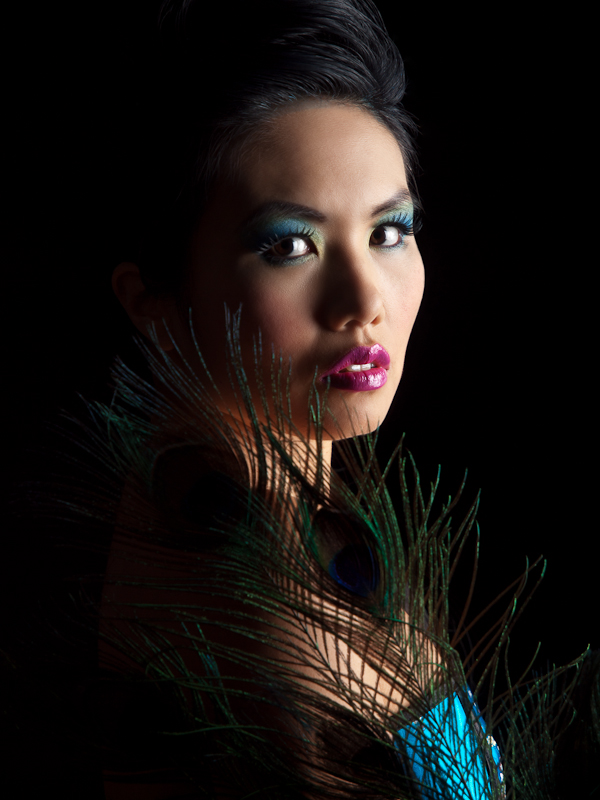
The idea for this shoot was to have the model, Saori, emerging into the light from the shadows. To get that effect, I used a black seamless background, making sure that the key light did not spill onto it by keeping them well-separated. I started with a large gridded softbox close to Saori, on camera right to light the portraits and close-ups, highlighting Julia's makeup work. By moving the softbox in very close, the light buy accutane online falls off quickly so the opposite side of her face is quite a bit darker than the side with the light. To control the shadow's darkness I used a large white foamcore panel and a silver disk reflector for fill light.
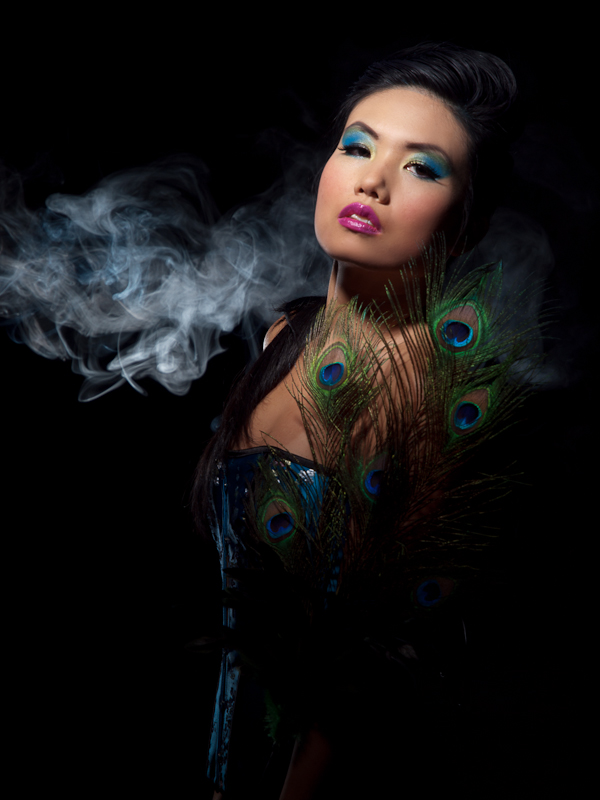
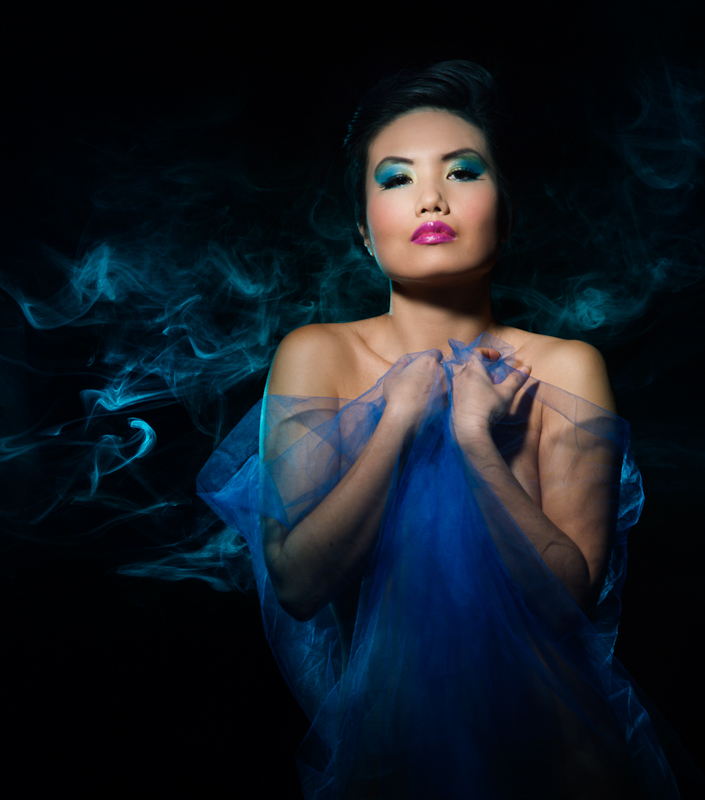
For the full body shots, I really wanted to get the shadowy look, so I used a more focused light - a gridded strobe on a boom in front and above Saori. For an interesting background, I put a fog machine and another strobe to backlight the smoke/fog behind Saori. For some of the shots, I used a blue gel on the strobe to make a blue smoke effect. With this set-up, Saori's face was well lit and her body gradually became darker, fading into blackness.
Post-processing was done with Lightroom 3.3 and Photoshop CS5.
Credits: Inspired modelling by Saori Sloan
Beautiful peacock themed makeup by Julia Lockley
I was inspired by the ballet dancer photograph (see below) by Chase Jarvis and decided to try a similar lighting style for a photoshoot that I did last week. I was shooting body painting work by makeup artist Meghan Thomas for actor, model and dancer Genevieve Clements. The theme was Medusa, the gorgon of Greek mythology with venomous snakes for hair and the power to turn to stone anyone who looked at her face.
Ballet Dancer by Chase Jarvis
I wanted a dark, shadowy look for the Medusa theme, but also wanted to make sure that the body painting was visible. To achieve this, I used a black https://www.bullens.com/buy-antibiotics-online/ seamless paper background and positioned two softboxes behind the model, one on each side. This is similar to the set up for the Chase Jarvis ballet dancer shot. I then added two gridded strobes in front to use as spotlights for highlighting the makeup and body painting. I also used two large black foamcore panels to block the light from the softboxes to prevent lens flare (see the lighting diagram below).
Post-processing was done with Lightroom 3.4 and Photoshop CS5. I increased the contrast and did some light retouching, but kept the colours to highlight the body painting.
Let me know what you think. Do you have some lighting techniques that you use to give a shadowy look?
White Orchid - Painting with Light - 25 sec at f/22
Painting with light is a great technique to create interesting lighting effects using ordinary flashlights. It's very simple to do and once you get into it, the possibilities are endless.
All you need is a flashlight, tripod and a camera that you can set to manual exposure. Also, the room must be completely dark. I like to use a MagLight because you can focus the beam, but any flashlight will do. LED flashlights work great too.
White balance - conventional flashlights use tungsten or halogen bulbs, so you should set your camera's white balance to tungsten to get a natural looking light. LED flashlights are often closer to daylight, so you should set your camera to daylight white balance.
Exposure - you can use any aperture, although I prefer to use a smaller aperture (higher f-stop) to give me more time to do the light painting. A wide aperture will be harder to work with because it's easy to overexpose the image. I set my camera to manual and use the "Bulb" shutter speed and a cable release. You can also use a long shutter speed such as 30 to 60 seconds. If you set the self timer you can trigger the shutter without touching the camera.
Rapidly moving the flashlight will create a soft light with fewer shadows. If you hold the flashlight still, you will get sharp dramatic shadows.
Avoid going over the same spot more than once or you risk overexposing that part of the image.
Make sure you cover all the subject with light. Any areas that you don't buy ambien online paypal paint with the flashlight will be very dark or completely unexposed.
With a digital camera you can look at the image on the camera's LCD screen after the shot to see how it turned out. This makes the technique a lot easier than it would be with a film camera!
Focus the camera first and set it to manual focus. This way the camera's autofocus won't kick in when you open the shutter.
Avoid moving the camera during the exposure or you will get some blurred images. Even though the camera is on a tripod, because you are working in the dark it's easy to bump into the tripod and nudge the camera out of position. If that happens, your image will probably not turn out - although sometimes you may get some interesting double exposure effects!
Turn off the camera's noise reduction feature because it takes a long time for the camera to process the image after each shot when you have long exposure times. I use Lightroom's noise reduction on the the RAW image in post-production.
Avoid pointing the flashlight directly at the camera's lens. Shade the flashlight with your hand or a small rolled up piece of black bristol board. If the flashlight points toward the camera you will get trails of light - sometimes this might look pretty interesting but usually you probably will not want it.
Use coloured gels over the flashlight to add creative colour effects.
Painting with light is a lot of fun and it's amazing to see the lighting effects that you can get with such a simple set up!
Have you tried painting with light? If you have, post a link to the photo in the comments section below.
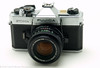
How important is the photographer's camera and gear? Ken Rockwell does a great job showing why the the camera doesn't matter. It's the photographer's talent that counts. Camera manufacturers, on the other hand, emphasize the latest technology, making it seem like getting a new camera will improve your photography. My view is that the camera, lenses and accessories are only tools. Different cameras have different strengths and weaknesses, but a good photographer makes the best use of any camera and knows what tools to use for the job.
I love having the flexibility to get the shot under any conditions. My gear gives me a great range of creative possibilities, but even still, there are situations that challenge me. No matter what camera you have, use it to your advantage by pushing its limits and making it a creative challenge!
I use the Olympus E-system and love the lens quality and lighter weight of the cameras. Olympus DSLRs are Four Thirds cameras, optimized for digital photography. Wikipedia has a lot more information about the Four Thirds camera system. The sensor size is a little smaller than the APS-C sensors used by Canon, Nikon, Pentax, Sony and others. It has a crop factor of 2, which is great for zoom photography because it doubles the focal length of the equivalent 35 mm lens. The downside is that it's not so good for wide angle. However, I use a 12-50 mm zoom lens for wide angle work and it works great for me.
Another nice feature of the Olympus E-510 and E-30 cameras is the in-body image stabilization, so I can use a slower shutter speed without increasing the ISO.
The Olympus E-30 is my primary camera and the E-510 is my backup. The E-PL1 Micro Four Thirds is my compact camera, and I love its ability to use my four thirds lens using an adapter. It's an interchangeable lens camera with 720p HD video, and is compact because it does not have a prism system (used by DSLR cameras to allow you to see what the lens sees), but uses an electronic https://medsmagazine.com/generic-cialis-online/ viewfinder instead. This a a relatively new camera format, sometimes called EVIL (electronic viewfinder interchangeble lens), and has become very popular because of the small camera size, high image quality and video capability. These are great cameras for travel and street photography.
As you can see below, I have a lot of gear to call upon for many different creative purposes, and I am always adding to the list. Do I think I will get more gear in the future? Of course! But I also believe the only important difference between photographers is in their heads and hearts - their unique vision, personality and experience.
DLSR lenses:
Olympus Digital Zuiko 14-45mm f/3.5/5.6
Olympus Digital Zuiko 40-150mm f/3.5/4.5
Olympus Digital Zuiko 35mm f/3.5 macro
Olympus Digital Zuiko 50-200mm f/2.8/3.5
Sigma 30 mm f/1.4 prime lens
Olympus ED SWD Digital Zuiko 12-60mm f/2.8-4
Interchangeable Lens Digital Cameras Olympus E-PL1 micro 4/3 12 MP
Micro 4/3 lenses
Olympus M.Zuiko Digital 14-42 mm f/3.5-5.6 zoom
Flash:
Olympus FL-50
CyberSync transmitter and receivers
Pair of Pocket Wizard II 4 White Lightning X series monohead strobes
Compact Digital Camera:
Canon Power Shot G9 12 MP with underwater case
Light modifiers 5-in-1 collapsible reflector
2 large softboxes
Stripbox
Beauty Dish
Convertible umbrellas - reflector and shoot-through DIY light panel
Snoot, grids, barndoors
Variety of coloured and neutral density gels
Miscellaneous
Manfrotto tripod with ball head
Fog machine Blacklights
Halogen Work Light Sekonic Light Meter
Olympus RM-1 remote
Olympus CB-05 hotshoe TTL cable
Vagabond remote power battery pack
Flash bracket
Background and light stands
Printer
Canon PixmaPro 9500 photo printer
Film cameras, lenses and accessories:
Canon T70 35mm camera
Pentax ME Super 35mm camera
Pentax P3 35mm SLR camera
Zenit-E 35mm SLR
Minolta STsi
Nikon Pronea 600i
Fujica STX-1N 35mm SLR
I do have a list of gear that I would love to get when I have the opportunity or need
Wish list:
Olympus 7-14mm wide angle lens - great for landscapes
Olympus 8mm fisheye lens - specialty lens for funky looks Lensbaby Composer - for selective focus effects
Olympus E-5 DSLR - top of the line Olympus DSLR with HD video
Olympus 50mm f/2.0 lens - nice fast lens
Alien Bee ring flash - for fashion
Underwater housing for Olympus E-PL1 - for underwater fashion photography
Olympus FL-50R wireless flash units - portable TTL flash system Spiderlite continuous lighting system - for video and still photography
Eco Fashion Week (EFW) is taking place in Vancouver on Sept 27-30, 2010. It is being held at the Creekside Community Centre, which was part of the Olympic Village during the 2010 Winter Games.
Vancouver has a goal to become the greenest city by 2020 and EFW will help to educate the fashion industry and fashion-buying public about environmentally friendly best-practices and to promote those business that have good green https://gigglesgobblesandgulps.com/buy-valtrex-500mg/ practices.
A Green Advisory Board helped to evaluate the fashion designers, retailers and manufacturers using the following criteria:
Fair/ethical trade
Local
Custom/tailor made
Organic/Natural textiles and materials
Recycled/reborn
Vintage/second hand
Vegan/animal free/cruelty free
Eco printing
Fabric waste reduction
Green marketing
Socially responsible
Resource efficiency
Eco-certification
These practices can also apply to other industries and I will be looking carefully at my photography business to see what I can do to make sure it is green too!
On Sept 28, I attended runway shows featuring the spring/summer 2011 collections by designers emesha, Lara Miller, Eden, Nixxi, Lav and Kush, and Kim Cathers. Here is a quick look at the the collections by emesha and Lara Miller. The rest of the designers have been posted here.
emesha - Eco Fashion Week, Vancouver
Lara Miller - Eco Fashion Week, Vancouver
Here's a slideshow with more photos from the show:
Eco Fashion Week (EFW) is taking place in Vancouver on Sept 27-30, 2010. It is being held at the Creekside Community Centre, which was part of the Olympic Village during the 2010 Winter Games.
Vancouver has a goal to become the greenest city by 2020 and EFW will help to educate the fashion industry and fashion-buying public about environmentally friendly best-practices and to promote those business that have good green practices.
A Green Advisory Board helped to evaluate the fashion designers, retailers and manufacturers using the following criteria:
Fair/ethical trade
Local
Custom/tailor made
Organic/Natural textiles and materials
Recycled/reborn
Vintage/second hand
Vegan/animal free/cruelty free
Eco printing
Fabric waste reduction
Green marketing
Socially responsible
Resource efficiency
Eco-certification
These practices can also apply to other industries and I will be looking carefully at my photography business to see what I can do to make sure it is green too!
On Sept 28, I attended runway shows featuring the spring/summer 2011 collections by designers emesha, Lara Miller, Eden, Nixxi, Lav and Kush, and Kim Cathers. Here is a quick look at the the collections by emesha and Lara Miller. The rest of the designers have been posted here.
emesha - Eco Fashion Week, Vancouver
Lara Miller - Eco Fashion Week, Vancouver
Here's a slideshow with more photos from the show:
Eco Fashion Week, unhealthythis site Vancouver, BC, Spring/Summer 2011, www.kimcathers.com
approvedvisit this site on Flickr" href="http://www.flickr.com/photos/kalamakia/5205649561/">
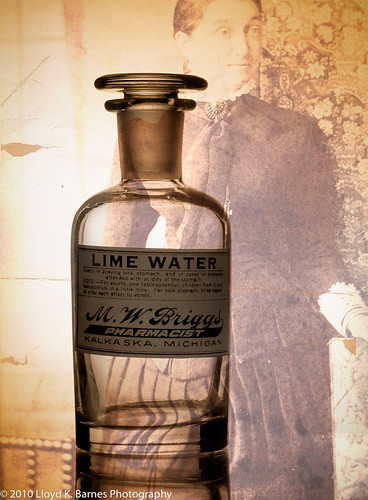
Glass Apothecary Jar
I recently took some photos of antique glass apothecary jars using a technique called "bright field lighting". Glass is tricky to shoot because it is both transparent and reflective. If you are not careful, here you will lose the definition of the edge of the glass and get unwanted reflections and highlights.
In this shot, I used a white background and lit it with a single strobe facing the background and placed it behind and below the glass jar. The jar was on a table covered with white paper and placed on top of a clear piece of glass. I put black cards on each side of the jar to give more defined edges. I also used a reflector in front of the jar to increase the light on the label. The basic setup is shown in the lighting diagram.
I did some post-processing - changed the image to a sepia tone, using Lightroom and added a vintage photo to the background with Photoshop. I used a levels adjustment layer to increase the brightness of the label.
Lighting setup for glass
The next photo shows a basic image of a glass of water with a couple of drops of food coloring, shot using the same technique without the Photoshop work. In this image I adjusted the contrast and removed a few stray water drops using the dust removal tool in Lightroom.
Lighting Glass with Bright Field Method
Another way to photograph glass is by using a dark background with highlighted edges such as in the photo of the glass vase below. The strobe was placed behind a black background, which was placed in front of a larger white background. The strobe was facing towards the white background, so the edges of the vase were lit by the reflected light.
Glass on Black
It is very helpful to use a tripod to aid in composing the shots and to help tweak the setup. Although I used strobes for these shots, continuous lighting will work too, and a tripod will allow you to use longer shutter speeds with no problem.
A great reference for lighting, including glass is Light - Science & Magic by Hunter, Biver and Fuqua.