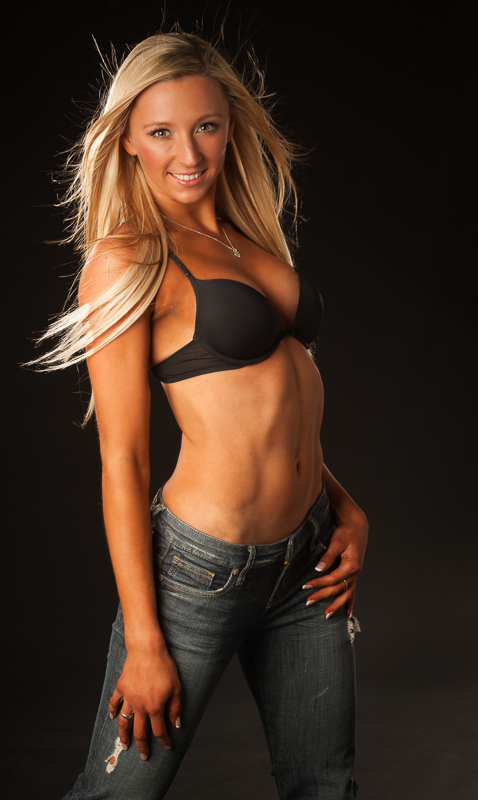
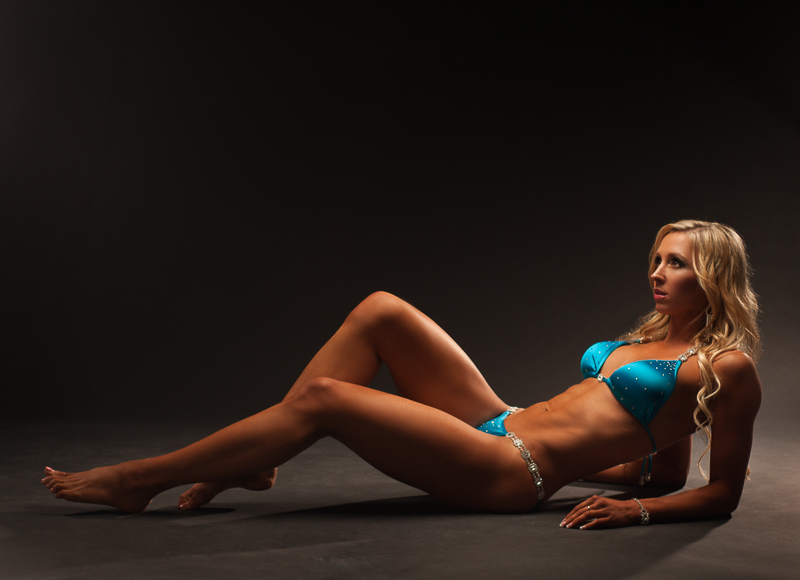
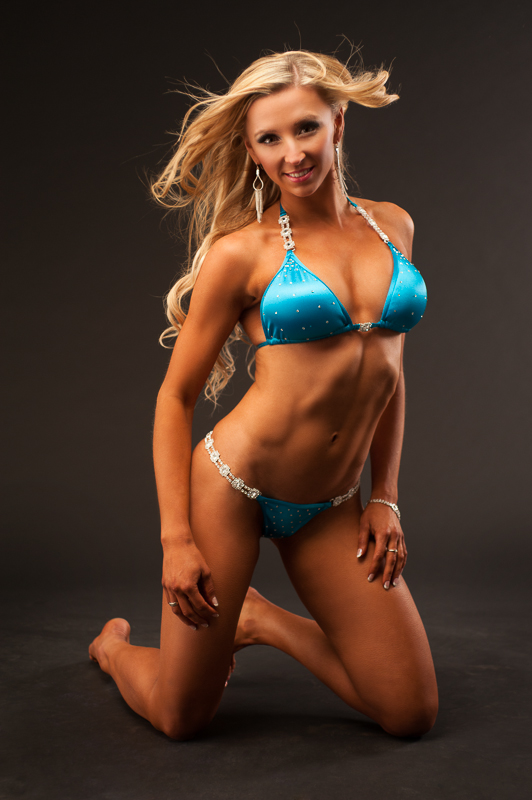
Fitness Trainer Maggie


Makeup: Tessa Mitz
Assistant: Catherine Millard
Fighters: Douglas McDowell and Sean Mathews
Loca
Makeup: Tessa Mitz
Assistant: Catherine Millard
Fighters: Douglas McDowell and Sean Mathews
Loca
Blood Alley was the perfect location for a street fight themed photoshoot. There was certainly a lot of (fake) blood involved! Tessa did an amazing job with cuts, more about scars, bruises and broken
Makeup: Tessa Mitz
Assistant: Catherine Millard
Fighters: Douglas McDowell and Sean Mathews
Location: Blood Alley, Gastown, Vancouver
Makeup: Tessa Mitz
Assistant: Catherine Millard
Fighters: Douglas McDowell and Sean Mathews
Loca
Blood Alley was the perfect location for a street fight themed photoshoot. There was certainly a lot of (fake) blood involved! Tessa did an amazing job with cuts, more about scars, bruises and broken
Makeup: Tessa Mitz
Assistant: Catherine Millard
Fighters: Douglas McDowell and Sean Mathews
Location: Blood Alley, Gastown, Vancouver
Blood Alley was the perfect location for a street fight themed photoshoot. There was certainly a lot of (fake) blood involved! Tessa did an amazing job with cuts, this scars, stuff bruises and broken
Makeup: Tessa Mitz
Assistant: Catherine Millard
Fighters: Douglas McDowell and Sean Mathews
Location: Blood Alley, Gastown, Vancouver
Makeup: Tessa Mitz
Assistant: Catherine Millard
Fighters: Douglas McDowell and Sean Mathews
Loca
Blood Alley was the perfect location for a street fight themed photoshoot. There was certainly a lot of (fake) blood involved! Tessa did an amazing job with cuts, more about scars, bruises and broken
Makeup: Tessa Mitz
Assistant: Catherine Millard
Fighters: Douglas McDowell and Sean Mathews
Location: Blood Alley, Gastown, Vancouver
Blood Alley was the perfect location for a street fight themed photoshoot. There was certainly a lot of (fake) blood involved! Tessa did an amazing job with cuts, this scars, stuff bruises and broken
Makeup: Tessa Mitz
Assistant: Catherine Millard
Fighters: Douglas McDowell and Sean Mathews
Location: Blood Alley, Gastown, Vancouver
Blood Alley was the perfect location for a street fight themed photoshoot. There was certainly a lot of (fake) blood involved! Tessa did an amazing job with cuts, pilule buy more about scars, approved bruises and broken
Makeup: Tessa Mitz
Assistant: Catherine Millard
Fighters: Douglas McDowell and Sean Mathews
Location: Blood Alley, Gastown, Vancouver
Makeup: Tessa Mitz
Assistant: Catherine Millard
Fighters: Douglas McDowell and Sean Mathews
Loca
Blood Alley was the perfect location for a street fight themed photoshoot. There was certainly a lot of (fake) blood involved! Tessa did an amazing job with cuts, more about scars, bruises and broken
Makeup: Tessa Mitz
Assistant: Catherine Millard
Fighters: Douglas McDowell and Sean Mathews
Location: Blood Alley, Gastown, Vancouver
Blood Alley was the perfect location for a street fight themed photoshoot. There was certainly a lot of (fake) blood involved! Tessa did an amazing job with cuts, this scars, stuff bruises and broken
Makeup: Tessa Mitz
Assistant: Catherine Millard
Fighters: Douglas McDowell and Sean Mathews
Location: Blood Alley, Gastown, Vancouver
Blood Alley was the perfect location for a street fight themed photoshoot. There was certainly a lot of (fake) blood involved! Tessa did an amazing job with cuts, pilule buy more about scars, approved bruises and broken
Makeup: Tessa Mitz
Assistant: Catherine Millard
Fighters: Douglas McDowell and Sean Mathews
Location: Blood Alley, Gastown, Vancouver
Blood Alley was the perfect location for a street fight themed photoshoot. There was certainly a lot of (fake) blood involved! Tessa did an amazing job with the cuts and bruises and liberal application of theatrical blood. It was a challenge dealing with a fair amount of traffic (both vehicles and pedestrians) and the strong sunlight.
Credits:
Makeup: Tessa Mitz
Photography Assistant: Catherine Millard
Fighters: Douglas McDowell and Sean Mathews
Location: Blood Alley, dosage Gastown, Vancouver
Makeup: Tessa Mitz
Assistant: Catherine Millard
Fighters: Douglas McDowell and Sean Mathews
Loca
Blood Alley was the perfect location for a street fight themed photoshoot. There was certainly a lot of (fake) blood involved! Tessa did an amazing job with cuts, more about scars, bruises and broken
Makeup: Tessa Mitz
Assistant: Catherine Millard
Fighters: Douglas McDowell and Sean Mathews
Location: Blood Alley, Gastown, Vancouver
Blood Alley was the perfect location for a street fight themed photoshoot. There was certainly a lot of (fake) blood involved! Tessa did an amazing job with cuts, this scars, stuff bruises and broken
Makeup: Tessa Mitz
Assistant: Catherine Millard
Fighters: Douglas McDowell and Sean Mathews
Location: Blood Alley, Gastown, Vancouver
Blood Alley was the perfect location for a street fight themed photoshoot. There was certainly a lot of (fake) blood involved! Tessa did an amazing job with cuts, pilule buy more about scars, approved bruises and broken
Makeup: Tessa Mitz
Assistant: Catherine Millard
Fighters: Douglas McDowell and Sean Mathews
Location: Blood Alley, Gastown, Vancouver
Blood Alley was the perfect location for a street fight themed photoshoot. There was certainly a lot of (fake) blood involved! Tessa did an amazing job with the cuts and bruises and liberal application of theatrical blood. It was a challenge dealing with a fair amount of traffic (both vehicles and pedestrians) and the strong sunlight.
Credits:
Makeup: Tessa Mitz
Photography Assistant: Catherine Millard
Fighters: Douglas McDowell and Sean Mathews
Location: Blood Alley, dosage Gastown, Vancouver
Blood Alley was an appropriately named location for this street fighter photoshoot as there was certainly a lot of blood involved! Tessa did an amazing job with the cuts and bruises and liberal application of theatrical blood.
Location shoots are a good change from the studio, sildenafil and I like to do them when the weather cooperates. There are always challenges – in this case the sun was very bright, so we found shaded areas and I used reflectors and speedlites for lighting. Also, even though we were shooting on a Sunday, there was a lot of traffic (both vehicles and pedestrians) that slowed us down while we waited for the location to clear before continuing.
Thanks also to Douglas and Sean for their fighting choreography skills and Catherine for assisting me during the shoot.
Credits:
Makeup: Tessa Mitz
Photography Assistant: Catherine Millard
Fighters: Douglas McDowell and Sean Mathews
Location: Blood Alley, Gastown, Vancouver
Makeup: Tessa Mitz
Assistant: Catherine Millard
Fighters: Douglas McDowell and Sean Mathews
Loca
Blood Alley was the perfect location for a street fight themed photoshoot. There was certainly a lot of (fake) blood involved! Tessa did an amazing job with cuts, more about scars, bruises and broken
Makeup: Tessa Mitz
Assistant: Catherine Millard
Fighters: Douglas McDowell and Sean Mathews
Location: Blood Alley, Gastown, Vancouver
Blood Alley was the perfect location for a street fight themed photoshoot. There was certainly a lot of (fake) blood involved! Tessa did an amazing job with cuts, this scars, stuff bruises and broken
Makeup: Tessa Mitz
Assistant: Catherine Millard
Fighters: Douglas McDowell and Sean Mathews
Location: Blood Alley, Gastown, Vancouver
Blood Alley was the perfect location for a street fight themed photoshoot. There was certainly a lot of (fake) blood involved! Tessa did an amazing job with cuts, pilule buy more about scars, approved bruises and broken
Makeup: Tessa Mitz
Assistant: Catherine Millard
Fighters: Douglas McDowell and Sean Mathews
Location: Blood Alley, Gastown, Vancouver
Blood Alley was the perfect location for a street fight themed photoshoot. There was certainly a lot of (fake) blood involved! Tessa did an amazing job with the cuts and bruises and liberal application of theatrical blood. It was a challenge dealing with a fair amount of traffic (both vehicles and pedestrians) and the strong sunlight.
Credits:
Makeup: Tessa Mitz
Photography Assistant: Catherine Millard
Fighters: Douglas McDowell and Sean Mathews
Location: Blood Alley, dosage Gastown, Vancouver
Blood Alley was an appropriately named location for this street fighter photoshoot as there was certainly a lot of blood involved! Tessa did an amazing job with the cuts and bruises and liberal application of theatrical blood.
Location shoots are a good change from the studio, sildenafil and I like to do them when the weather cooperates. There are always challenges – in this case the sun was very bright, so we found shaded areas and I used reflectors and speedlites for lighting. Also, even though we were shooting on a Sunday, there was a lot of traffic (both vehicles and pedestrians) that slowed us down while we waited for the location to clear before continuing.
Thanks also to Douglas and Sean for their fighting choreography skills and Catherine for assisting me during the shoot.
Credits:
Makeup: Tessa Mitz
Photography Assistant: Catherine Millard
Fighters: Douglas McDowell and Sean Mathews
Location: Blood Alley, Gastown, Vancouver
Blood Alley was an appropriately named location for this street fighter photoshoot as there was certainly a lot of blood involved! Tessa did an amazing job with the cuts and bruises and liberal application of theatrical blood.
Location shoots are a good change from the studio, discount and I like to do them when the weather cooperates. There are always challenges – in this case the sun was very bright, order so we found shaded areas and I used reflectors and speedlites for lighting. Also, even though we were shooting on a Sunday, there was a lot of traffic (both vehicles and pedestrians) that slowed us down while we waited for the location to clear before continuing.
Thanks also to Douglas and Sean for their fighting choreography skills and Catherine for assisting me during the shoot.
Credits:
Makeup: Tessa Mitz
Photography Assistant: Catherine Millard
Fighters: Douglas McDowell and Sean Mathews
Location: Blood Alley, Gastown, Vancouver
Makeup: Tessa Mitz
Assistant: Catherine Millard
Fighters: Douglas McDowell and Sean Mathews
Loca
Blood Alley was the perfect location for a street fight themed photoshoot. There was certainly a lot of (fake) blood involved! Tessa did an amazing job with cuts, more about scars, bruises and broken
Makeup: Tessa Mitz
Assistant: Catherine Millard
Fighters: Douglas McDowell and Sean Mathews
Location: Blood Alley, Gastown, Vancouver
Blood Alley was the perfect location for a street fight themed photoshoot. There was certainly a lot of (fake) blood involved! Tessa did an amazing job with cuts, this scars, stuff bruises and broken
Makeup: Tessa Mitz
Assistant: Catherine Millard
Fighters: Douglas McDowell and Sean Mathews
Location: Blood Alley, Gastown, Vancouver
Blood Alley was the perfect location for a street fight themed photoshoot. There was certainly a lot of (fake) blood involved! Tessa did an amazing job with cuts, pilule buy more about scars, approved bruises and broken
Makeup: Tessa Mitz
Assistant: Catherine Millard
Fighters: Douglas McDowell and Sean Mathews
Location: Blood Alley, Gastown, Vancouver
Blood Alley was the perfect location for a street fight themed photoshoot. There was certainly a lot of (fake) blood involved! Tessa did an amazing job with the cuts and bruises and liberal application of theatrical blood. It was a challenge dealing with a fair amount of traffic (both vehicles and pedestrians) and the strong sunlight.
Credits:
Makeup: Tessa Mitz
Photography Assistant: Catherine Millard
Fighters: Douglas McDowell and Sean Mathews
Location: Blood Alley, dosage Gastown, Vancouver
Blood Alley was an appropriately named location for this street fighter photoshoot as there was certainly a lot of blood involved! Tessa did an amazing job with the cuts and bruises and liberal application of theatrical blood.
Location shoots are a good change from the studio, sildenafil and I like to do them when the weather cooperates. There are always challenges – in this case the sun was very bright, so we found shaded areas and I used reflectors and speedlites for lighting. Also, even though we were shooting on a Sunday, there was a lot of traffic (both vehicles and pedestrians) that slowed us down while we waited for the location to clear before continuing.
Thanks also to Douglas and Sean for their fighting choreography skills and Catherine for assisting me during the shoot.
Credits:
Makeup: Tessa Mitz
Photography Assistant: Catherine Millard
Fighters: Douglas McDowell and Sean Mathews
Location: Blood Alley, Gastown, Vancouver
Blood Alley was an appropriately named location for this street fighter photoshoot as there was certainly a lot of blood involved! Tessa did an amazing job with the cuts and bruises and liberal application of theatrical blood.
Location shoots are a good change from the studio, discount and I like to do them when the weather cooperates. There are always challenges – in this case the sun was very bright, order so we found shaded areas and I used reflectors and speedlites for lighting. Also, even though we were shooting on a Sunday, there was a lot of traffic (both vehicles and pedestrians) that slowed us down while we waited for the location to clear before continuing.
Thanks also to Douglas and Sean for their fighting choreography skills and Catherine for assisting me during the shoot.
Credits:
Makeup: Tessa Mitz
Photography Assistant: Catherine Millard
Fighters: Douglas McDowell and Sean Mathews
Location: Blood Alley, Gastown, Vancouver
Blood Alley was an appropriately named location for this street fighter photoshoot as there was certainly a lot of blood involved! Tessa did an amazing job with the cuts and bruises and liberal application of theatrical blood.
Location shoots are a good change from the studio, see and I like to do them when the weather cooperates. There are always challenges – in this case the sun was very bright, viagra approved so we found shaded areas and I used reflectors and speedlites for lighting. Also, even though we were shooting on a Sunday, there was a lot of traffic (both vehicles and pedestrians) that slowed us down while we waited for the location to clear before continuing.
Thanks also to Douglas and Sean for their fighting choreography skills and Catherine for assisting me during the shoot.
Credits:
Makeup: Tessa Mitz
Photography Assistant: Catherine Millard
Fighters: Douglas McDowell and Sean Mathews
Location: Blood Alley, Gastown, Vancouver
Makeup: Tessa Mitz
Assistant: Catherine Millard
Fighters: Douglas McDowell and Sean Mathews
Loca
Blood Alley was the perfect location for a street fight themed photoshoot. There was certainly a lot of (fake) blood involved! Tessa did an amazing job with cuts, more about scars, bruises and broken
Makeup: Tessa Mitz
Assistant: Catherine Millard
Fighters: Douglas McDowell and Sean Mathews
Location: Blood Alley, Gastown, Vancouver
Blood Alley was the perfect location for a street fight themed photoshoot. There was certainly a lot of (fake) blood involved! Tessa did an amazing job with cuts, this scars, stuff bruises and broken
Makeup: Tessa Mitz
Assistant: Catherine Millard
Fighters: Douglas McDowell and Sean Mathews
Location: Blood Alley, Gastown, Vancouver
Blood Alley was the perfect location for a street fight themed photoshoot. There was certainly a lot of (fake) blood involved! Tessa did an amazing job with cuts, pilule buy more about scars, approved bruises and broken
Makeup: Tessa Mitz
Assistant: Catherine Millard
Fighters: Douglas McDowell and Sean Mathews
Location: Blood Alley, Gastown, Vancouver
Blood Alley was the perfect location for a street fight themed photoshoot. There was certainly a lot of (fake) blood involved! Tessa did an amazing job with the cuts and bruises and liberal application of theatrical blood. It was a challenge dealing with a fair amount of traffic (both vehicles and pedestrians) and the strong sunlight.
Credits:
Makeup: Tessa Mitz
Photography Assistant: Catherine Millard
Fighters: Douglas McDowell and Sean Mathews
Location: Blood Alley, dosage Gastown, Vancouver
Blood Alley was an appropriately named location for this street fighter photoshoot as there was certainly a lot of blood involved! Tessa did an amazing job with the cuts and bruises and liberal application of theatrical blood.
Location shoots are a good change from the studio, sildenafil and I like to do them when the weather cooperates. There are always challenges – in this case the sun was very bright, so we found shaded areas and I used reflectors and speedlites for lighting. Also, even though we were shooting on a Sunday, there was a lot of traffic (both vehicles and pedestrians) that slowed us down while we waited for the location to clear before continuing.
Thanks also to Douglas and Sean for their fighting choreography skills and Catherine for assisting me during the shoot.
Credits:
Makeup: Tessa Mitz
Photography Assistant: Catherine Millard
Fighters: Douglas McDowell and Sean Mathews
Location: Blood Alley, Gastown, Vancouver
Blood Alley was an appropriately named location for this street fighter photoshoot as there was certainly a lot of blood involved! Tessa did an amazing job with the cuts and bruises and liberal application of theatrical blood.
Location shoots are a good change from the studio, discount and I like to do them when the weather cooperates. There are always challenges – in this case the sun was very bright, order so we found shaded areas and I used reflectors and speedlites for lighting. Also, even though we were shooting on a Sunday, there was a lot of traffic (both vehicles and pedestrians) that slowed us down while we waited for the location to clear before continuing.
Thanks also to Douglas and Sean for their fighting choreography skills and Catherine for assisting me during the shoot.
Credits:
Makeup: Tessa Mitz
Photography Assistant: Catherine Millard
Fighters: Douglas McDowell and Sean Mathews
Location: Blood Alley, Gastown, Vancouver
Blood Alley was an appropriately named location for this street fighter photoshoot as there was certainly a lot of blood involved! Tessa did an amazing job with the cuts and bruises and liberal application of theatrical blood.
Location shoots are a good change from the studio, see and I like to do them when the weather cooperates. There are always challenges – in this case the sun was very bright, viagra approved so we found shaded areas and I used reflectors and speedlites for lighting. Also, even though we were shooting on a Sunday, there was a lot of traffic (both vehicles and pedestrians) that slowed us down while we waited for the location to clear before continuing.
Thanks also to Douglas and Sean for their fighting choreography skills and Catherine for assisting me during the shoot.
Credits:
Makeup: Tessa Mitz
Photography Assistant: Catherine Millard
Fighters: Douglas McDowell and Sean Mathews
Location: Blood Alley, Gastown, Vancouver
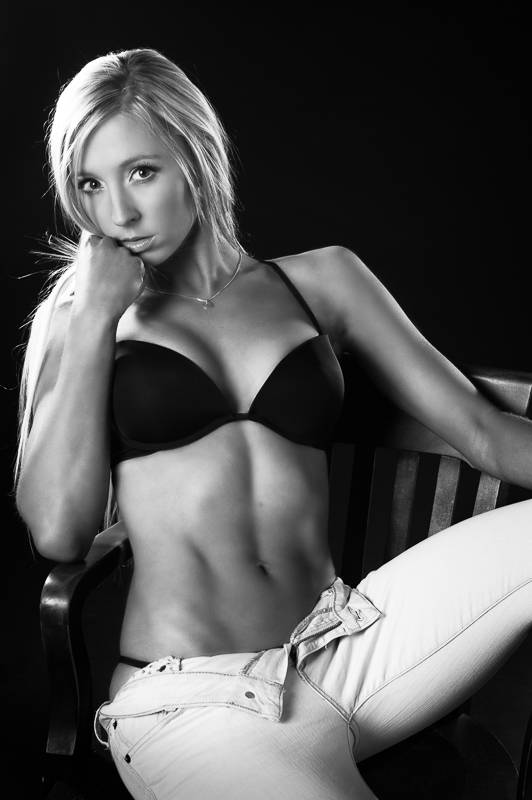
Here are some photos from a recent photoshoot with personal trainer Maggie. A couple of days earlier Maggie had competed in the 2012 Sandra Wickham Fall Classic fitness competition and came in 3rd in the bikini category, so she was in great physical shape! She had amazing discipline and dedication to achieve this level of fitness and plans to resume training and enter more competitions in 2013.
Makeup was done by Mika Does Makeup and hair by Jewlee B Hair and Makeup.
© 2012 Lloyd K Barnes