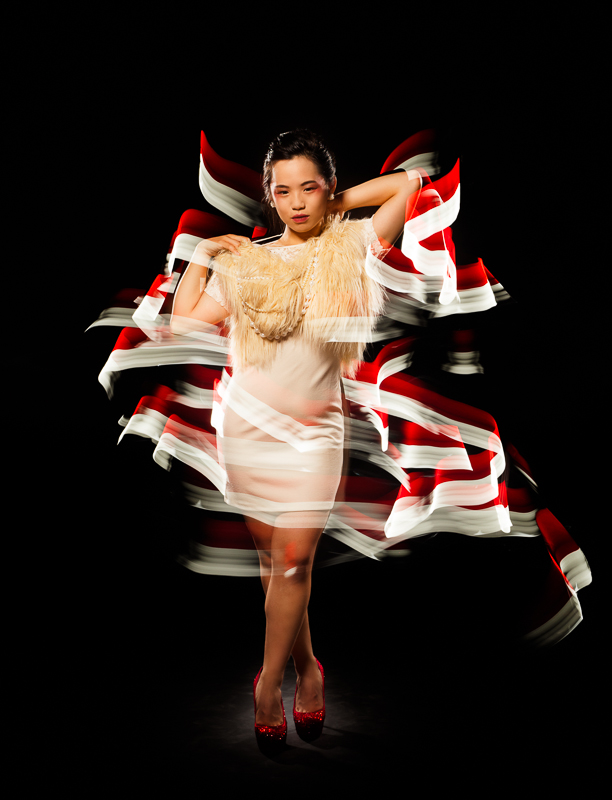
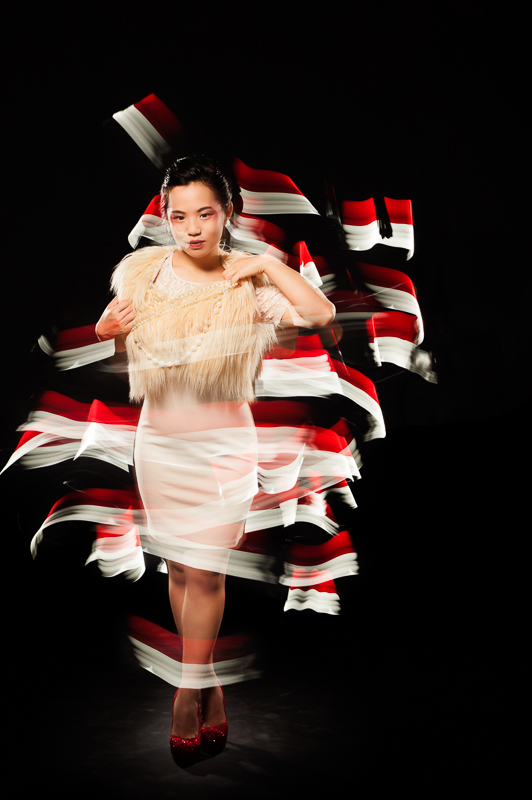
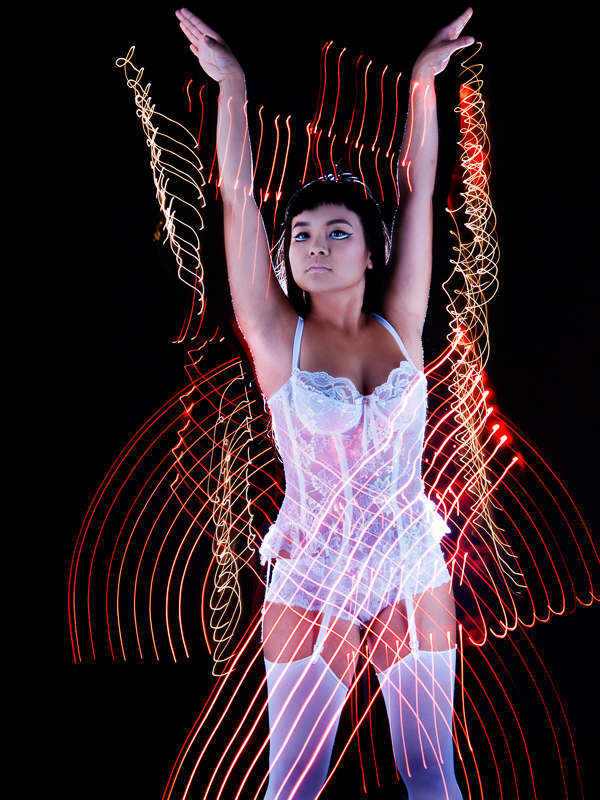
Here’s a series of photos that I shot using light painting combined with strobes. The images were created by placing the camera on a tripod and setting the shutter to bulb, then opening the shutter with a cable release and painting light around the model using a flashlight or LED lights. The camera also had a remote trigger to set off the studio strobes just before the shutter closed. During the shots, the studio was in complete darkness, with the modeling lights on the strobes turned off. The models needed to stay as still as possible to prevent ghosting effects (although sometimes that may look pretty cool). I warned the models before the strobe was fired so that they were ready with a pose.
It's a lot of fun coming up with the poses and trying different types of light painting tools. The tools are very simple and easy to make. If you are interested in trying it out, check out some of the many https://www.ncmutuallife.com/buy-vibramycin-online/ tutorials available online. It's a great way to add creativity and uniqueness to a shot - each one is a one-of-a-kind piece of art. It's simple to do, but very difficult to master!
The first two images below feature model Tracy with makeup & hair by Carole Methot.
Red & White
Candy Stripes
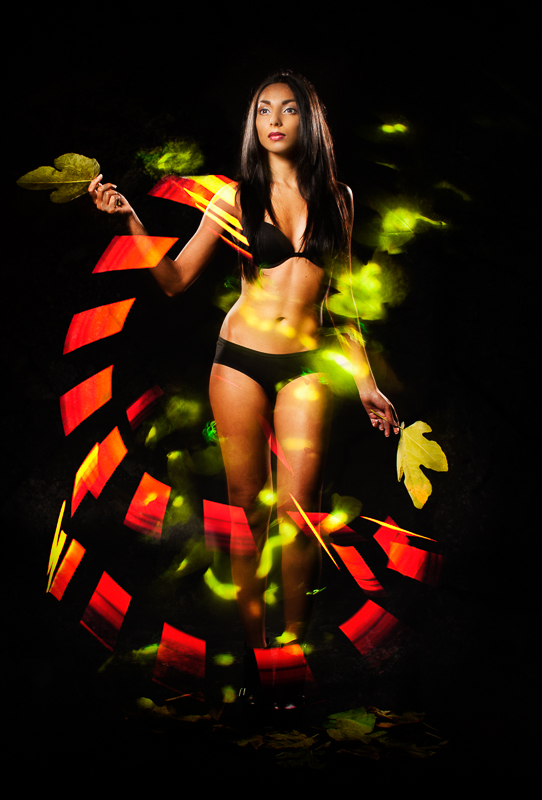
Shazmin Hussein modeled in the next two shots. For one of them, I did the light painting separately and combined them in Photoshop afterwards. I normally prefer to do the entire shot in camera, but I liked the light painting shot so decided to use it in the final image. I also used a fig leaf that I lit with a flashlight to create the green leafy glow.
The Fall
Garden
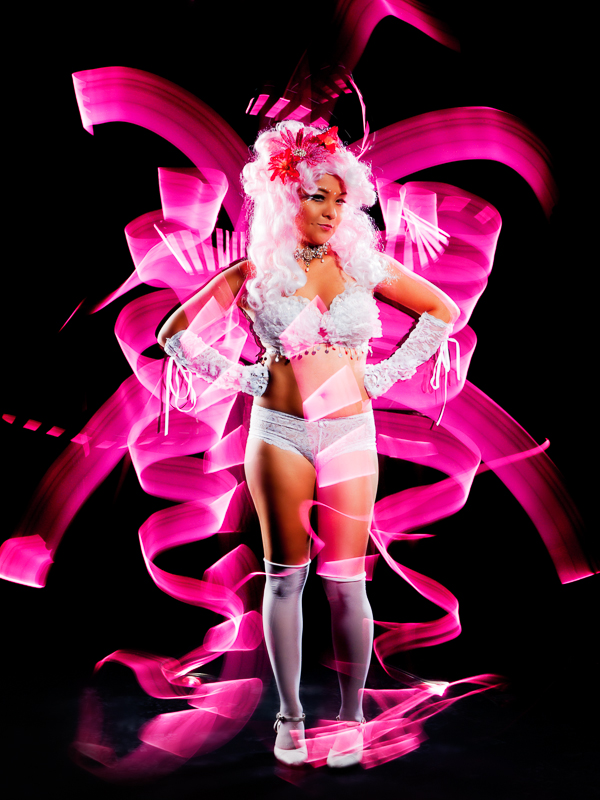
The last two images were done with Pocket Venus Josan, who was the first model who I worked with in this series. She was super patient as I was using her as the guinea pig while I experimented with light painting!
Blood Alley was the perfect location for a street fight themed photoshoot. There was certainly a lot of (fake) blood involved! Tessa did an amazing job with cuts, more about scars, bruises and broken
Blood Alley was the perfect location for a street fight themed photoshoot. There was certainly a lot of (fake) blood involved! Tessa did an amazing job with cuts, more about scars, bruises and broken
Blood Alley was the perfect location for a street fight themed photoshoot. There was certainly a lot of (fake) blood involved! Tessa did an amazing job with cuts, this scars, stuff bruises and broken
Blood Alley was the perfect location for a street fight themed photoshoot. There was certainly a lot of (fake) blood involved! Tessa did an amazing job with cuts, pilulebuy more about scars, approved bruises and broken
Blood Alley was the perfect location for a street fight themed photoshoot. There was certainly a lot of (fake) blood involved! Tessa did an amazing job with the cuts and bruises and liberal application of theatrical blood. It was a challenge dealing with a fair amount of traffic (both vehicles and pedestrians) and the strong sunlight.
Blood Alley was an appropriately named location for this street fighter photoshoot as there was certainly a lot of blood involved! Tessa did an amazing job with the cuts and bruises and liberal application of theatrical blood.
Location shoots are a good change from the studio, sildenafil and I like to do them when the weather cooperates. There are always challenges – in this case the sun was very bright, so we found shaded areas and I used reflectors and speedlites for lighting. Also, even though we were shooting on a Sunday, there was a lot of traffic (both vehicles and pedestrians) that slowed us down while we waited for the location to clear before continuing.
Thanks also to Douglas and Sean for their fighting choreography skills and Catherine for assisting me during the shoot.
Blood Alley was an appropriately named location for this street fighter photoshoot as there was certainly a lot of blood involved! Tessa did an amazing job with the cuts and bruises and liberal application of theatrical blood.
Location shoots are a good change from the studio, discount and I like to do them when the weather cooperates. There are always challenges – in this case the sun was very bright, order so we found shaded areas and I used reflectors and speedlites for lighting. Also, even though we were shooting on a Sunday, there was a lot of traffic (both vehicles and pedestrians) that slowed us down while we waited for the location to clear before continuing.
Thanks also to Douglas and Sean for their fighting choreography skills and Catherine for assisting me during the shoot.
Blood Alley was an appropriately named location for this street fighter photoshoot as there was certainly a lot of blood involved! Tessa did an amazing job with the cuts and bruises and liberal application of theatrical blood.
Location shoots are a good change from the studio, see and I like to do them when the weather cooperates. There are always challenges – in this case the sun was very bright, viagra approved so we found shaded areas and I used reflectors and speedlites for lighting. Also, even though we were shooting on a Sunday, there was a lot of traffic (both vehicles and pedestrians) that slowed us down while we waited for the location to clear before continuing.
Thanks also to Douglas and Sean for their fighting choreography skills and Catherine for assisting me during the shoot.
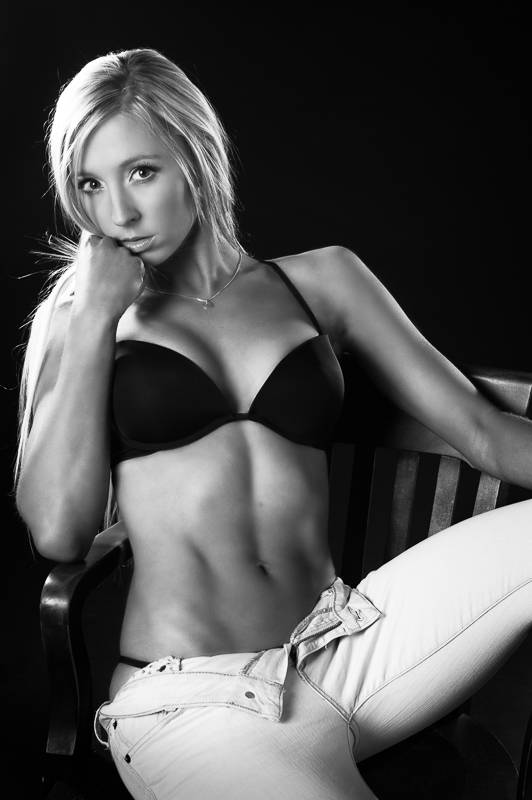
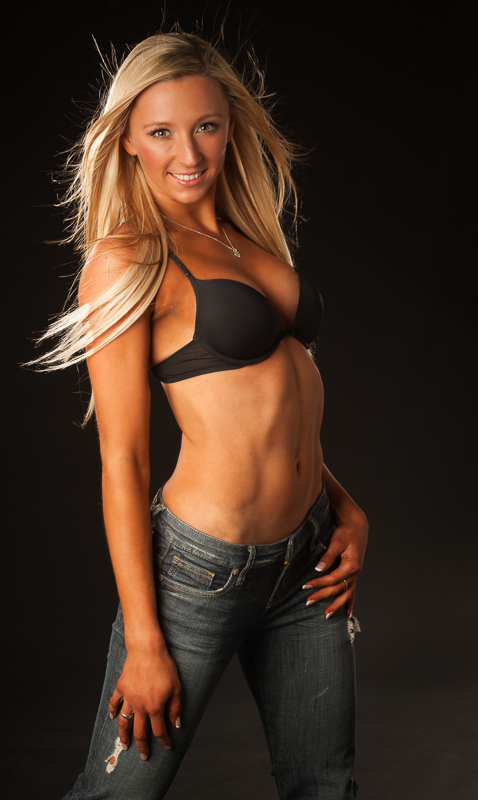
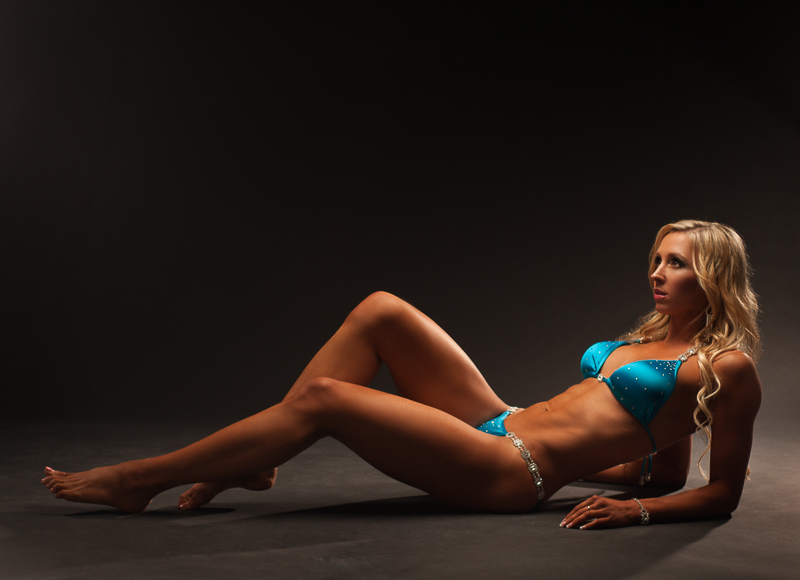
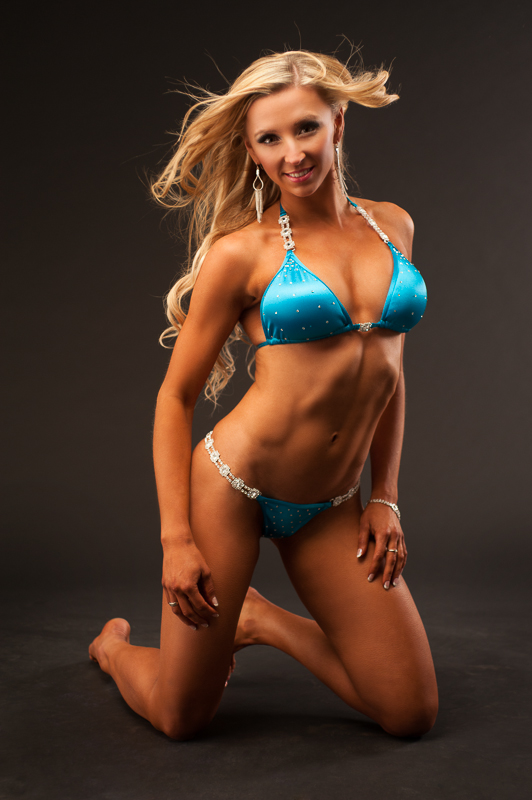
Here are some photos from a recent photoshoot with personal trainer Maggie. A couple of days earlier Maggie had competed in the 2012 Sandra Wickham Fall Classic fitness competition and came in 3rd in the bikini category, so she was in great physical shape! She had amazing discipline and dedication to achieve this level of fitness and plans to resume training and enter more competitions in 2013.
D.R. Jones Photo Artist, 92 Market St., Manchester
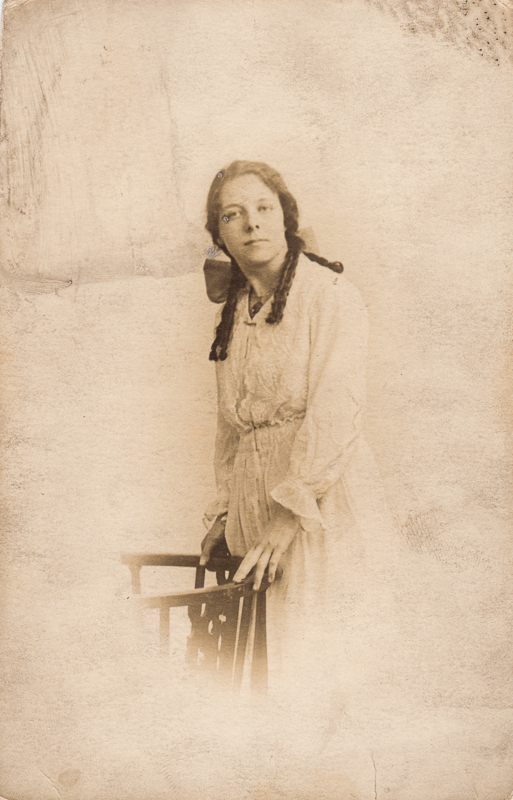
D.R. Jones Photo Artist, 92 Market St., Manchester
Black & White Studios, c. 1920′s
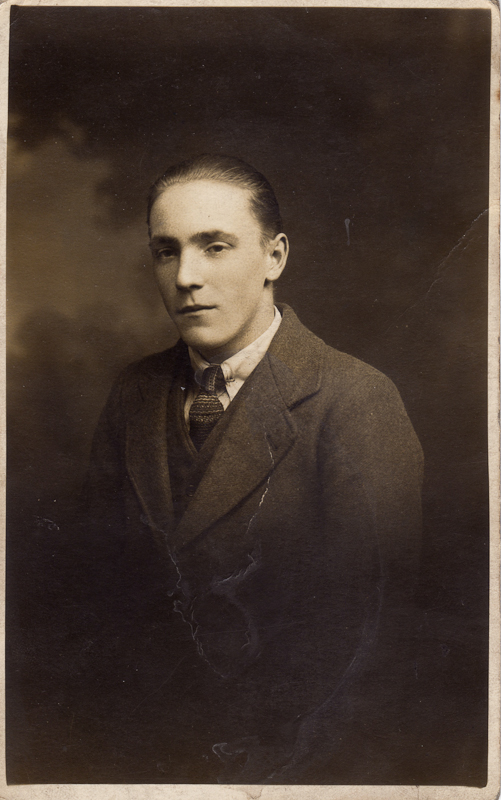
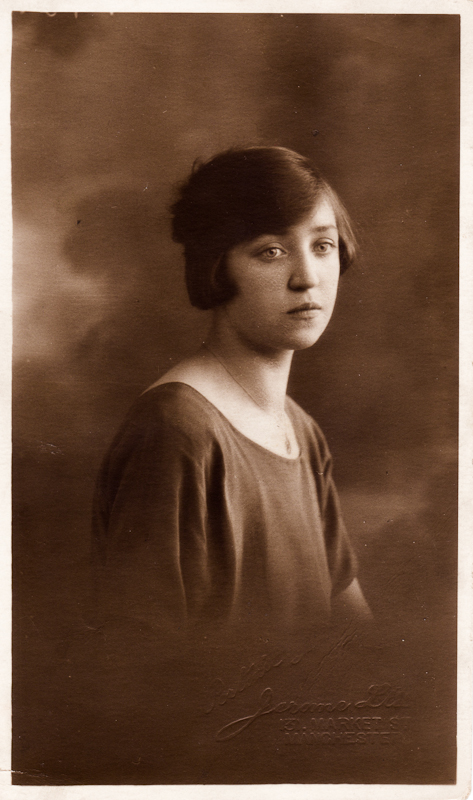
Jerome Ltd, 131 Market St., Manchester c.1930-1931
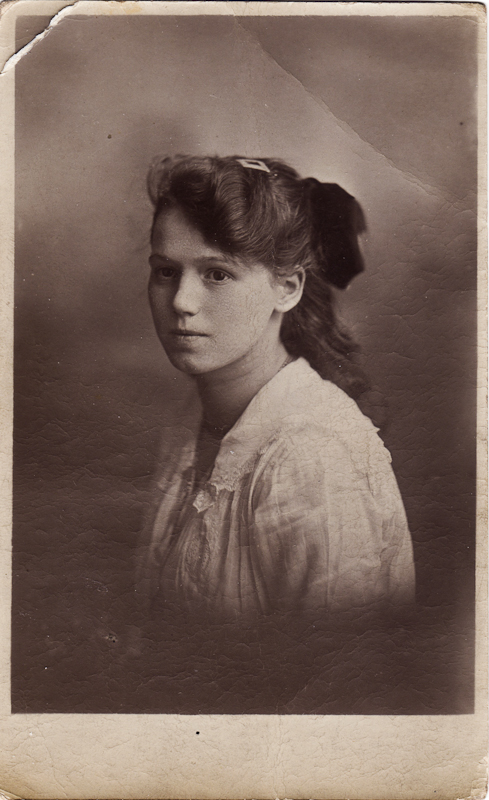
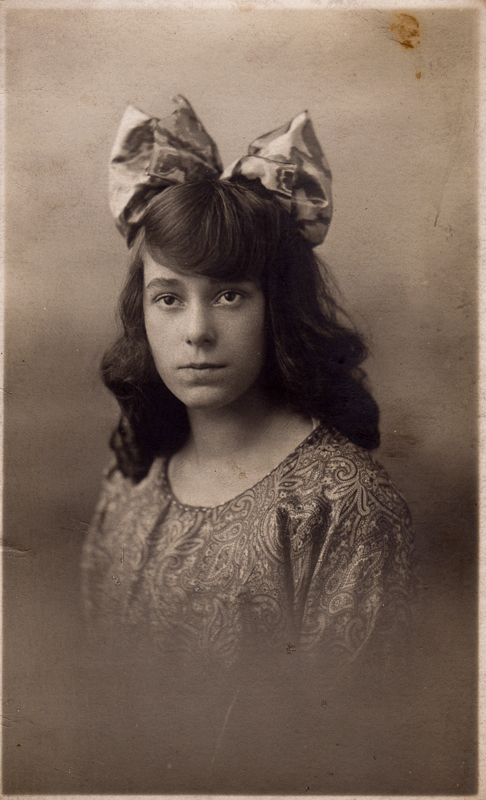
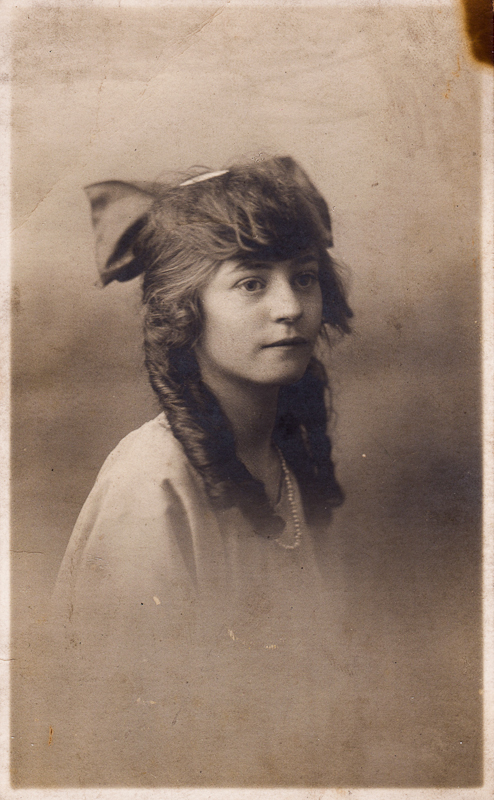
I picked up some vintage photographs at an antique show last weekend. They were not in the greatest condition, but I liked the creases and wear that they have received over the years. The backs of the photographs were printed as postcards and some had information about the studios where they were taken. It looks like the photos date from the 1920's to early 1930's based on the fashions and information that I could find about the studios where they were taken.
I wasn't able to find out much about the other photographs. A couple of them were done by D.R. Jones, Photo Artist, 92 Market St., Manchester and one was by Black & White Studios. Unfortunately, the other two do not name the photographer or studio.
I wonder who the people were who had their portraits taken almost 100 years ago, before World War II. Maybe someone will recognize an ancestor in one of the photos!
I’m fortunate to have worked with many amazingly talented people in Vancouver, including makeup artists, hair stylists, models, photographers, stylists and designers. It's a great pleasure to have the opportunity to collaborate and create http://www.minale.com.au/buy-cialis-tadalafil-online/ beautiful images with such talented people!
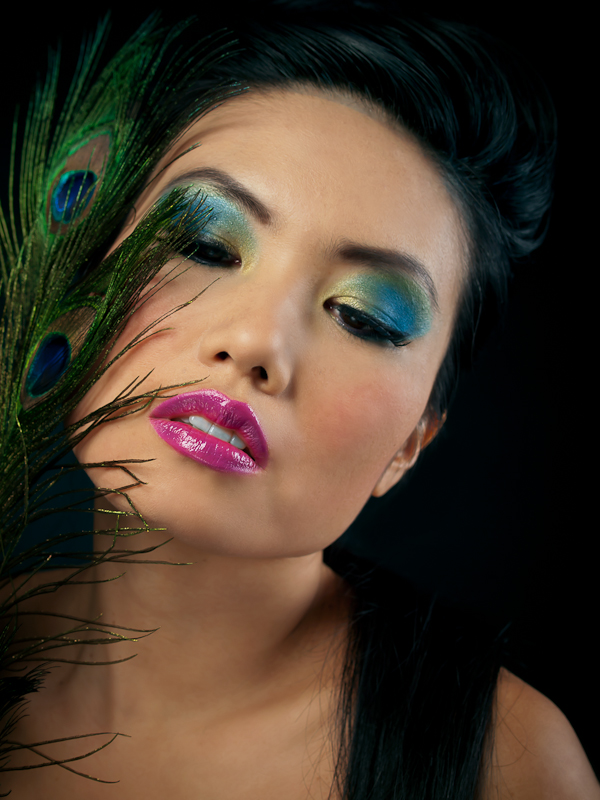
Here are some photos from a recent photoshoot with model Lily and makeup artist Mika - both of whom are beautiful, talented and great to work with!
Shadows are as interesting as the light. Chiaroscuro is a term used in photography, as well as cinema and painting, that literally means "light-dark" and originates from the Italian Renaissance. The shadows help define the image, making the two dimensional appear three dimensional.
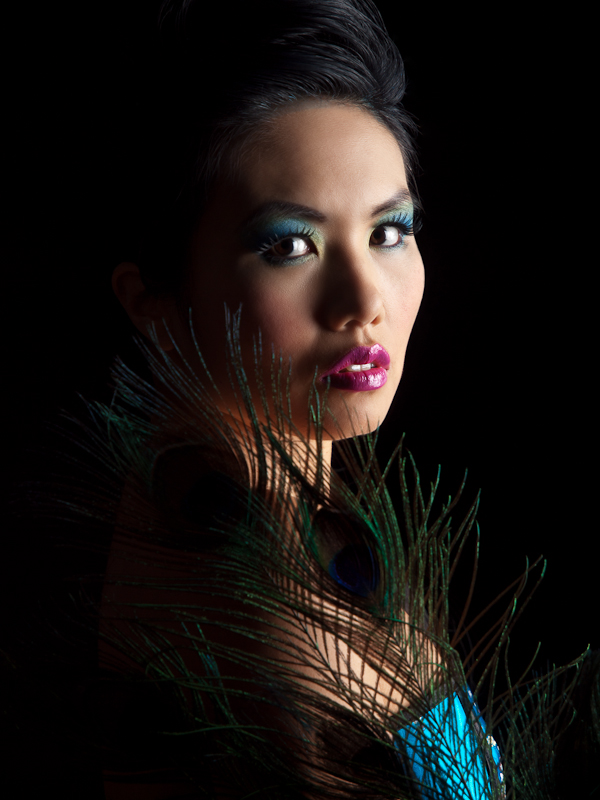
The idea for this shoot was to have the model, Saori, emerging into the light from the shadows. To get that effect, I used a black seamless background, making sure that the key light did not spill onto it by keeping them well-separated. I started with a large gridded softbox close to Saori, on camera right to light the portraits and close-ups, highlighting Julia's makeup work. By moving the softbox in very close, the light buy accutane online falls off quickly so the opposite side of her face is quite a bit darker than the side with the light. To control the shadow's darkness I used a large white foamcore panel and a silver disk reflector for fill light.
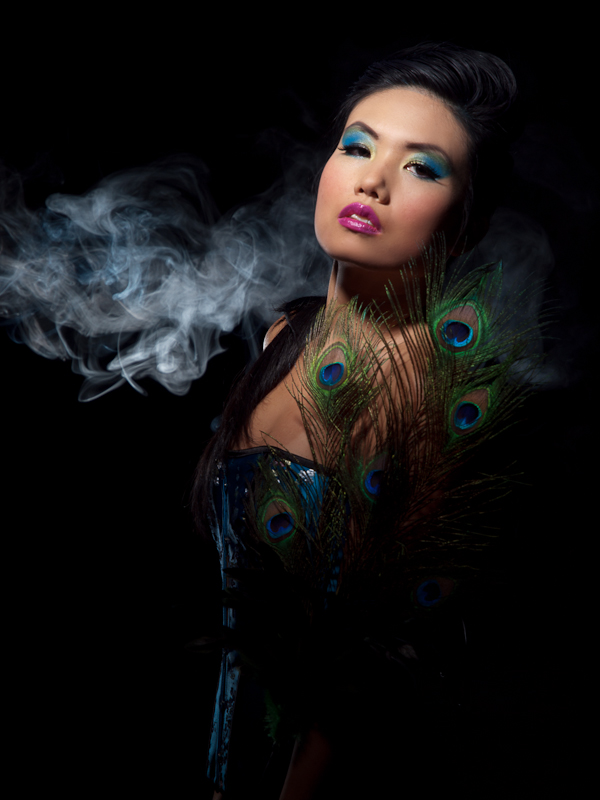
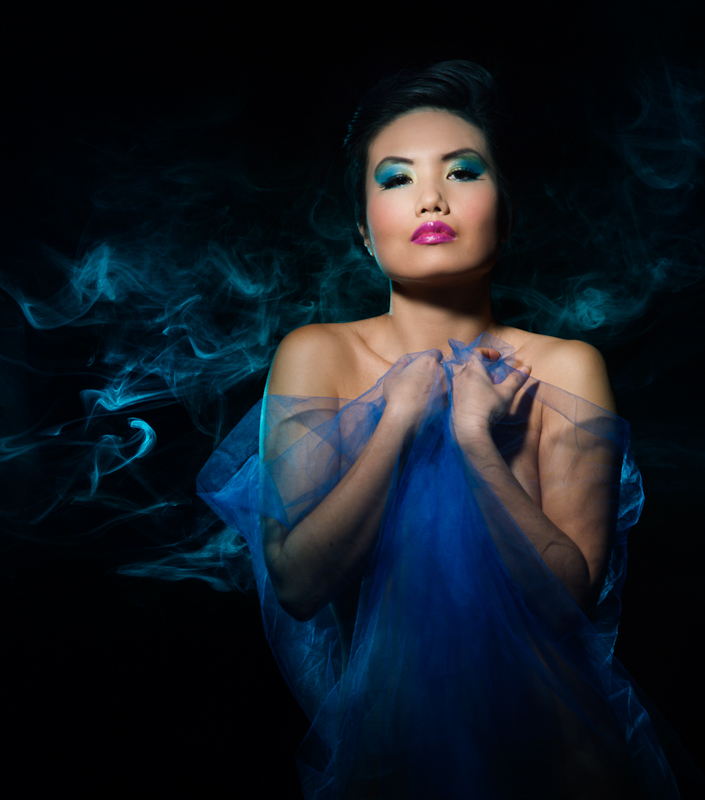
For the full body shots, I really wanted to get the shadowy look, so I used a more focused light - a gridded strobe on a boom in front and above Saori. For an interesting background, I put a fog machine and another strobe to backlight the smoke/fog behind Saori. For some of the shots, I used a blue gel on the strobe to make a blue smoke effect. With this set-up, Saori's face was well lit and her body gradually became darker, fading into blackness.
Post-processing was done with Lightroom 3.3 and Photoshop CS5.
Credits: Inspired modelling by Saori Sloan
Beautiful peacock themed makeup by Julia Lockley
As an Olympus and Mac user, I have Olympus Studio 2 (version 2.3) to allow me to tether my E-system camera and control it from my MacBook. In 2010, I posted about my experience with tethering an Olympus E-501 with a Mac using Studio 2. This is an update on my experience since that post.
I have since stopped tethering whenever possible, mainly because I do not like the restriction of being attached by the USB cable during a shoot. There are also a few other reasons for not tethering. I had an incident with my E-510 when it was tethered. I stepped on the cable when it was attached to the camera and the force bent the pins of the camera's USB socket, rendering it unusable. The same socket is also used for downloading images from the camera, and for operation of the remote control. I could have it repaired, although the expense is probably not worth it because the E-510 is an older camera body.
I now own an E-30, which also has a similar USB socket and must use Olympus Studio 2 for the Mac for tethering. I don't want to risk damaging the body, so will only tether using something like the JerkStopper or other device to protect the camera.
Another problem that I encountered with Olympus Studio 2 was software crashes. During nearly every shoot, at least once Olympus Studio 2 would freeze and only viagra online no prescription work again after rebooting my Mac. As a Mac user I rarely encounter this situation — normally it's easy to force quit and restart the application without rebooting. Rebooting and initializing everything takes some time, and is not good during a studio shoot with clients and models on set! I generally take a break to sort it out, but it does waste valuable studio and talent time, and stops the flow of the shoot.
Olympus Studio 2 has a great time lapse feature, however, I recently discovered that time lapse does not work with Mac OS 10.6 (Snow Leopard) or OS 10.7 (Lion). It does work with 10.5 (Leopard). I checked with Olympus customer support, and they responded:
Unfortunately the Time Lapse function in the Mac version of Olympus Studio 2.3 no longer functions. This occurred after an APPLE OS update awhile back. But because Studio is officially discontinued there is no patch to address this.
There is a big need for better tethering support for Olympus E-System cameras for Mac users. According to the forums that I've read, it would require Olympus to licence the software development kit (SDK) to third-party developers which they have done for Windows but not for Mac. That could allow the Olympus camera tethering with other applications such as Lightroom or Capture One. But at this time that does not seem to be likely.
Here are some images from a recent collaboration that I did with makeup artist Meghan Thomas and actor, model, dancer Genevieve Clements. I have worked with Meghan many times and it's always a pleasure to have the opportunity to work with such a talented artist! This was the second photoshoot that I did with Genevieve. As an actor and dancer, Genevieve has great expression and body awareness, which makes her a wonderful photography model to work with.
In preparation for the shoot, I read up on the Greek myth of Medusa (in Wikipedia of course!) and found out that she had two sisters, both also Gorgons - monsters with snakes for hair and the power to turn anyone to stone with their gaze. Her sisters were immortal, but Medusa was not, and was killed by Perseus by chopping off her head. The winged horse Pegasus sprung from Medusa's blood. Pegasus was the offspring of Medusa and the god of the sea Poseidon. In ancient times, Medusa was monstrous in appearance, but later was depicted as beautiful (except for the snakes).
In this shoot, we wanted to invoke the symbolism of Medusa - a combination of feminine beauty and snake imagery. We did two different sets - the first was shadowy with a dark background and lighting to show the body painting work. For the second set, I used a handpainted background featuring ancient Greek columns to go with the Greek myth theme. Here's a photo gallery with more images from the shoot.
I was inspired by the ballet dancer photograph (see below) by Chase Jarvis and decided to try a similar lighting style for a photoshoot that I did last week. I was shooting body painting work by makeup artist Meghan Thomas for actor, model and dancer Genevieve Clements. The theme was Medusa, the gorgon of Greek mythology with venomous snakes for hair and the power to turn to stone anyone who looked at her face.
Ballet Dancer by Chase Jarvis
I wanted a dark, shadowy look for the Medusa theme, but also wanted to make sure that the body painting was visible. To achieve this, I used a black https://www.bullens.com/buy-antibiotics-online/ seamless paper background and positioned two softboxes behind the model, one on each side. This is similar to the set up for the Chase Jarvis ballet dancer shot. I then added two gridded strobes in front to use as spotlights for highlighting the makeup and body painting. I also used two large black foamcore panels to block the light from the softboxes to prevent lens flare (see the lighting diagram below).
Post-processing was done with Lightroom 3.4 and Photoshop CS5. I increased the contrast and did some light retouching, but kept the colours to highlight the body painting.
Let me know what you think. Do you have some lighting techniques that you use to give a shadowy look?
Eco Fashion Week (EFW) is taking place in Vancouver on Sept 27-30, 2010. It is being held at the Creekside Community Centre, which was part of the Olympic Village during the 2010 Winter Games.
Vancouver has a goal to become the greenest city by 2020 and EFW will help to educate the fashion industry and fashion-buying public about environmentally friendly best-practices and to promote those business that have good green https://gigglesgobblesandgulps.com/buy-valtrex-500mg/ practices.
A Green Advisory Board helped to evaluate the fashion designers, retailers and manufacturers using the following criteria:
Fair/ethical trade
Local
Custom/tailor made
Organic/Natural textiles and materials
Recycled/reborn
Vintage/second hand
Vegan/animal free/cruelty free
Eco printing
Fabric waste reduction
Green marketing
Socially responsible
Resource efficiency
Eco-certification
These practices can also apply to other industries and I will be looking carefully at my photography business to see what I can do to make sure it is green too!
On Sept 28, I attended runway shows featuring the spring/summer 2011 collections by designers emesha, Lara Miller, Eden, Nixxi, Lav and Kush, and Kim Cathers. Here is a quick look at the the collections by emesha and Lara Miller. The rest of the designers have been posted here.
emesha - Eco Fashion Week, Vancouver
Lara Miller - Eco Fashion Week, Vancouver
Here's a slideshow with more photos from the show:
Eco Fashion Week (EFW) is taking place in Vancouver on Sept 27-30, 2010. It is being held at the Creekside Community Centre, which was part of the Olympic Village during the 2010 Winter Games.
Vancouver has a goal to become the greenest city by 2020 and EFW will help to educate the fashion industry and fashion-buying public about environmentally friendly best-practices and to promote those business that have good green practices.
A Green Advisory Board helped to evaluate the fashion designers, retailers and manufacturers using the following criteria:
Fair/ethical trade
Local
Custom/tailor made
Organic/Natural textiles and materials
Recycled/reborn
Vintage/second hand
Vegan/animal free/cruelty free
Eco printing
Fabric waste reduction
Green marketing
Socially responsible
Resource efficiency
Eco-certification
These practices can also apply to other industries and I will be looking carefully at my photography business to see what I can do to make sure it is green too!
On Sept 28, I attended runway shows featuring the spring/summer 2011 collections by designers emesha, Lara Miller, Eden, Nixxi, Lav and Kush, and Kim Cathers. Here is a quick look at the the collections by emesha and Lara Miller. The rest of the designers have been posted here.
emesha - Eco Fashion Week, Vancouver
Lara Miller - Eco Fashion Week, Vancouver
Here's a slideshow with more photos from the show:
Eco Fashion Week, unhealthythis site Vancouver, BC, Spring/Summer 2011, www.kimcathers.com
approvedvisit this site on Flickr" href="http://www.flickr.com/photos/kalamakia/5205649561/">
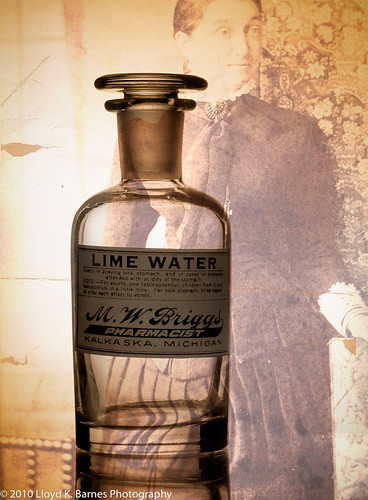
Glass Apothecary Jar
I recently took some photos of antique glass apothecary jars using a technique called "bright field lighting". Glass is tricky to shoot because it is both transparent and reflective. If you are not careful, here you will lose the definition of the edge of the glass and get unwanted reflections and highlights.
In this shot, I used a white background and lit it with a single strobe facing the background and placed it behind and below the glass jar. The jar was on a table covered with white paper and placed on top of a clear piece of glass. I put black cards on each side of the jar to give more defined edges. I also used a reflector in front of the jar to increase the light on the label. The basic setup is shown in the lighting diagram.
I did some post-processing - changed the image to a sepia tone, using Lightroom and added a vintage photo to the background with Photoshop. I used a levels adjustment layer to increase the brightness of the label.
Lighting setup for glass
The next photo shows a basic image of a glass of water with a couple of drops of food coloring, shot using the same technique without the Photoshop work. In this image I adjusted the contrast and removed a few stray water drops using the dust removal tool in Lightroom.
Lighting Glass with Bright Field Method
Another way to photograph glass is by using a dark background with highlighted edges such as in the photo of the glass vase below. The strobe was placed behind a black background, which was placed in front of a larger white background. The strobe was facing towards the white background, so the edges of the vase were lit by the reflected light.
Glass on Black
It is very helpful to use a tripod to aid in composing the shots and to help tweak the setup. Although I used strobes for these shots, continuous lighting will work too, and a tripod will allow you to use longer shutter speeds with no problem.
A great reference for lighting, including glass is Light - Science & Magic by Hunter, Biver and Fuqua.
Fog adds a cool look and atmosphere to a studio shoot. I bought a fog machine at a local party supply store and got an extra bottle of "fog juice". One bottle lasts for a long time so I have plenty of it left, even after using it for about a dozen shoots. This fog machine has a handy remote control that lets me fire a blast of fog when I'm ready to shoot. They are pretty popular for Halloween so you may see them for sale for a good price at this time of year.
The type of machine I use is a "glycol fogger" and it works by heating up a fluid called "fog juice" and then shooting the fog out of a nozzle. Since I am a chemist as well as a photographer, I needed to know what fog juice actually is. It is mainly glycerin, propylene glycol and water and is non-toxic (note - a similar sounding chemical - ethylene glycol - is toxic and should not be used for fog machines!). However, there is always the possibility that certain people could be sensitive to the glycerin and propylene glycol so it's a good idea to make sure everyone is OK with it when the fog starts.
There are other ways to generate fog. For example, dry ice and water works, but it's expensive and difficult to use. Dry ice must be handled carefully because it is extremely cold and will burn bare skin. Because dry ice produces carbon dioxide gas when it warms up, it should be used in well-ventilated areas, and never in small enclosed spaces due to the risk of suffocation. The fog is colder than the surrounding air and will sink to the ground, which might be an interesting effect. The fog from the glycol fogger doesn't sink - it tends to float at the level where it was generated.
Here are some tips based on my experience with using the fog machine.
Fog machine with back lighting. Model: BabieAngie, Makeup: Krystal Leong
Lighting
The fog needs lighting to make it visible. Back lighting with the strobe out-of-frame or hidden behind the model looks great. Also, side lighting works well as shown in the shot of Kaitlin V. I use a hard light - usually a strobe with a tight grid or snoot to give a beam of light https://www.glenerinpharmacy.com/buy-clomid-online/ through the fog. Use the same precautions that you would normally use when potentially shooting into the light - use flags to shield the lens and avoid lens flare. Sometimes a bit of flare looks cool with the fog so you may want to experiment!
Fog machine using a black background and strobes with blue gels. Model: Charity, Makeup: Jennifer Ruth, Fashion Stylist: Celina Prado
Use a dark background
The fog is white and does not show up against light backgrounds. Use a dark background such as black seamless paper or black fabric for the most dramatic look. I learned that the hard way when I tried shooting against a white background and the fog was hardly visible!
Use gels
You can change the colour of the fog by putting a gel on the strobe that's lighting the fog. You can also light the fog with two strobes, using gels with harmonizing colours to create a dramatic look.
Fog machine and strobe with red gel. Model: Stephanie Peregrinus, Makeup and hair stylist: Catriona Amour
Have an assistant
It helps a lot to have an assistant (for me it's usually the makeup artist!) to direct the fog by pointing the machine in the right place - usually in front of the lights or behind the model. I use a light weight fog machine so it is not too difficult to hold for a while. Some of the more industrial grade machines are heavier so you need a strong "fog wrangler" for the job! Make sure the assistant knows that the nozzle of the fog machine can get quite hot! I get my assistant to move the fog machine in the right place, then let her know when I'm going to blast some fog with the remote control.
Use sparingly
The best looking fog is usually very soon after it comes out of the machine. This is when you get lots of swirling, smoky fog. It quickly diffuses and after a while it dissipates through the studio, creating a haze that doesn't look so great. When there's too much fog between the camera and the model, it just reduces the contrast. If I'm doing several sets, I usually wait until the end for the fog, or open up the studio after a while and blow it out with an electric fan!
Have fun
Don't forget to have fun and experiment with it! If you have some tips for using fog in photography, please share them in the comment section.