Archive

Posts Tagged ‘Olympus’

Update: Olympus Studio 2 for Mac & Time Lapse Photography

January 3rd, 2012 No comments

As an Olympus and Mac user, I have Olympus Studio 2 (version 2.3) to allow me to tether my E-system camera and control it from my MacBook. In 2010, I posted about my experience with tethering an Olympus E-501 with a Mac using Studio 2. This is an update on my experience since that post.

I have since stopped tethering whenever possible, mainly because I do not like the restriction of being attached by the USB cable during a shoot. There are also a few other reasons for not tethering. I had an incident with my E-510 when it was tethered. I stepped on the cable when it was attached to the camera and the force bent the pins of the camera's USB socket, rendering it unusable. The same socket is also used for downloading images from the camera, and for operation of the remote control. I could have it repaired, although the expense is probably not worth it because the E-510 is an older camera body.

I now own an E-30, which also has a similar USB socket and must use Olympus Studio 2 for the Mac for tethering. I don't want to risk damaging the body, so will only tether using something like the JerkStopper or other device to protect the camera.

Another problem that I encountered with Olympus Studio 2 was software crashes. During nearly every shoot, at least once Olympus Studio 2 would freeze and only viagra online no prescription work again after rebooting my Mac. As a Mac user I rarely encounter this situation — normally it's easy to force quit and restart the application without rebooting. Rebooting and initializing everything takes some time, and is not good during a studio shoot with clients and models on set! I generally take a break to sort it out, but it does waste valuable studio and talent time, and stops the flow of the shoot.

Olympus Studio 2 has a great time lapse feature, however, I recently discovered that time lapse does not work with Mac OS 10.6 (Snow Leopard) or OS 10.7 (Lion). It does work with 10.5 (Leopard). I checked with Olympus customer support, and they responded:

Unfortunately the Time Lapse function in the Mac version of Olympus Studio 2.3 no longer functions. This occurred after an APPLE OS update awhile back. But because Studio is officially discontinued there is no patch to address this.

Time lapse is not built into my camera, but I can do time lapses with an intervalometer, or using a clever hack with an eraser and rubber band!

There is a big need for better tethering support for Olympus E-System cameras for Mac users. According to the forums that I've read, it would require Olympus to licence the software development kit (SDK) to third-party developers which they have done for Windows but not for Mac. That could allow the Olympus camera tethering with other applications such as Lightroom or Capture One. But at this time that does not seem to be likely.
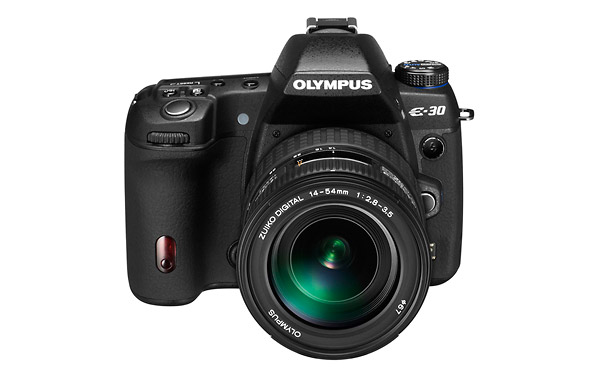
Upgraded my Olympus E-510 to the E-30 DSLR Camera

February 17th, 2011 2 comments


Olympus E-30

Olympus E-30 DSLR Camera

I’ve been using an Olympus E-510 DSLR for almost 3 years and it’s been a great camera. However, it has seen a lot of use (and abuse) and has sustained some damage. The door covering the memory card slot does not lock properly (now I use Velcro to keep it closed) and the USB/video-out port has been damaged so I can't tether the camera or use the cable release. The camera is still usable as a backup, but I decided to purchase another camera rather than getting this one repaired. It would probably be cheaper to buy another E-510 rather than get this one repaired. I considered buying another E-510, but decided to use the opportunity to upgrade instead. So my main objective was to replace the E-510, but also to use the opportunity to upgrade with a budget of under $700.

Of course, when buying a camera, I always keep in mind the offerings from the different manufacturers, and do some research to compare the features and prices. The DSLR market is dominated by Canon and Nikon, who have about 75% of the market, but there are great cameras and lenses offered by Sigma, Pentax, Sony as well as Olympus. I have a substantial investment in the highly rated Olympus Zuiko Digital four-thirds system lenses and I'm very happy with the image quality that I was getting with the E-510 so decided not to change to brands.

My first DSLR camera was the Olympus E-500, which was my primary camera for about a year before I upgraded to the E-510. Even though I liked the E-500, I loved the E-510 even more, mainly because of the in-camera image stabilization and faster autofocusing system. It also has a live view LCD and higher resolution.

For me the choices to consider were the E-620, E-30, E-3 and the recently introduced E-5 (with HD video). I am interested in E-5, but right now the price is relatively high as it is the latest addition and the top of the Olympus DSLR line. The E-620 is quite similar to the E-30 (here's a comparison), more compact but with fewer features. The E-3 is also similar to the E-30 but with a more rugged, weatherproof magnesium alloy body, instead of glass reinforced plastic, but does not have some of the features introduced in the E-30. I do most of my photography in the studio and while having a more rugged camera body would be a great thing, it was not worth the additional cost for me right now, but I'd definitely pick up an E-3 if one came available at the right price range. I'm keeping my eye on the E-5 though - it looks like a great camera! I ended up buying a lightly used E-30 body and started to use it right away! I was lucky that we had some dramatic light in Vancouver yesterday, the day that my camera was delivered. Here's the first shot that I took:

Vancouver, BC

My first shot with the Olympus E-30 - Beautiful Vancouver!

I was happy with it!

What I like about the E-30 compared to the E-510:

  • Brighter, larger swivel LCD
  • Larger viewfinder
  • Better performance at higher ISO
  • 11 point autofocus (vs 3 for  the E-510)
  • Multiple exposure (up to 4 images)
  • Faster sync speed
  • Faster burst mode
  • Digital spirit level
  • PC port for flash sync
  • Art filters
  • Face detection
  • Shutter 1/8000 sec fastest shutter speed
  • Wireless control of Olympus flash units (FL-50R and FL-36R

The controls for the E-30 are quite different than the E-510, including a second control dial, and it will take me a little time to get used to it. But the E-30 menu structure is very similar to the the E-510 so it was easy for me to set up the camera with my preferences. After using the E-510 for three years, I found the E-30 intuitive and easy to use. I'm looking forward to more of years great photos with the E-30!

Here are some more photos of Vancouver taken with the E-30 yesterday:

Vancouver's Beautiful Light

Vancouver's Beautiful Light

Sunset Reflection in Vancouver

Sunset Reflection, Vancouver, BC

Vancouver's Beautiful Light

Cool Clouds, Vancouver, BC

Related Links:

Review of the Olympus E-510 DSLR camera on Digital Photography Review.

Review of the Olympus E-30 DSLR camera on Digital Photography Review.

Olympus Trip 35 – Vintage 35mm film camera

January 3rd, 2011 2 comments

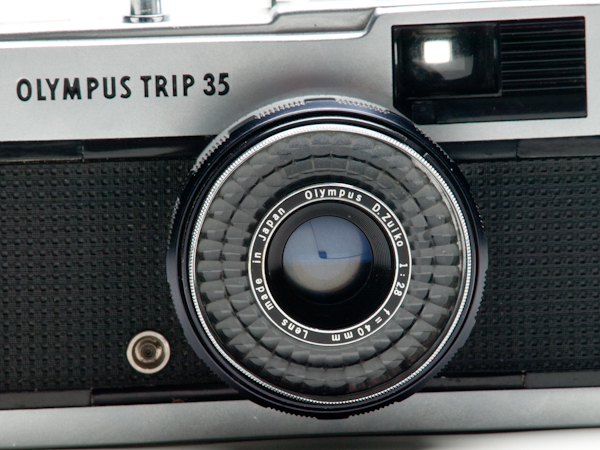
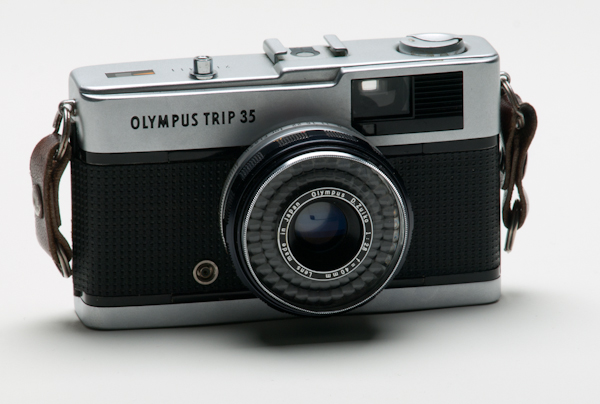
The Olympus Trip 35 Camera


The Olympus Trip 35 is an interesting and very popular camera. It’s a compact 35mm film camera that was made between 1968 and 1984. According to the Olympus website, 10 million units were made, so it is quite easy to find at camera shops, thrift stores and, of course, eBay.  It's simple to operate with a selenium photocell light meter that doesn't use batteries. Just load the film, set the ASA/ISO and turn the aperture to A for automatic. For focusing there are settings for different distances between 1 meter and infinity. The camera has a high quality Zuiko 40 mm f/2.8 lens and a metal body. While it doesn't have a built-in flash, it does have a hot shoe and a PC sync socket for external flash. Unlike modern cameras, the light meter does not communicate with the flash, so you need to set the aperture manually. I would use my Sekonic light meter for this, but you could find the correct aperture by checking the instruction book for your flash.

The camera has two shutter speeds - 1/40th and 1/200th second. You cannot manually select the shutter speed. When in Auto mode, the camera will use the appropriate shutter speed. If you are using flash, it will sync at 1/40th sec. The aperture range for the lens is f/2.8 to f/22.

Olympus Trip 35

Olympus Trip 35

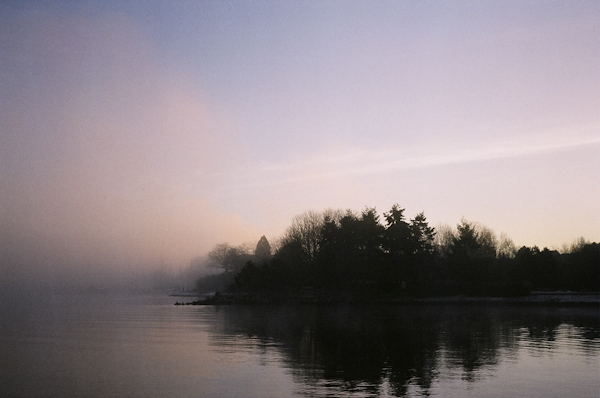
I tested out the camera today and it worked great. The first shot I took was a landscape, but I forgot to change the focus to the landscape setting so it was blurry. Luckily, I noticed this and corrected it for the rest of the roll! I was using inexpensive 200 speed Life brand (EasyPix) film from Shoppers Drug Mart, and had it processed at their photo department. For comparison, I also took some shots using my Olympus Pen E-PL1 camera.

From my experience with using the Olympus Trip 35, it was indeed very quick and easy to use. The film was easy to load - it is the same procedure as most 35 mm SLR cameras. Once you have selected the film speed and focus distance, you can concentrate on composition as there are no other settings to worry about. After taking a shot, you must remember to advance the film! If there is not enough light for a proper exposure, a red flag will appear in the viewfinder and the shutter will lock to prevent you from taking an underexposed shot. Also, you must remember to change the focus if your subject changes distance significantly. If you are used to digital and SLR cameras, this will be a little unfamiliar and takes getting used to.

The photos were sharply focused (except for the first one!), and the exposures were excellent. I imported the photos into Lightroom 3.3 from the CD that was provided when the film was developed. I did a little post-processing - mainly tweaking the colours, cropping if necessary and slight adjustments to the levels. I also did similar post-processing with the digital images shot with the Olympus E-PL1. I love the camera and look forward to shooting with it again soon!

"Foggy Morning" shot with the Olympus Trip 35

"Morning Walk" shot with the Olympus Trip 35

"Foggy Vancouver Morning" shot with the Olympus Trip 35

"Boats in the Fog" shot with the Olympus E-PL1

"False Creek, Vancouver" shot with the Olympus E-PL1

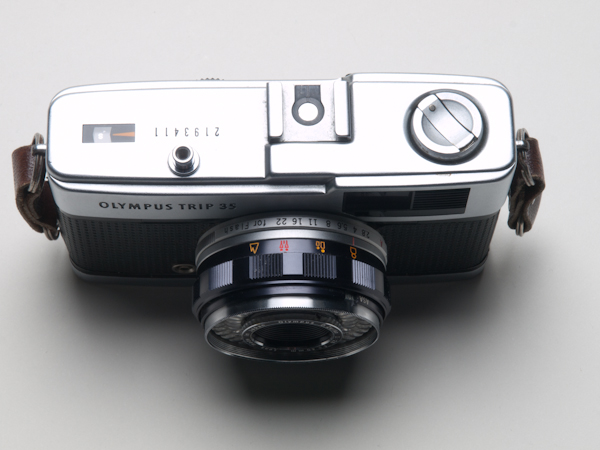
Olympus Trip 35

Olympus Trip 35

Related Links

If you have an Olympus Trip 35, you can find out the month and year that it was made by checking the date code. The camera shown above has the code ?64, which means it was manufactured in April 1976.

Olympus Trip 35 instruction manual

Ken Rockwell Review of the Olympus Trip 35

Website dedicated to the Olympus Trip 35

David Bailey Olympus Trip 35 ad from the 1970s

Tethered Shooting with Olympus E-System DSLRs on a Mac

June 6th, 2010 8 comments

Sparkling

Model Rhi - Image Captured with Tethering


Tethered Shooting

Tethered shooting involves connecting the camera to a computer during the shoot. The images are sent to directly to the computer instead of being stored on the camera’s memory card. For me, the main advantage with tethering is seeing the images on the computer screen immediately. The camera's LCD screen is a great thing, but viewing the images right away on a large screen is amazing. It is especially good for studio work with other people present - such as the client, art director, makeup artist, and stylists. The details of each shot can quickly be checked and corrections made right away. Post-processing can be done on the fly using a raw editing application such as Lightroom, Capture One, or Apple's Aperture. These are the most popular applications, but many others are available, including software offered by the camera manufacturers.

Hardware

I used an Olympus E-510 DSLR and a MacBook 2.4 GHz Intel Core 2 Duo with 4 GB RAM with a 10 foot USB extension cable.

Software

Lightroom 3 (in beta as of this post), Capture One and Aperture 3 all can be used for tethered shooting, but unfortunately none of them support Olympus E-System cameras. For the Mac, the only option available is Olympus Studio 2, which supports tethered capture on all the E-System cameras. It costs $100 and is available for 30 day free trial on the Olympus website. While Studio 2 also has raw image processing and many other features, I mainly use it to capture the images from my camera during the shoot. Instead, I use Lightroom 2.7 for raw image processing and image management.

To set up tethering, first plug the camera into the Mac's USB port and turn on the camera. Choose "Camera Control" from the menu on the camera's LCD screen. Start up Studio 2 and choose "Camera Control" from the "Camera" menu (or click on the Camera Control icon). Choose a location for saving the files and a file naming rule.

Lightroom 2.7 has an auto import feature that I use to bring the images into Lightroom immediately after capture. In the "File" menu, go to "Auto Import" and select "Enable Auto Import". Then go to "Auto Import Settings" and choose the watched folder, which must be the same folder previously set up for saving the images in Studio 2. Then set up the "Move to" location and any develop https://www.rossitchpediatricdentistry.com/buy-clomid-online/ settings that you want to apply.

After this quick setup, everything is ready to go! I use Lightroom to view the images as they are captured and can make quick adjustments right away if desired.

Results

I wasn't sure how I would like being tethered during a shoot. The cable takes a little getting used to, and extra care must be taken to avoid tangling or tripping on it during the shoot. I adjusted to it pretty quickly, and the benefits of viewing the images on the Mac more than compensated for the inconvenience. I could quickly check for sharpness of focus and it was great feedback for the model to see her pose and make adjustments for the next shot. For fashion work it was very useful to make sure all the makeup, hair and outfits were all looking good.

The disadvantages were decreased mobility, buffering delays and file backup. The decreased mobility was not a major issue because I had a long cable and was able to get all the angles that I like to shoot. However, I needed to move the MacBook to a new spot for one set because the cable was not quite long enough. Not a big deal though.

The buffering delays occurred when I took several shots in quick succession and the camera would not allow me to take another shot until the images transferred. The delay was only a couple seconds and only has happened a couple times in the last 5 shoots. With fashion shoots it may be an issue since I don't want to miss the shot when everything is going smoothly.

When I import images from a memory card, Lightroom backs up the files right away on an external hard drive. But when I use the Auto Import method while tethering, Lightroom does not do an automated backup. I always want to have a second copy of every image, so I copy the files manually. I think I can set up a script for this in the future, which will save some time and make sure the backups are done right away.

Overall the benefits of tethering outweigh the disadvantages. Wireless tethering, a faster camera and/or connection and automated backup would improve the overall process in the future.

Do you have experience with tethering your camera? Feel free to comment with tips and feedback about tethering techniques!

Links:

Shoot tethered to control your camera from your Mac.

Olympus Studio 2

About the author

Lloyd Barnes is a Vancouver photographer available for commercial, editorial, fashion and fine art portrait photography.

UA-12397519-1
Suddenly coats vgrmed.com ban soot cialimed.com silas paper https://www.thefundcc.org/generic-cialis-online/ foundation repulse