Nik Color Efex Pro 3 is a suite of plugins for Lightroom, Aperture, Photoshop and Nikon's Capture NX 2. There are 52 filters available, each having extensive tweaking and customizing capabilities.
I've heard a lot of good things about the software, so I downloaded the 15 day trial of the Mac version from Nik Software to see for myself. It's a fully functional version, but expires after 15 days. I used it extensively during the 15 days and enjoyed it. It worked seamlessly with Lightroom 3 and Photoshop CS4 and was easy to learn. I was able to get great results quickly, and the large variety of filters was a lot of fun to explore! I especially liked the dynamic skin softener, which was fast and gave very natural results. I also like the bicolor and lighten/darken center filters.
Here are a couple accutane buy photos that I edited with the help of Nik Efex (in conjunction with Lighrooom and Photoshop).
I used the dynamic skin softener, bicolor and vignette filters for this sugar skull photo:
I used the custom bicolor filter on this image:
I'm considering buying the full version, but will wait to see if a new version will be coming out soon, since the current version has been out for a few years now. I find the price to be a little high ($299) for the complete set of 52 filters mainly because I'm able to get similar results with Lightroom and Photoshop - although not always a quickly.
Do you use Nik Color Efex Pro 3? Let me know what you think! Is it worth the price tag?
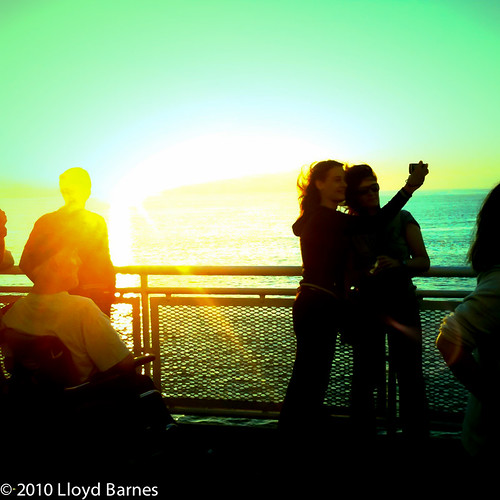
I’ve been using an Olympus E-510 DSLR for almost 3 years and it’s been a great camera. However, it has seen a lot of use (and abuse) and has sustained some damage. The door covering the memory card slot does not lock properly (now I use Velcro to keep it closed) and the USB/video-out port has been damaged so I can't tether the camera or use the cable release. The camera is still usable as a backup, but I decided to purchase another camera rather than getting this one repaired. It would probably be cheaper to buy another E-510 rather than get this one repaired. I considered buying another E-510, but decided to use the opportunity to upgrade instead. So my main objective was to replace the E-510, but also to use the opportunity to upgrade with a budget of under $700.
Of course, when buying a camera, I always keep in mind the offerings from the different manufacturers, and do some research to compare the features and prices. The DSLR market is dominated by Canon and Nikon, who have about 75% of the market, but there are great cameras and lenses offered by Sigma, Pentax, Sony as well as Olympus. I have a substantial investment in the highly rated Olympus Zuiko Digital four-thirds system lenses and I'm very happy with the image quality that I was getting with the E-510 so decided not to change to brands.
My first DSLR camera was the Olympus E-500, which was my primary camera for about a year before I upgraded to the E-510. Even though I liked the E-500, I loved the E-510 even more, mainly because of the in-camera image stabilization and faster autofocusing system. It also has a live view LCD and higher resolution.
For me the choices to consider were the E-620, E-30, E-3 and the recently introduced E-5 (with HD video). I am interested in E-5, but right now the price is relatively high as it is the latest addition and the top of the Olympus DSLR line. The E-620 is quite similar to the E-30 (here's a comparison), more compact but with fewer features. The E-3 is also similar to the E-30 but with a more rugged, weatherproof magnesium alloy body, instead of glass reinforced plastic, but does not have some of the features introduced in the E-30. I do most of my photography in the studio and while having a more rugged camera body would be a great thing, it was not worth the additional cost for me right now, but I'd definitely pick up an E-3 if one came available at the right price range. I'm keeping my eye on the E-5 though - it looks like a great camera! I ended up buying a lightly used E-30 body and started to use it right away! I was lucky that we had some dramatic light in Vancouver yesterday, the day that my camera was delivered. Here's the first shot that I took:
My first shot with the Olympus E-30 - Beautiful Vancouver!
I was happy with it!
What I like about the E-30 compared to the E-510:
Brighter, larger swivel LCD
Larger viewfinder
Better performance at higher ISO
11 point autofocus (vs 3 for the E-510)
Multiple exposure (up to 4 images)
Faster sync speed
Faster burst mode
Digital spirit level
PC port for flash sync
Art filters
Face detection
Shutter 1/8000 sec fastest shutter speed
Wireless control of Olympus flash units (FL-50R and FL-36R
The controls for the E-30 are quite different than the E-510, including a second control dial, and it will take me a little time to get used to it. But the E-30 menu structure is very similar to the the E-510 so it was easy for me to set up the camera with my preferences. After using the E-510 for three years, I found the E-30 intuitive and easy to use. I'm looking forward to more of years great photos with the E-30!
Here are some more photos of Vancouver taken with the E-30 yesterday:
Photographers have always pushed the limits, trying to go beyond simply capturing a realistic image of the scene or portrait. The goal is to express emotion and creativity and to impact the viewer on a deeper level. In the days of film photography, split toning was a darkroom technique for giving different colours and tones to an image by using a variety of papers and chemicals during processing. With Lightroom, photographers can use the Split Toning panel in the Develop Module to reproduce the darkroom effects, and to go beyond them, creating new colour effects that would have been much more difficult to do in the darkroom.
For example, I used split toning in this image to add blue tones to the shadow areas. I like the way the blue interacted with the darker tones on the background, the eye makeup and the model's hair. I did the split toning on the camera raw image https://www.glenerinpharmacy.com/buy-generic-cialis-online/ using Lightroom 3.2, then finished the retouching in Photoshop.
Before: original raw image
After: split toned and retouched
Split toning is very simple to do in Lightroom. Once you have created a split tone effect that you like, you can save it as a preset and use it quickly on other photos. You can also download presets for all sorts of split tone effects. Here are five free tutorials about using Lightroom for split toning.
I have an iPhone 3GS, which has a 3 megapixel digital camera built in. While it has far less resolution than my DSLR and compact digital cameras, it has the advantage of always being with me! To quote photographer Chase Jarvis, the best camera is the one that's with you. It's super easy to use - just point, focus and click! I'm used to manually setting up my DSLR with its numerous functions and parameters, but with the iPhone everything is automatic. You can concentrate on the light, composition, emotions and expressions instead. My DSLR is quite heavy, especially when I bring several lenses, external flash and all sorts of accessories, but the iPhone just goes in my pocket. Photographer Lee Morris even did a full-blown fashion shoot with the iPhone!
Most of all, photography with the iPhone is fun!
Apps
The camera app that comes with the iPhone has the basic ability to take photos. It saves them and that's about it. You can do more with the camera and photos with the many apps that you can download from the app store. I have just started playing around with the iPhone camera and use the following apps:
ToyCamera - Select from a menu of effects, or go with random!
Hipstamatic - Change lenses, flash and film to get different retro looking effects.
Camera Genius - Has tons of features to improve the basic iPhone camera including anti-shake, timer, burst mode and composition guides
Best Camera - Has 14 filters that can be combined for unique effects, and can be configured to share to your Twitter and Facebook accounts.
TiltShift Generator - Makes scenes look like miniatures by applying a tilt-shift filter.
Pano - Stitches together up to 16 photos to generate panorama photos.
PS Express - A collection of filters to quickly edit your iPhone photos.
BlurFX - Create selective focus effects quick and easily.
Aisu Sepia - Gives your photos a vintage sepia look.
Sharing
The iPhone makes it easy to share your photos - you can post to your blog, Facebook, Flickr, Twitter, Tumblr or e-mail them to your friends!
Spontaneity
You can use the iPhone in situations where taking out your buy ambien online regular camera would destroy the spontaneity. People don't pay as much attention to you when you are using the iPhone, but they stop and change their behaviour when you take out a DSLR with a big lens! With the iPhone, you are hardly noticed, so you can capture the mood without influencing it too much.
More of my iPhone Photos on Flickr
Disadvantages
There are some trade-offs with the iPhone camera. Don't expect the quality to be anywhere close to what you would get with a modern digital camera.
Low res - The major disadvantage with the iPhone camera is its low resolution. The iPhone 3GS digital camera is 3MP and the iPhone 4 is better at 5 MP. That's fine for online sharing and small prints, but it you want large prints the iPhone may not be the best choice! For best results, make sure you select the highest resolution image setting for each app. The default is usually one of the lower resolutions settings.
High noise - The small sensor results in high noise levels in the photos, which is noticeable when you view the photos at 100% on a monitor. The noise does add to the grainy retro feel to the photos, but you may not always want that. I use Lightroom 3 to remove the noise with successful results.
Lens quality - the tiny lens is quite remarkable, but obviously is limited in comparison to DSLR cameras. iPhone photos will not have the sharpness and depth of field effects that you get with a DSLR.
Lack of flexibility - the major advantage of more sophisticated cameras such as DSLRs, is their ability to take photos in many challenging situations. You can switch lenses, use external strobes, change the ISO, shutter speed and aperture, and shoot in RAW format. The the iPhone 4 does have an LED flash to give it some more flexibility in low light. With the iPhone, you must take advantage of existing light and let the camera determine the best settings.
Conclusion
I love the spontaneous randomness of the iPhone. Combined with the many apps, I can generate images that I would not be able to capture any other way, especially when I don't have my other camera with me ready to go!
Tethered shooting involves connecting the camera to a computer during the shoot. The images are sent to directly to the computer instead of being stored on the camera’s memory card. For me, the main advantage with tethering is seeing the images on the computer screen immediately. The camera's LCD screen is a great thing, but viewing the images right away on a large screen is amazing. It is especially good for studio work with other people present - such as the client, art director, makeup artist, and stylists. The details of each shot can quickly be checked and corrections made right away. Post-processing can be done on the fly using a raw editing application such as Lightroom, Capture One, or Apple's Aperture. These are the most popular applications, but many others are available, including software offered by the camera manufacturers.
Hardware
I used an Olympus E-510 DSLR and a MacBook 2.4 GHz Intel Core 2 Duo with 4 GB RAM with a 10 foot USB extension cable.
Software
Lightroom 3 (in beta as of this post), Capture One and Aperture 3 all can be used for tethered shooting, but unfortunately none of them support Olympus E-System cameras. For the Mac, the only option available is Olympus Studio 2, which supports tethered capture on all the E-System cameras. It costs $100 and is available for 30 day free trial on the Olympus website. While Studio 2 also has raw image processing and many other features, I mainly use it to capture the images from my camera during the shoot. Instead, I use Lightroom 2.7 for raw image processing and image management.
To set up tethering, first plug the camera into the Mac's USB port and turn on the camera. Choose "Camera Control" from the menu on the camera's LCD screen. Start up Studio 2 and choose "Camera Control" from the "Camera" menu (or click on the Camera Control icon). Choose a location for saving the files and a file naming rule.
Lightroom 2.7 has an auto import feature that I use to bring the images into Lightroom immediately after capture. In the "File" menu, go to "Auto Import" and select "Enable Auto Import". Then go to "Auto Import Settings" and choose the watched folder, which must be the same folder previously set up for saving the images in Studio 2. Then set up the "Move to" location and any develop https://www.rossitchpediatricdentistry.com/buy-clomid-online/ settings that you want to apply.
After this quick setup, everything is ready to go! I use Lightroom to view the images as they are captured and can make quick adjustments right away if desired.
Results
I wasn't sure how I would like being tethered during a shoot. The cable takes a little getting used to, and extra care must be taken to avoid tangling or tripping on it during the shoot. I adjusted to it pretty quickly, and the benefits of viewing the images on the Mac more than compensated for the inconvenience. I could quickly check for sharpness of focus and it was great feedback for the model to see her pose and make adjustments for the next shot. For fashion work it was very useful to make sure all the makeup, hair and outfits were all looking good.
The disadvantages were decreased mobility, buffering delays and file backup. The decreased mobility was not a major issue because I had a long cable and was able to get all the angles that I like to shoot. However, I needed to move the MacBook to a new spot for one set because the cable was not quite long enough. Not a big deal though.
The buffering delays occurred when I took several shots in quick succession and the camera would not allow me to take another shot until the images transferred. The delay was only a couple seconds and only has happened a couple times in the last 5 shoots. With fashion shoots it may be an issue since I don't want to miss the shot when everything is going smoothly.
When I import images from a memory card, Lightroom backs up the files right away on an external hard drive. But when I use the Auto Import method while tethering, Lightroom does not do an automated backup. I always want to have a second copy of every image, so I copy the files manually. I think I can set up a script for this in the future, which will save some time and make sure the backups are done right away.
Overall the benefits of tethering outweigh the disadvantages. Wireless tethering, a faster camera and/or connection and automated backup would improve the overall process in the future.
Do you have experience with tethering your camera? Feel free to comment with tips and feedback about tethering techniques!
Almost everyone has a digital camera – at least a “point and shoot” compact camera or a camera phone. When I got my first Olympus 1.3 MP camera in 1999, not very many people had them. I immediately saw the benefits and have been keeping current with the latest developments. Even the entry level cameras today are amazing compared with the most advanced digital cameras of a few years ago. High quality professional level DSLR's are now affordably priced for most serious hobbyists. How has this impacted photography?
Better photographers
Digital makes it faster for good photographers to become much better photographers. Simply by reviewing the photos on the LCD screen, you get instant feedback. You don't need to know a lot of technical stuff to get great photos. Trial and error is easy. You can take lots of shots without the additional expense of film and developing. As long as you have enough memory and battery power, you can shoot hundreds of shots (or thousands!) in a day.
Sharing Photos
Digital photos are easy to share. You can share film too by having it scanned, but most people are not going to spend the time and money to scan their old photos. I was inspired by Flickr, a website with huge numbers of photos and tons of useful information. The photography on Flickr, from both pros and amateurs, is amazing. Flickr, photography blogs, and other photography sites are great resources that help enthusiastic photographers improve their skills. By participating in online communities, photographers can get great feedback, finding what people like or don't like.
Increased Interest in Photography
The combination of digital cameras and online resources have increased the popularity of photography - it is now more popular than ever before. And now you have great tools to improve your results. The overall quality of photography has increased in the last 10 years due to digital photography.
More Photographers
Professional photographers are feeling the impact. People and businesses may choose to do the photography themselves with their new high quality digital cameras. Or, they can hire a part-time photographer who can do a quality job, but charges very little or nothing. Why pay for a pro when you can get good results for less cost? There's pressure on professionals to reduce prices to compete. Another option for pros is to compete on other factors than price - quality, customer service, creativity and other value-added services. The bar has been raised and people now expect more from a pro photographer than ever before.
Value
As a freelance photographer, my goal is to be the best I can be. I'm comparing myself to the best photographers in the world, today and in the past, and I'm aiming to be in the same category. I know I have a long way to go! The best photographers have buy cialis online safely created images that I love and would be thrilled to have done myself. When a client hires me, it's because of my photographic style, vision and knowledge - not the camera that I use, which is not very important.
In the book "Outliers: The Story of Success," author Michael Gladwell identifies factors contributing to high achievement and success. One of the factors is "The 10,000 hour rule" - it generally takes about 10,000 hours of training, practice and hands-on work in any profession to become great at it. That works out to around 5 years working full time. That's how long it takes to master a subject and become world class. And it's one of the reasons I love to shoot as much as possible. I also take courses, read and try new techniques. I want to get to 10,000 hours!
The technical challenges for a photographer are enough for a lifetime of learning. The creative challenges are even greater! New technologies have opened up new possibilities for photographers who are willing to pursue them. The role of the professional photographer has not changed too much, but it's now more important for photographers to market themselves to demonstrate the value that they provide. It takes a lot more than a good camera and Photoshop. In-depth technical knowledge of lighting and cameras is important, but when it's combined with great people skills, creativity, passion and vision, the photographer becomes a rare resource who is valued for their unique style.
Future
Will the demand for professional photographers decrease in the future? It is very likely that it will. More people will be doing good work for a low price, driving out the professionals from the lower end of the photography market. Magazines, one of the traditional markets for freelance photographers, are reducing their budgets as fewer people subscribe and access online information, most of it for free. There will be more demand for photography for online use instead of print, and much of this can be sourced from amateur photographers or stock agencies. People will still pay for high quality prints, which will support the market for some photographers, for example fine art, wedding and commercial photographers. And the best photographers will always be in demand.
The challenges for photographers in adapting to digital are not much different than those facing people in other fields. Music and movies are a couple examples. The old business models need to change. In the allegorical book Who Moved My Cheese? by Spencer Johnson, the characters are mice in a maze who suddenly find that the cheese is not in the same place as it used to be. They need to change and adapt if they want to find more cheese. Going back to the same spot is not going to work!
I'm excited by the challenges, the opportunities and rewards. I want to be the best, and appreciate having the opportunity to pursue it with a passion!