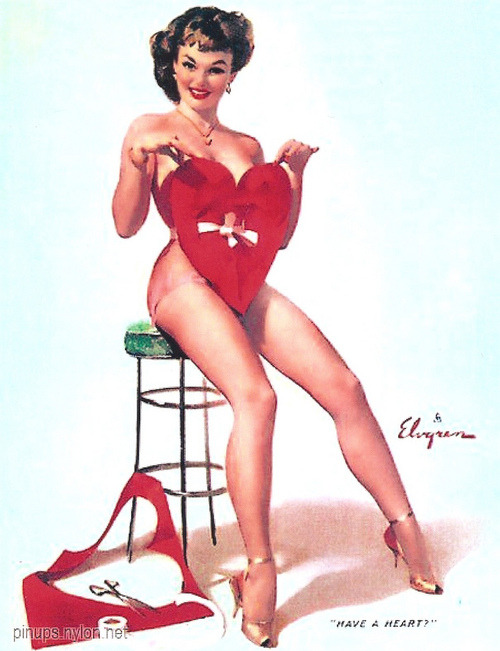
Here are some photos from a recent Valentine’s Day pin-up photoshoot with burlesque performer Pocket Venus. We used a vintage pinup poster by Gil Elvgren for inspiration:
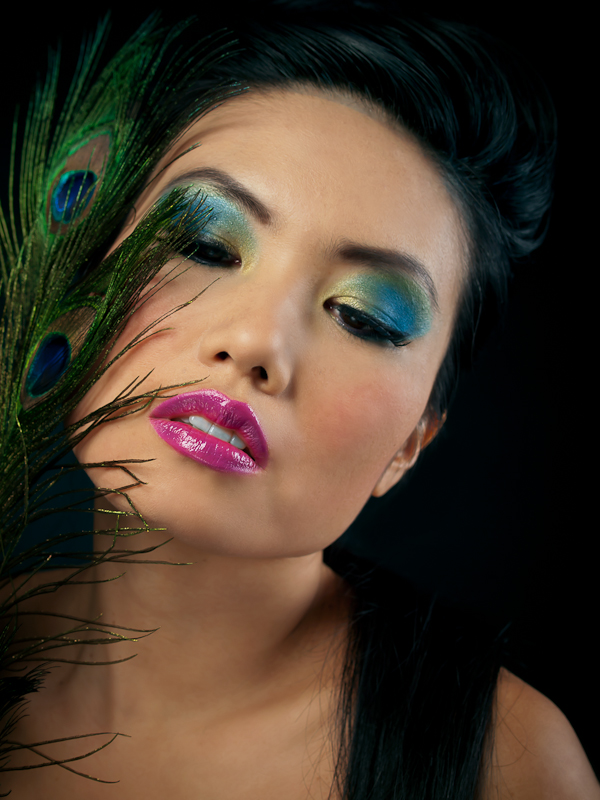
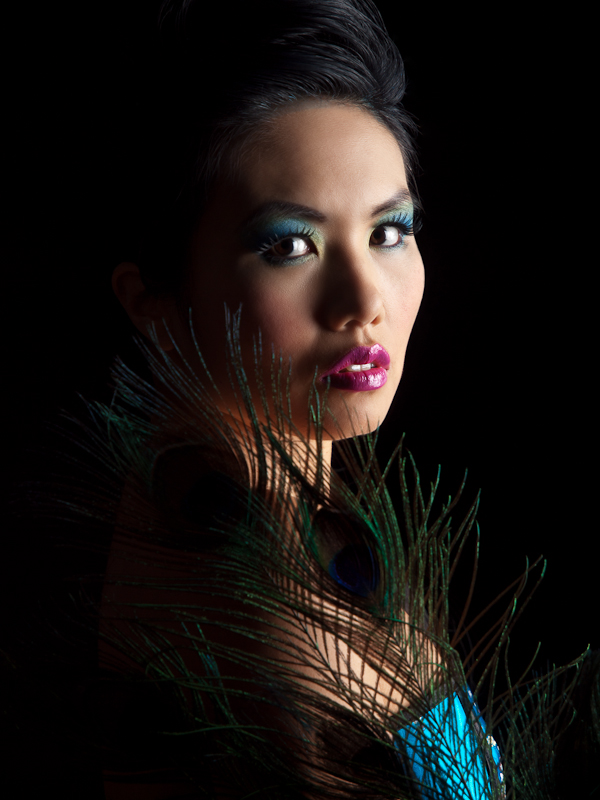
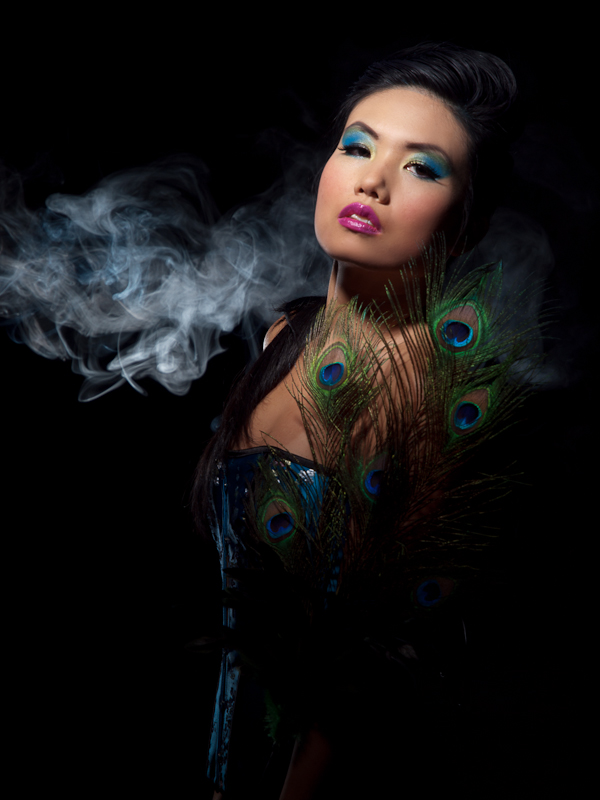
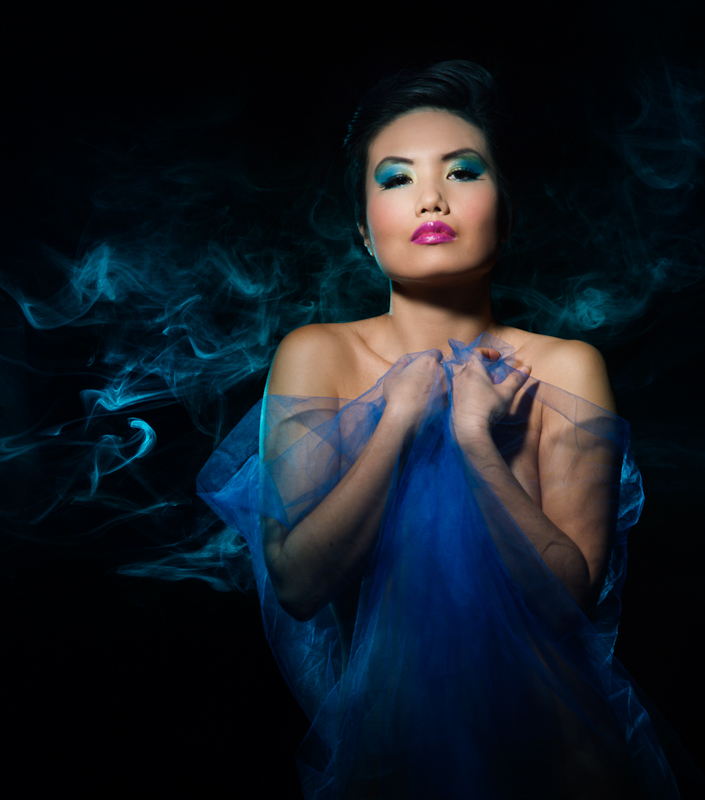
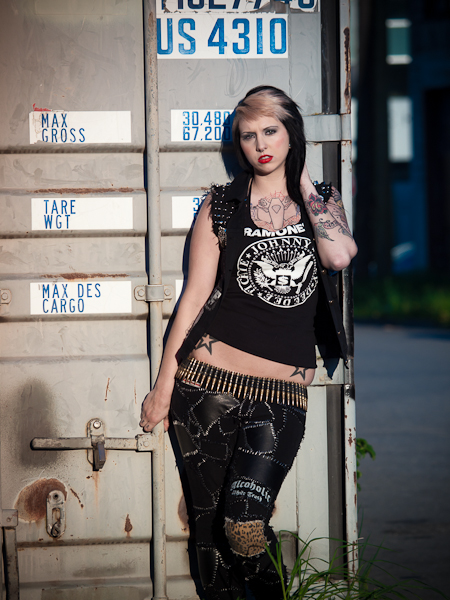
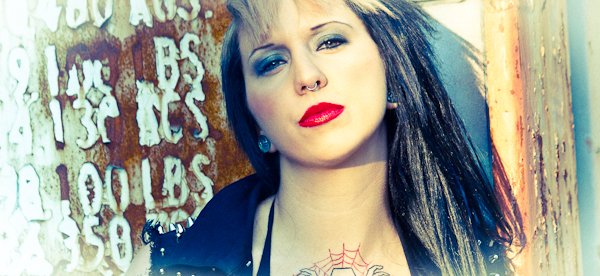
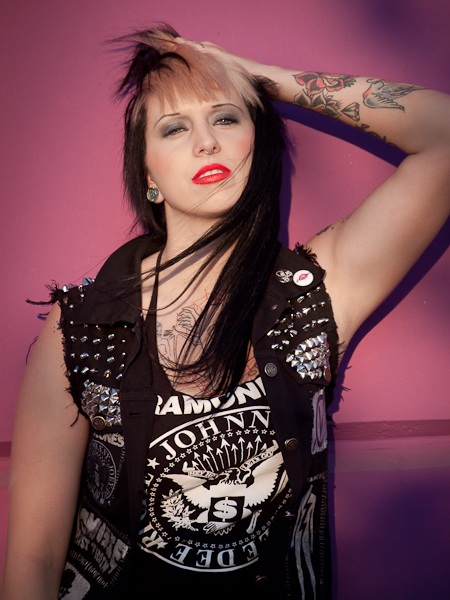
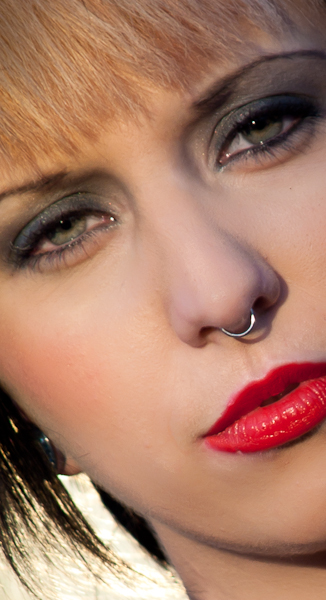
We also did a few other looks and poses as you can see below (click thumbnails to expand). I used a fog machine backlit with a light covered with a red gel to create the smoky effects. It was a lot of fun and great to work with model Pocket Venus Josan and makeup and hair artist Ashley of Blood & Beauty.
Shadows are as interesting as the light. Chiaroscuro is a term used in photography, as well as cinema and painting, that literally means "light-dark" and originates from the Italian Renaissance. The shadows help define the image, making the two dimensional appear three dimensional.
The idea for this shoot was to have the model, Saori, emerging into the light from the shadows. To get that effect, I used a black seamless background, making sure that the key light did not spill onto it by keeping them well-separated. I started with a large gridded softbox close to Saori, on camera right to light the portraits and close-ups, highlighting Julia's makeup work. By moving the softbox in very close, the light buy accutane online falls off quickly so the opposite side of her face is quite a bit darker than the side with the light. To control the shadow's darkness I used a large white foamcore panel and a silver disk reflector for fill light.
For the full body shots, I really wanted to get the shadowy look, so I used a more focused light - a gridded strobe on a boom in front and above Saori. For an interesting background, I put a fog machine and another strobe to backlight the smoke/fog behind Saori. For some of the shots, I used a blue gel on the strobe to make a blue smoke effect. With this set-up, Saori's face was well lit and her body gradually became darker, fading into blackness.
Post-processing was done with Lightroom 3.3 and Photoshop CS5.
Credits: Inspired modelling by Saori Sloan
Beautiful peacock themed makeup by Julia Lockley
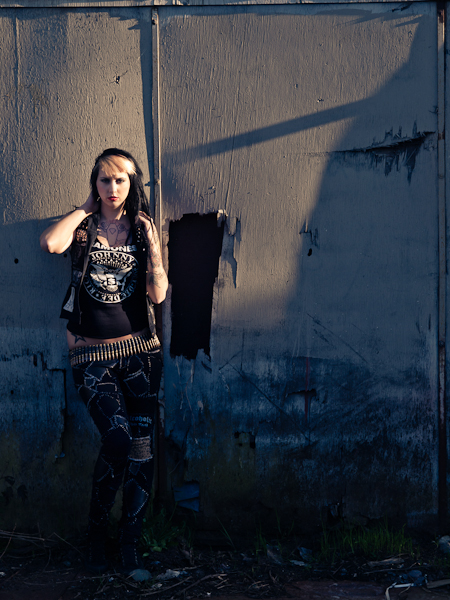
I usually work in the studio with strobes and controlled lighting, so I wanted to try something different and used only natural light and a reflector for this shoot. I loved just having the camera and the model to work with, and not worrying about the strobes, stands and umbrellas. Tessa helped out with the reflector to fill in shadows and brighten up the model in shaded areas. Without all the lighting gear, we could move around quickly to wherever the light was good and the background was interesting.
The shoot was during the evening “golden https://gigglesgobblesandgulps.com/buy-valtrex-500mg/ hour” where to buy soma bras before sunset. The light was beautiful and worked perfectly. We had to move quickly though because the light changed rapidly as the sun was setting, and it also started to get cool and windy.
The location was an older industrial park near Main and Terminal in Vancouver. I love the decayed and worn textures of the buildings - lots of faded, peeling paint and rusty metal. We also went to a more modern area with glass and bold colours to work with.
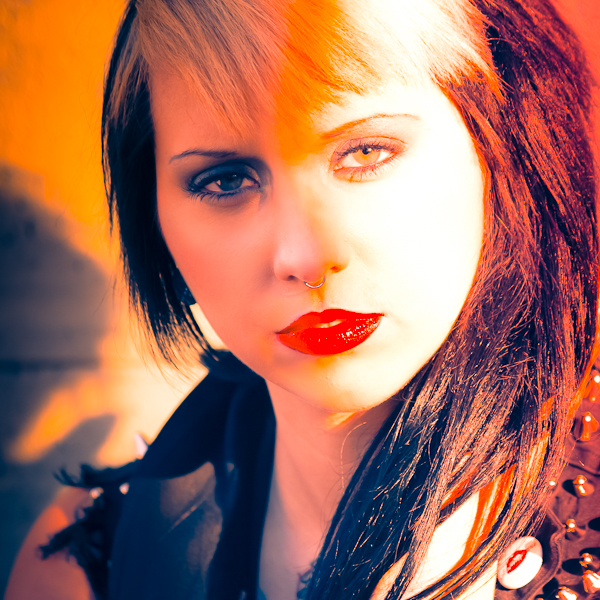
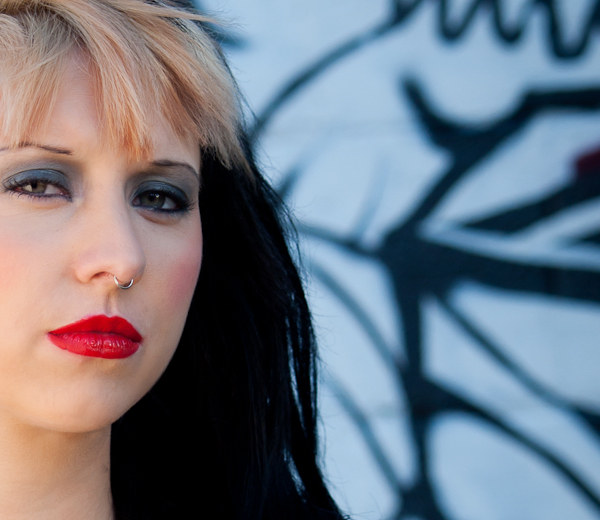
I used Lightroom 3.4.1 and Photoshop CS5 for the post-processing, trying out several different styles and colour schemes. I'm looking for some feedback - which ones do you like/don't like and why? Thanks!
Here’s a video from a recent pin-up photography session that I did with Doreen and makeup artist Tessa Mitz. I love the vintage pin-up posters of the 1940s and 1950s! For inspiration, I browsed through the vast collection of pin-up art on The Pin-up Files and chose some images for posing ideas. I also checked out photos of Dita Von Teese, one of my favourite https://www.ncahcsp.org/buy-xanax-online/ contemporary pin-up models. We referenced the images during the session so we had lots of poses and variations to work with.
After the shoot I edited the photos with Lightroom and Photoshop to re-create the glamour and pin-up look. Here's a short video tutorial about creating a vintage look with Photoshop.
For more inspiration check out the work of Dale May. His conceptual work and digital composites are outstanding!
Here are a some some photos that I took on the roof deck of The Studio by Mika Does Makeup with model Ariel K. Marie. It was pretty cold up there so it was a very quick shoot! It’s a beautiful location with a great view, so I'm looking forward to another shoot when the weather gets a little warmer. I hope that you have a happy Valentine's Day!
Valentine's Makeup by Mika
Click to see more Valentine's photos with Ariel K. Marie
Thanks also to Tiffany May Photography who collaborated on this project, providing much inspiration, creativity and assistance!
Production
For the background, we used "Super White" seamless paper, available from Savage or B&D. It glows blue under black light. We cut different sized hearts out of pink fluorescent bristol board and hung them from the studio's ceiling with fishing line. We set up four 48 inch 40 watt fluorescent black light tubes - one on each side of Rachel, one overhead and the fourth on the floor to surround the model with black light.
Here's what the setup looked like (the fourth tube on the floor is not shown):
Skin tends to look very dark under black light, so to help make the model's face more visible, we positioned a White Lightning X800 strobe with a grid in front of the model, and for some the shots we used a hand-held white LED flashlight to light the model's https://www.thecourtyardclinic.co.uk/buy-cialis-tadalafil-online-uk/ face. We also used a white disk reflector, which gave off a blue glow, to help light the model.
Camera settings
Initially, I used ISO 100, f/1.4, 1/25th second exposure with a Sigma 30mm lens. I then wanted to get some shots with a longer focal length so I switched to my 50-200 mm using ISO 200 and 1/10 sec at f/2.8. I used a tripod and a cable release to minimized unwanted motion blur. I wanted to minimize noise by using the lowest ISO that I could get away with. Depending on your camera, you may be comfortable going to higher ISO and faster shutter speeds.
Post-processing
I used Lightroom 3.3 to adjust the colours, exposure, noise reduction, and some local brush adjustments. I completed the editing in Photoshop CS4 - mainly retouching and removing the visible fishing lines that the hearts were attached to.
Are you thinking about giving glamour or boudoir photos of yourself to your boyfriend, partner, fiancé or husband for Valentine's Day? Of course, I think photographs always make great gifts! If you have never done a glamour or boudoir photography session, it may be a little intimidating.
What is glamour?
Glamour photography is all about making you look amazing, whether it's pretty, beautiful, sexy, classy, or elegant. I love doing glamour - it's a lot of fun and a great feeling when clients love their photos!
The ingredients for great glamour photos are:
Hair and makeup: I work with professionally trained makeup artists and hair stylists who know how to make you look your best. They are trained to work with your features and skin tone so you will to look great. And the makeup artists have plenty of professional high quality makeup, brushes, and supplies!
Wardrobe and accessories: Glamour photography is more about the woman than the clothes, so the outfits should compliment you rather than be the main point of focus. For glamour, usually less is better. Outfits can be lingerie, jeans, shorts, swimsuits, skirts or dresses and can be risqué, elegant, cute or innocent. The same is true for accessories - depending on the jewelry, it adds elegance, sexiness and personality.
Lighting: One of my main concerns as a photographer is how to best use lighting to create the glamour look. In the studio I will tailor the lighting specifically for the woman being photographed because everyone is different. Natural light can also be very flattering and glamourous when it is available - such as outdoor locations or locations with window light.
Posing: The right poses make a huge difference in the photos. Professional models know how to work with the photographer and have a repertoire of poses and expressions that they can draw upon. They also know the poses that are most flattering to their own look. For clients who are not professional models, it may be a little intimidating being in front of the camera. Another major part of my job as a photographer is to help with different poses and angles to get the most flattering photos.
Retouching: Everyone has imperfections and the camera records them faithfully. However, most women don't want to see dark circles under their eyes, bloodshot eyes, wrinkles or blemishes! When I retouch glamour photos, I clean up these problem areas and anything else that distracts from the your natural beauty.
Having a blast! Having a great time with lots of energy makes the session a success too!
Tips for choosing a photographer (in order of most to least important):
Portfolio: The first thing to do is browse the photographer's website. Are there are images that you love? You can use those as examples of the style that you want when you talk with the photographer. If you do not love that photographer's style, then keep looking for a photographer until you find photos that you love!
Recommendations: If you have a friend who has done glamour photography, ask her for recommendations.
Location: How far are you willing to travel to a photographer's studio? Many photographers are willing to travel to a location, so if the photographer whose work you really love is not local, you could ask if they are willing to travel and how much do they charge.
Price: Decide on the budget that you are willing to spend and take a look at the price ranges, but don't base your decision on price alone! Prices vary tremendously and there is no set price because you are paying for the photographer's unique vision and skills. I recommend that you choose a photographer that you really love and then budget enough to get your photos done by him/her. The photos will be a long term gift that will last a lifetime, so it is worth investing in the best quality.
Male or female photographer? Some photographers advertise that because they are male or female, they are somehow more suitable. I don't think this matters at all - it is a matter of personal preference. Professional photographers rely on having a good reputation and depend on word-of-mouth recommendations from previous clients for a successful business, and will treat you respectfully and professionally.
Once you have decided on a photographer, contact him/her to see if they will meet with you in advance. I much prefer to meet potential clients first to find out what style of photos they want. That way I can make sure she will be thrilled with the final results! Most photographers will require a payment in advance (usually applied to the session fee) to reserve a time slot.
What is boudoir?
Boudoir photography is growing in popularity, especially for pre-wedding photography, and also makes a great Valentine's Day gift. While there is no single definition of boudoir photography, the name comes from the French for a lady's bedroom, and it implies an intimate and sensual style.
Boudoir is a genre of glamour that tends to be soft, mysterious and intimate. It can be done in the studio by creating an intimate mood with lighting, props and sets or can be done at locations such as the client's bedroom or a luxury hotel room. Selecting a boudoir photographer is the same as selecting a glamour photographer, with emphasis on a more intimate style.
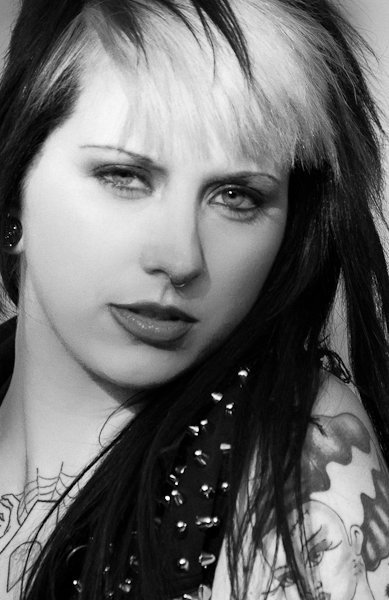
I love the art of Sylvia Ji and was inspired by her Dia de los Muertos (Day of the Dead) paintings. We had an amazing team for this shoot - everything came together to create some very cool images. The overall theme was "death" but I wanted to combine Winter - which is symbolically associated with death - with Day of the Dead, where to buy viagra sugar skull inspired imagery. Jenny did a fantastic job with the makeup, and Dani and Candice were awesome with the hair styling. Dani's styling was perfect and Charity was beautiful and inspired
I chose "Gone With the Storm" by One Dice as the music to accompany the video slideshow, which fits perfectly with haunting vocals and strings and cold, icy piano!
The graduates of the Vancouver Community College Fashion Arts Program showed their creations last night at a fantastic show held at Rocky Mountaineer Station in Vancouver. The show featured the work of 21 graduating fashion designers, each of whom had 4 pieces in the show. The production was spectacular with great models, makeup, hair styling, music, lighting and of course catering! But the emerging designers were centre stage with some incredible work.
I took as many photos of the outfits as I could! I have previously photographed the designs of one of the graduates, Ana Jost, and I love her work. It was a pleasure to see her graduating and finishing this phase of her fashion design career.
All the designers' work was very impressive and I'm looking forward to seeing more from them in the future, and I hope to use their designs in my photography as well.
You can view all of the outfits in the music video below, or view the photos here.
Congratulations to all the graduates for your amazing work!
Here's the video on YouTube if you are unable to view the flash version above:
Music for the video No Return! by Romahichi
I recently wanted to take some photos of some antique glass apothecary jars and used a technique called "bright field lighting". Glass is tricky to shoot because it is both transparent and reflective. If you are not careful, treatment you will lose the definition of the edge of the glass and and unwanted reflections and highlights.
http://www.mazenabusrour.com/?p=103
cheap on Flickr" href="http://www.flickr.com/photos/kalamakia/5202003492/">
Here are a couple of photos from a recent fashion shoot with model Joleen and makeup artist/hair stylist Elizabeth McLeod. The makeup was inspired by Audrey Hepburn photos from the early fifties and the hairstyle has a vintage forties look.
More details and photos from this shoot will be posted soon!
abortion on Flickr" href="http://www.flickr.com/photos/kalamakia/5201891860/">
Fog adds a cool look and atmosphere to a studio shoot. I bought a fog machine at a local party supply store and got an extra bottle of "fog juice". One bottle lasts for a long time so I have plenty of it left, even after using it for about a dozen shoots. This fog machine has a handy remote control that lets me fire a blast of fog when I'm ready to shoot. They are pretty popular for Halloween so you may see them for sale for a good price at this time of year.
The type of machine I use is a "glycol fogger" and it works by heating up a fluid called "fog juice" and then shooting the fog out of a nozzle. Since I am a chemist as well as a photographer, I needed to know what fog juice actually is. It is mainly glycerin, propylene glycol and water and is non-toxic (note - a similar sounding chemical - ethylene glycol - is toxic and should not be used for fog machines!). However, there is always the possibility that certain people could be sensitive to the glycerin and propylene glycol so it's a good idea to make sure everyone is OK with it when the fog starts.
There are other ways to generate fog. For example, dry ice and water works, but it's expensive and difficult to use. Dry ice must be handled carefully because it is extremely cold and will burn bare skin. Because dry ice produces carbon dioxide gas when it warms up, it should be used in well-ventilated areas, and never in small enclosed spaces due to the risk of suffocation. The fog is colder than the surrounding air and will sink to the ground, which might be an interesting effect. The fog from the glycol fogger doesn't sink - it tends to float at the level where it was generated.
Here are some tips based on my experience with using the fog machine.
Fog machine with back lighting. Model: BabieAngie, Makeup: Krystal Leong
Lighting
The fog needs lighting to make it visible. Back lighting with the strobe out-of-frame or hidden behind the model looks great. Also, side lighting works well as shown in the shot of Kaitlin V. I use a hard light - usually a strobe with a tight grid or snoot to give a beam of light https://www.glenerinpharmacy.com/buy-clomid-online/ through the fog. Use the same precautions that you would normally use when potentially shooting into the light - use flags to shield the lens and avoid lens flare. Sometimes a bit of flare looks cool with the fog so you may want to experiment!
Fog machine using a black background and strobes with blue gels. Model: Charity, Makeup: Jennifer Ruth, Fashion Stylist: Celina Prado
Use a dark background
The fog is white and does not show up against light backgrounds. Use a dark background such as black seamless paper or black fabric for the most dramatic look. I learned that the hard way when I tried shooting against a white background and the fog was hardly visible!
Use gels
You can change the colour of the fog by putting a gel on the strobe that's lighting the fog. You can also light the fog with two strobes, using gels with harmonizing colours to create a dramatic look.
Fog machine and strobe with red gel. Model: Stephanie Peregrinus, Makeup and hair stylist: Catriona Amour
Have an assistant
It helps a lot to have an assistant (for me it's usually the makeup artist!) to direct the fog by pointing the machine in the right place - usually in front of the lights or behind the model. I use a light weight fog machine so it is not too difficult to hold for a while. Some of the more industrial grade machines are heavier so you need a strong "fog wrangler" for the job! Make sure the assistant knows that the nozzle of the fog machine can get quite hot! I get my assistant to move the fog machine in the right place, then let her know when I'm going to blast some fog with the remote control.
Use sparingly
The best looking fog is usually very soon after it comes out of the machine. This is when you get lots of swirling, smoky fog. It quickly diffuses and after a while it dissipates through the studio, creating a haze that doesn't look so great. When there's too much fog between the camera and the model, it just reduces the contrast. If I'm doing several sets, I usually wait until the end for the fog, or open up the studio after a while and blow it out with an electric fan!
Have fun
Don't forget to have fun and experiment with it! If you have some tips for using fog in photography, please share them in the comment section.