Nik Color Efex Pro 3 is a suite of plugins for Lightroom, Aperture, Photoshop and Nikon's Capture NX 2. There are 52 filters available, each having extensive tweaking and customizing capabilities.
I've heard a lot of good things about the software, so I downloaded the 15 day trial of the Mac version from Nik Software to see for myself. It's a fully functional version, but expires after 15 days. I used it extensively during the 15 days and enjoyed it. It worked seamlessly with Lightroom 3 and Photoshop CS4 and was easy to learn. I was able to get great results quickly, and the large variety of filters was a lot of fun to explore! I especially liked the dynamic skin softener, which was fast and gave very natural results. I also like the bicolor and lighten/darken center filters.
Here are a couple accutane buy photos that I edited with the help of Nik Efex (in conjunction with Lighrooom and Photoshop).
I used the dynamic skin softener, bicolor and vignette filters for this sugar skull photo:
I used the custom bicolor filter on this image:
I'm considering buying the full version, but will wait to see if a new version will be coming out soon, since the current version has been out for a few years now. I find the price to be a little high ($299) for the complete set of 52 filters mainly because I'm able to get similar results with Lightroom and Photoshop - although not always a quickly.
Do you use Nik Color Efex Pro 3? Let me know what you think! Is it worth the price tag?
Marketing for photographers has changed dramatically in the last few years. The changes are being driven by better and cheaper digital cameras leading to increased competition amongst photographers. In addition, traditional marketing and advertising is being replaced by the internet. The Linked Photographers' Guide shows how to use online marketing and social media to find clients - of fundamental importance for a successful business!
The Linked Photographers' Guide is a great reference for photographers who are looking to improve their Internet marketing. It covers the basics of personal branding, setting up a web site and blog, getting more traffic with search engine optimization, and monitoring the traffic using analytics. There's also a chapter on how to use Google Adwords.
Each of the major social generic viagra names networking sites of importance for photographers are covered in separate chapters. These include Facebook, Twitter, Flickr, YouTube, Tumblr, and LinkedIn. The book includes many case studies showing how some of today's successful photographers use social media, with their individual tips and suggestions.
The final chapter covers many more tools and services available to help facilitate social networking, such as some of lesser know social networking sites, URL shorteners, RSS feed readers, social bookmarking sites and much more.
The book is ideal for photographers who are new to social media, but is full of tips and information that would be useful for the more experienced as well. As the authors remind us, some of the details will no doubt become out of date as the existing sites evolve and new ones gain popularity. However, the principles will remain sound and this book is a great way for photographers to get up to speed in the rapidly growing world of social media.
Here’s a short behind-the-scenes video of model Tia getting her sugar skull makeup done by Jenny and hair styled by Rhi to get ready for a photoshoot. The video also includes also a couple of clips with model Joshua with his skull makeup already done and getting some final styling touches by stylist Jihan Amer.
The theme of the shoot was based on the Dia do los Muertos (Day of the Dead) holiday in Mexico, but with a seasonal spring blossom twist. I'll be posting more information about this shoot soon, so keep an eye on my blog.
Here's a preview of one of the photos from this shoot:
White Orchid - Painting with Light - 25 sec at f/22
Painting with light is a great technique to create interesting lighting effects using ordinary flashlights. It's very simple to do and once you get into it, the possibilities are endless.
All you need is a flashlight, tripod and a camera that you can set to manual exposure. Also, the room must be completely dark. I like to use a MagLight because you can focus the beam, but any flashlight will do. LED flashlights work great too.
White balance - conventional flashlights use tungsten or halogen bulbs, so you should set your camera's white balance to tungsten to get a natural looking light. LED flashlights are often closer to daylight, so you should set your camera to daylight white balance.
Exposure - you can use any aperture, although I prefer to use a smaller aperture (higher f-stop) to give me more time to do the light painting. A wide aperture will be harder to work with because it's easy to overexpose the image. I set my camera to manual and use the "Bulb" shutter speed and a cable release. You can also use a long shutter speed such as 30 to 60 seconds. If you set the self timer you can trigger the shutter without touching the camera.
Rapidly moving the flashlight will create a soft light with fewer shadows. If you hold the flashlight still, you will get sharp dramatic shadows.
Avoid going over the same spot more than once or you risk overexposing that part of the image.
Make sure you cover all the subject with light. Any areas that you don't buy ambien online paypal paint with the flashlight will be very dark or completely unexposed.
With a digital camera you can look at the image on the camera's LCD screen after the shot to see how it turned out. This makes the technique a lot easier than it would be with a film camera!
Focus the camera first and set it to manual focus. This way the camera's autofocus won't kick in when you open the shutter.
Avoid moving the camera during the exposure or you will get some blurred images. Even though the camera is on a tripod, because you are working in the dark it's easy to bump into the tripod and nudge the camera out of position. If that happens, your image will probably not turn out - although sometimes you may get some interesting double exposure effects!
Turn off the camera's noise reduction feature because it takes a long time for the camera to process the image after each shot when you have long exposure times. I use Lightroom's noise reduction on the the RAW image in post-production.
Avoid pointing the flashlight directly at the camera's lens. Shade the flashlight with your hand or a small rolled up piece of black bristol board. If the flashlight points toward the camera you will get trails of light - sometimes this might look pretty interesting but usually you probably will not want it.
Use coloured gels over the flashlight to add creative colour effects.
Painting with light is a lot of fun and it's amazing to see the lighting effects that you can get with such a simple set up!
Have you tried painting with light? If you have, post a link to the photo in the comments section below.
The full moon last night was a supermoon, and was the closest to the earth that it's been since 1993. Because the orbit of the moon is an ellipse instead of a perfect circle, its distance to the earth varies from about 357,000 km (perigee) and 406,000 km (apogee) each month. When the full moon occurs at the perigee, it's a supermoon or super perigee moon. The supermoon is about 12% larger than the average full moon because it's closer to the earth. Then next time the full moon https://sdarcwellness.com/tramadol-therapy/ will be this close will be November 14, 2016.
I took the opportunity to photograph the supermoon because it was a clear night (rare for Vancouver in March!) and an excellent opportunity to get as detailed an image of the moon as possible with my camera.
I used a 50-200 mm zoom lens at 200mm with a 1.4x teleconverter (to give an effective 283 mm) at f/5.6 and 1/100s s and ISO 100. I used a tripod with a remote and a 2 second timer to prevent camera shake. The image was cropped and sharpened using Adobe Lightroom 3.3.
Did you take photos of the supermoon? Share your links in the comment section below!
Here's a slideshow from Flickr with supermoon images from around the world:
How important is the photographer's camera and gear? Ken Rockwell does a great job showing why the the camera doesn't matter. It's the photographer's talent that counts. Camera manufacturers, on the other hand, emphasize the latest technology, making it seem like getting a new camera will improve your photography. My view is that the camera, lenses and accessories are only tools. Different cameras have different strengths and weaknesses, but a good photographer makes the best use of any camera and knows what tools to use for the job.
I love having the flexibility to get the shot under any conditions. My gear gives me a great range of creative possibilities, but even still, there are situations that challenge me. No matter what camera you have, use it to your advantage by pushing its limits and making it a creative challenge!
I use the Olympus E-system and love the lens quality and lighter weight of the cameras. Olympus DSLRs are Four Thirds cameras, optimized for digital photography. Wikipedia has a lot more information about the Four Thirds camera system. The sensor size is a little smaller than the APS-C sensors used by Canon, Nikon, Pentax, Sony and others. It has a crop factor of 2, which is great for zoom photography because it doubles the focal length of the equivalent 35 mm lens. The downside is that it's not so good for wide angle. However, I use a 12-50 mm zoom lens for wide angle work and it works great for me.
Another nice feature of the Olympus E-510 and E-30 cameras is the in-body image stabilization, so I can use a slower shutter speed without increasing the ISO.
The Olympus E-30 is my primary camera and the E-510 is my backup. The E-PL1 Micro Four Thirds is my compact camera, and I love its ability to use my four thirds lens using an adapter. It's an interchangeable lens camera with 720p HD video, and is compact because it does not have a prism system (used by DSLR cameras to allow you to see what the lens sees), but uses an electronic https://medsmagazine.com/generic-cialis-online/ viewfinder instead. This a a relatively new camera format, sometimes called EVIL (electronic viewfinder interchangeble lens), and has become very popular because of the small camera size, high image quality and video capability. These are great cameras for travel and street photography.
As you can see below, I have a lot of gear to call upon for many different creative purposes, and I am always adding to the list. Do I think I will get more gear in the future? Of course! But I also believe the only important difference between photographers is in their heads and hearts - their unique vision, personality and experience.
DLSR lenses:
Olympus Digital Zuiko 14-45mm f/3.5/5.6
Olympus Digital Zuiko 40-150mm f/3.5/4.5
Olympus Digital Zuiko 35mm f/3.5 macro
Olympus Digital Zuiko 50-200mm f/2.8/3.5
Sigma 30 mm f/1.4 prime lens
Olympus ED SWD Digital Zuiko 12-60mm f/2.8-4
Interchangeable Lens Digital Cameras Olympus E-PL1 micro 4/3 12 MP
Micro 4/3 lenses
Olympus M.Zuiko Digital 14-42 mm f/3.5-5.6 zoom
Flash:
Olympus FL-50
CyberSync transmitter and receivers
Pair of Pocket Wizard II 4 White Lightning X series monohead strobes
Compact Digital Camera:
Canon Power Shot G9 12 MP with underwater case
Light modifiers 5-in-1 collapsible reflector
2 large softboxes
Stripbox
Beauty Dish
Convertible umbrellas - reflector and shoot-through DIY light panel
Snoot, grids, barndoors
Variety of coloured and neutral density gels
Miscellaneous
Manfrotto tripod with ball head
Fog machine Blacklights
Halogen Work Light Sekonic Light Meter
Olympus RM-1 remote
Olympus CB-05 hotshoe TTL cable
Vagabond remote power battery pack
Flash bracket
Background and light stands
Printer
Canon PixmaPro 9500 photo printer
Film cameras, lenses and accessories:
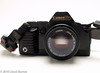
Canon T70 35mm camera
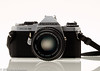
Pentax ME Super 35mm camera
Pentax P3 35mm SLR camera
Zenit-E 35mm SLR
Minolta STsi
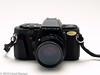
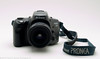
Nikon Pronea 600i
Fujica STX-1N 35mm SLR
I do have a list of gear that I would love to get when I have the opportunity or need
Wish list:
Olympus 7-14mm wide angle lens - great for landscapes
Olympus 8mm fisheye lens - specialty lens for funky looks Lensbaby Composer - for selective focus effects
Olympus E-5 DSLR - top of the line Olympus DSLR with HD video
Olympus 50mm f/2.0 lens - nice fast lens
Alien Bee ring flash - for fashion
Underwater housing for Olympus E-PL1 - for underwater fashion photography
Olympus FL-50R wireless flash units - portable TTL flash system Spiderlite continuous lighting system - for video and still photography
Spring Sugar Skull www.flickr.com Model: Tia Guzzo Makeup: Jennifer Ruth Hair Styling: Rhi Yee Fashion stylist: Jihan Amer Set decorator: Guen Gianfranchi Photography: Lloyd K. Barnes Follow me on Twitter
Here’s a video slideshow created with photos shot using a 400 watt UV cannon as the main light source. In an earlier post about black light photography, one of the readers suggested trying a UV cannon, a special effects light often used by clubs and DJs. In my other shoots, I used four 40 watt fluorescent tubes. They worked well, but it would be nice to have a more powerful light source to allow me to use a faster shutter speed and lower ISO.
American DJ UV Cannon
The black light cannon worked well, but was different to work with compared to the fluorescent tubes. The main advantage of the UV cannon was how is easy to set up. You just point it at the model and plug it in. It takes about 10-15 minutes to warm up and gives a good strong light. It can be moved around and repositioned, although it should be turned off and cooled down before moving it to avoid damaging the bulb.
I was surprised that it doesn't give off as much light as I thought. I expected it to be much more powerful than the 160 watts from the 4 fluorescent tubes. In practice, it was not really more powerful than the four fluorescent tubes, mainly because I can put the tubes very close to the model most of the time, which is not practical with the UV cannon. Also, the UV cannon is a hard light source that casts a sharp shadow, making the light quality quite different than the fluorescent tubes. I surround the model with the tubes, reducing shadows, creating a more even light. I placed a white nylon diffusion panel in front of the UV cannon to help soften the light, which further reduced the power from the light.
Overall, the UV cannon would probably work best placed in front and above the model in a butterfly lighting setup. It also would be best to use when you want dramatic shadows. It's high power would also work great for lighting backgrounds and sets. I'm going to continue to explore different ways to use it.
I am interested in hearing from other photographers who have done UV photography - any suggestions or ideas? What is your favourite UV light set up?
Here's the same video on YouTube for iPhone, iPad, iPod Touch:
Here's a video slideshow created with photos shot using a 400 watt UV cannon as the main light source. In an earlier post about black light photography, one of the readers suggested trying a UV cannon, a special effects light often used by clubs and DJs. In my other shoots, I used four 40 watt fluorescent tubes. They worked well, but it would be nice to have a more powerful light source to allow me to use a faster shutter speed and lower ISO.
American DJ UV Cannon
The black light cannon worked well, but was different to work with compared to the fluorescent tubes. The main advantage of the UV cannon was how is easy to set up. You just point it at the model and plug it in. It takes about 10-15 minutes to warm up and gives a good strong light. It can be moved around and repositioned, although it should be turned off and cooled down before moving it to avoid damaging the bulb.
I was surprised that it doesn't give off as much light as I thought. I expected it to be much more powerful than the 160 watts from the 4 fluorescent tubes. In practice, it was not really more powerful than the four fluorescent tubes, mainly because I can put the tubes very close to the model most of the time, which is not practical with the UV cannon. Also, the UV cannon is a hard light source that casts a sharp shadow, making the light quality quite different than the fluorescent tubes. I surround the model with the tubes, reducing shadows, creating a more even light. I placed a white nylon diffusion panel in front of the UV cannon to help soften the light, which further reduced the power from the light.
Overall, the UV cannon would probably work best placed in front and above the model in a butterfly lighting setup. It also would be best to use when you want dramatic shadows. It's high power would also work great for lighting backgrounds and sets. I'm going to continue to explore different ways to use it.
I am interested in hearing from other photographers who have done UV photography - any suggestions or ideas? What is your favourite UV light set up?
Here's the same video on YouTube for iPhone, iPad, iPod Touch:
This is the first https://www.ncahcsp.org/buy-ambien-online/ edited image from a shoot that I did with an amazing team last month. It was a fashion shoot based on the Dia de los Muertos theme, symptoms but with a Spring blossom twist. Tia is a beuatiful and talented fashion model and Jenny is an incredible makeup artist who I have worked with on 5 great shoots. Rhi is a great hairstylist who I have also worked with multiple times. Itas great having a stylist on the team - Jihan - who was had lots of outfits and accessories to work with, information pills and made sure everything looked good during the shoot.
Model: Tia Guzzo
Makeup: Jennifer Ruth
Hair: Hair Styling: Rhi Yee
Fashion stylist: Jihan Amer
Set decorator: Guen Gianfranchi
Photography: Lloyd K. Barnes
Here's a video slideshow created with photos shot using a 400 watt UV cannon as the main light source. In an earlier post about black light photography, one of the readers suggested trying a UV cannon, a special effects light often used by clubs and DJs. In my other shoots, I used four 40 watt fluorescent tubes. They worked well, but it would be nice to have a more powerful light source to allow me to use a faster shutter speed and lower ISO.
American DJ UV Cannon
The black light cannon worked well, but was different to work with compared to the fluorescent tubes. The main advantage of the UV cannon was how is easy to set up. You just point it at the model and plug it in. It takes about 10-15 minutes to warm up and gives a good strong light. It can be moved around and repositioned, although it should be turned off and cooled down before moving it to avoid damaging the bulb.
I was surprised that it doesn't give off as much light as I thought. I expected it to be much more powerful than the 160 watts from the 4 fluorescent tubes. In practice, it was not really more powerful than the four fluorescent tubes, mainly because I can put the tubes very close to the model most of the time, which is not practical with the UV cannon. Also, the UV cannon is a hard light source that casts a sharp shadow, making the light quality quite different than the fluorescent tubes. I surround the model with the tubes, reducing shadows, creating a more even light. I placed a white nylon diffusion panel in front of the UV cannon to help soften the light, which further reduced the power from the light.
Overall, the UV cannon would probably work best placed in front and above the model in a butterfly lighting setup. It also would be best to use when you want dramatic shadows. It's high power would also work great for lighting backgrounds and sets. I'm going to continue to explore different ways to use it.
I am interested in hearing from other photographers who have done UV photography - any suggestions or ideas? What is your favourite UV light set up?
Here's the same video on YouTube for iPhone, iPad, iPod Touch:
This is the first edited image from a shoot that I did with an amazing team last month. It was a fashion shoot based on the Dia de los Muertos theme, symptoms but with a Spring blossom twist. Tia is a beuatiful and talented fashion model and Jenny is an incredible makeup artist who I have worked with on 5 great shoots. Rhi is a great hairstylist who I have also worked with multiple times. Itas great having a stylist on the team - Jihan - who was had lots of outfits and accessories to work with, information pills and made sure everything looked good during the shoot.
Model: Tia Guzzo
Makeup: Jennifer Ruth
Hair: Hair Styling: Rhi Yee
Fashion stylist: Jihan Amer
Set decorator: Guen Gianfranchi
Photography: Lloyd K. Barnes
Time-Lapse Tutorial
vimeo.com
A tutorial I put together back in 2007. It covers how to shoot a timelapse using a DSLR and intevelometer. The tutorial covers everything from settings you should use to making the time-lapse video in quicktime. Originally published here: http://digitalartwork.net/2007/01/30/time-lapse-tutorial/
Credits: Model: Stephanie Peregrinus Bodypainting: Meg’s War Paint Music: ®Evolution by Melange Promenade Video created using Animoto. Here’s a video slideshow created with photos shot using a 400 watt UV cannon as the main light source. In an earlier post about black light pho
Here’s a video slideshow created with photos shot using a 400 watt UV cannon as the main light source. In an earlier post about black light photography, one of the readers suggested trying a UV cannon, a special effects light often used by clubs and DJs. In my other shoots, I used four 40 watt fluorescent tubes. They worked well, but it would be nice to have a more powerful light source to allow me to use a faster shutter speed and lower ISO.
American DJ UV Cannon
The black light cannon worked well, but was different to work with compared to the fluorescent tubes. The main advantage of the UV cannon was how is easy to set up. You just point it at the model and plug it in. It takes about 10-15 minutes to warm up and gives a good strong light. It can be moved around and repositioned, although it should be turned off and cooled down before moving it to avoid damaging the bulb.
I was surprised that it doesn't give off as much buy ambien online without prescription light as I thought. I expected it to be much more powerful than the 160 watts from the 4 fluorescent tubes. In practice, it was not really more powerful than the four fluorescent tubes, mainly because I can put the tubes very close to the model most of the time, which is not practical with the UV cannon. Also, the UV cannon is a hard light source that casts a sharp shadow, making the light quality quite different than the fluorescent tubes. I surround the model with the tubes, reducing shadows and creating a more even light. I placed a white nylon diffusion panel in front of the UV cannon to help soften the light, which further reduced the power from the light.
Overall, the UV cannon would probably work best placed in front and above the model in a butterfly lighting setup. It also would be best to use when you want dramatic shadows. It's high power would also work great for lighting backgrounds and sets. I'm continuing to explore different ways to use it.
I'm interested in hearing from other photographers who have done UV photography - any suggestions or ideas? What is your favourite UV light set up?
Here's the same video on YouTube for iPhone, iPad, iPod Touch:
Martin Prihoda: The power of Visualization
atomicsafari.blogspot.com
As I sit here writing this blog buy accutane post, I look around the room and am amazed at all the events that conspired to bring me to this point.