Archive

Posts Tagged ‘Photography’

Glamour and Boudoir Photography as Valentine’s Day Gifts
January 9th, 2011 1 comment

Glamour

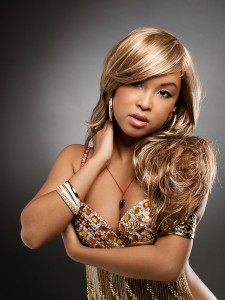
Are you thinking about giving glamour or boudoir photos of yourself to your boyfriend, partner, fiancé or husband for Valentine's Day? Of course, I think photographs always make great gifts! If you have never done a glamour or boudoir photography session, it may be a little intimidating.

What is glamour?

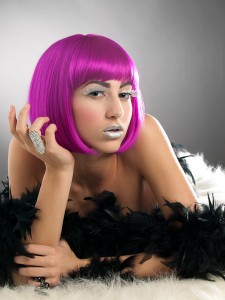
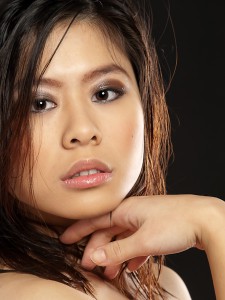
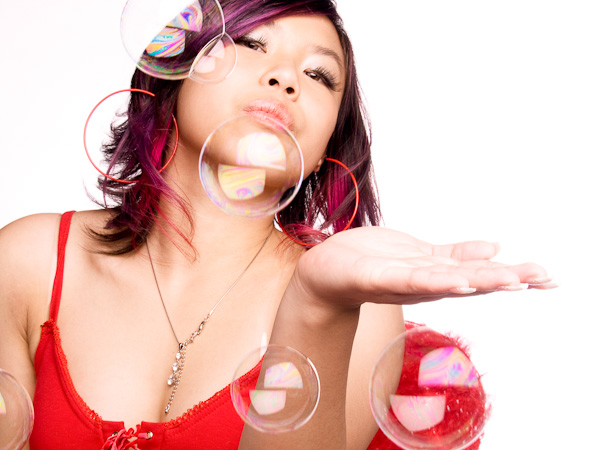
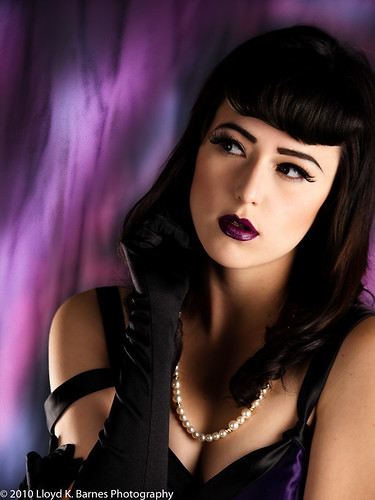
Glamour photography is all about making you look amazing, whether it's pretty, beautiful, sexy, classy, or elegant. I love doing glamour - it's a lot of fun and a great feeling when clients love their photos!

The ingredients for great glamour photos are:

  1. Hair and makeup: I work with professionally trained makeup artists and hair stylists who know how to make you look your best. They are trained to work with your features and skin tone so you will to look great.  And the makeup artists have plenty of professional high quality makeup, brushes, and supplies!
  2. Wardrobe and accessories: Glamour photography is more about the woman than the clothes, so the outfits should compliment you rather than be the main point of focus. For glamour, usually less is better. Outfits can be lingerie, jeans, shorts, swimsuits, skirts or dresses and can be risqué, elegant, cute or innocent. The same is true for accessories -  depending on the jewelry, it adds elegance, sexiness and personality.
  3. Lighting: One of my main concerns as a photographer is how to best use lighting to create the glamour look. In the studio I will tailor the lighting specifically for the woman being photographed because everyone is different. Natural light can also be very flattering and glamourous when it is available - such as outdoor locations or locations with window light.
  4. Posing: The right poses make a huge difference in the photos. Professional models know how to work with the photographer and have a repertoire of poses and expressions that they can draw upon. They also know the poses that are most flattering to their own look. For clients who are not professional models, it may be a little intimidating being in front of the camera. Another major part of my job as a photographer is to help with different poses and angles to get the most flattering photos.
  5. Retouching: Everyone has imperfections and the camera records them faithfully. However, most women don't want to see dark circles under their eyes, bloodshot eyes, wrinkles or blemishes! When I retouch glamour photos, I clean up these problem areas and anything else that distracts from the your natural beauty.
  6. Having a blast! Having a great time with lots of energy makes the session a success too!

Glam BeautyGlamour portrait

Tips for choosing a photographer (in order of most to least important):

  1. Portfolio: The first thing to do is browse the photographer's website. Are there are images that you love? You can use those as examples of the style that you want when you talk with the photographer. If you do not love that photographer's style, then keep looking for a photographer until you find photos that you love!
  2. Recommendations: If you have a friend who has done glamour photography, ask her for recommendations.
  3. Location: How far are you willing to travel to a photographer's studio? Many photographers are willing to travel to a location, so if the photographer whose work you really love is not local, you could ask if they are willing to travel and how much do they charge.
  4. Price: Decide on the budget that you are willing to spend and take a look at the price ranges, but don't base your decision on price alone! Prices vary tremendously and there is no set price because you are paying for the photographer's unique vision and skills. I recommend that you choose a photographer that you really love and then budget enough to get your photos done by him/her. The photos will be a long term gift that will last a lifetime, so it is worth investing in the best quality.
  5. Male or female photographer? Some photographers advertise that because they are male or female, they are somehow more suitable. I don't think this matters at all - it is a matter of personal preference. Professional photographers rely on having a good reputation and depend on word-of-mouth recommendations from previous clients for a successful business, and will treat you respectfully and professionally.

Once you have decided on a photographer, contact him/her to see if they will meet with you in advance. I much prefer to meet potential clients first to find out what style of photos they want. That way I can make sure she will be thrilled with the final results! Most photographers will require a payment in advance (usually applied to the session fee) to reserve a time slot.

Boudoir

What is boudoir?

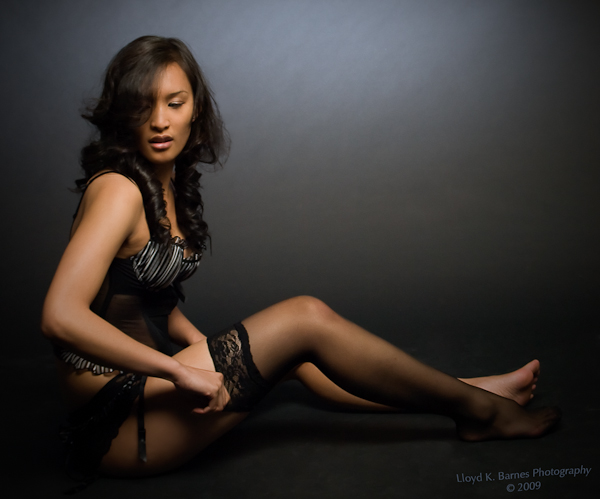
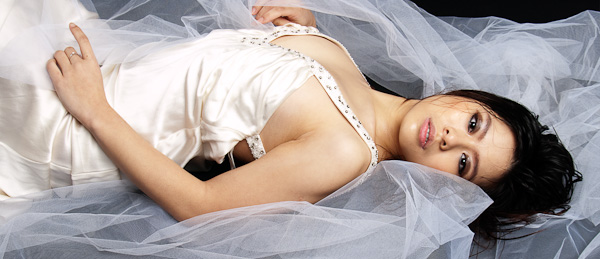
Boudoir photography is growing in popularity, especially for pre-wedding photography, and also makes a great Valentine's Day gift. While there is no single definition of boudoir photography, the name comes from the French for a lady's bedroom, and it implies an intimate and sensual style.

Boudoir is a genre of glamour that tends to be soft, mysterious and intimate. It can be done in the studio by creating an intimate mood with lighting, props and sets or can be done at locations such as the client's bedroom or a luxury hotel room. Selecting a boudoir photographer is the same as selecting a glamour photographer, with emphasis on a more intimate style.

Related Links
Tips for getting for choosing a photographer and deciding what to wear
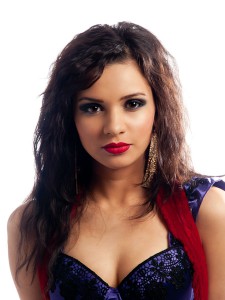
Boudoir photography

A Holiday Affair – LaSalle College Graduation Fashion Show

December 17th, 2010 No comments

document.write(" 0,40,0">

I had the pleasure to photograph the LaSalle College graduation fashion show, A Holiday Affair, that was held on December 15, 2010 in Vancouver. The show was a great buy klonopin online overnight delivery success with many awesome designs.

Check out the gallery for more photos from the show

Here's the video on YouTube if you are unable to see the version above.

Peacock Motif Collection by Monica Fraser

November 16th, 2010 4 comments

Peacock Dress

Dress with Vintage Peacock Print Train


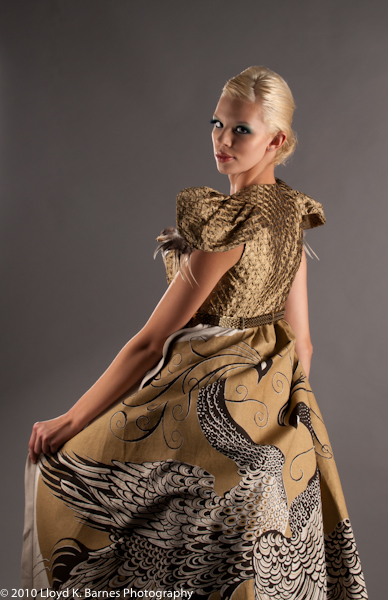
Monica Fraser is a graduate of the Vancouver Community College’s (VCC) Fashion Arts program. She was one of the designers at the VCC graduate fashion show that I wrote about in an earlier post. I was thrilled to have the opportunity to photograph her designs in the studio. In this session I photographed three beautiful outfits, each designed around the motif of the peacock.

I was fortunate to be able to work with an awesome model, Charr, and talented makeup artist Tessa Mitz as well.

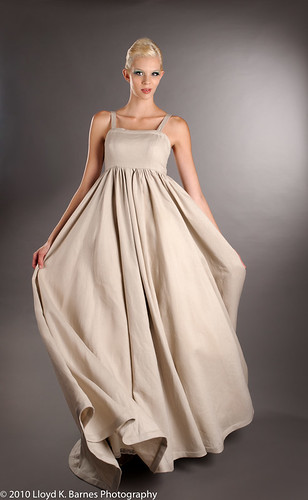
The first outfit featured a 2.5 meter train made from a vintage print from Vienna over a natural linen dress with a gold silk bolero jacket with pearls and feathers and a golden belt.

Charr

Linen Dress by Monica Fraser

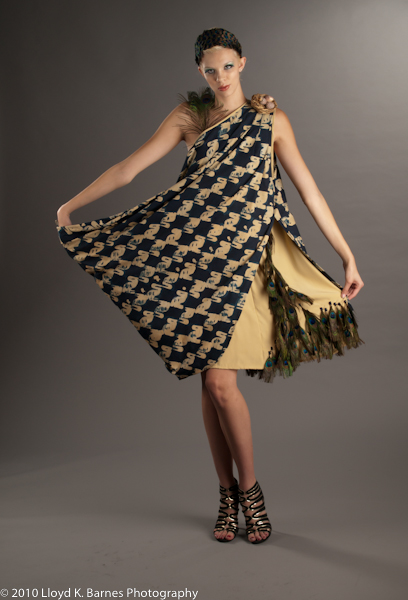
The next https://ellisclinic.com/medical/buy-cipro-online/ dress has a handmade tramadol buy online bird motif print by Monica Fraser. The fabric is white cotton dipped into caustic soda, waxed, then repeatedly dipped into indigo dye. The dress was finished with feathers, Swarovski crystals and a whimsical bird nest!

Charr with Indigo Dress

Indigo Batik Dress

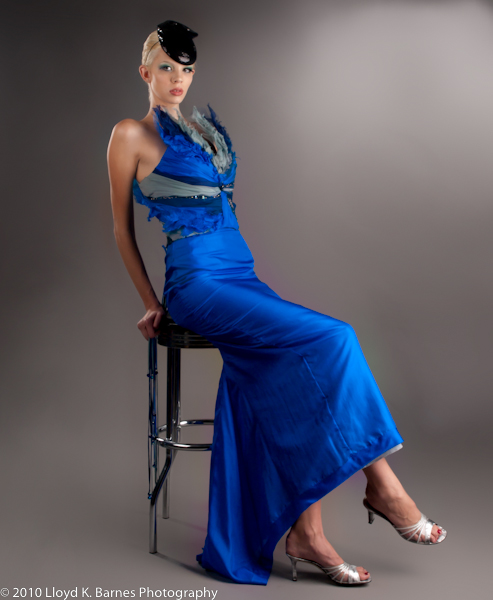
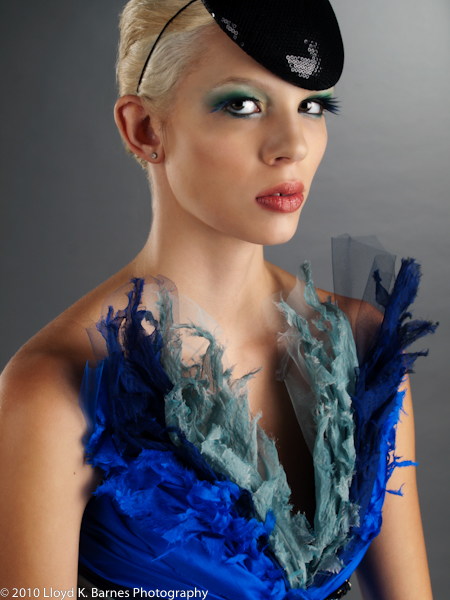
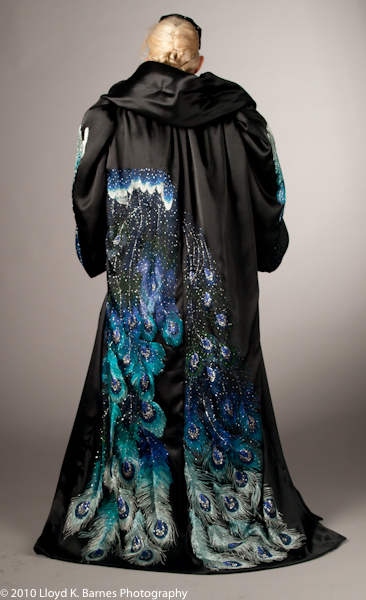
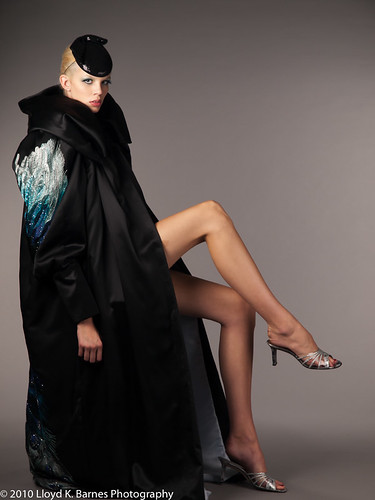
The third outfit was a beautiful vivid blue silk dress made using four different types of silks with shredded silk on the top to look like feathers. It also has a long tail with Swarovski crystals hanging from it. To go with the dress, is a long black hand embroidered coat with a beautiful peacock design made from silk threads in Vietnam.

Vivid Blue Silk Dress

Vivid Blue Silk Dress

Feathered Silk

Feathered Silk Detail

Hand Embroidered Silk Jacket

Hand Embroidered Silk Jacket

Charr

Charr Wearing Coat by Monica Fraser

Congratulations to Monica for a fantastic collection! Thanks also to Charr for modeling the outfits and to Tessa for the beautiful makeup and hair styling.

Women in Leadership 3rd Annual SuperWomen & Friends Gala Dinner

November 9th, 2010 No comments

document.write(" on Flickr" href="http://www.flickr.com/photos/kalamakia/5115385957/">Purple Satin

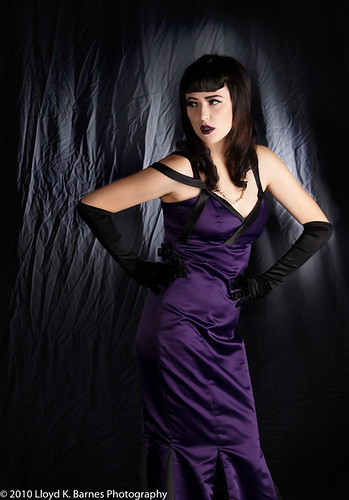
The makeup for this shoot was inspired by Audrey Hepburn photos from the early 1950's and the hairstyle has a 1940's look.

I used a 5 foot long softbox positioned vertically to light the beautiful satin dress from the camera's right side. To fill in the shadows, I used another softbox on the left that was set about a stop lower intensity than the first https://medimagery.com/online-pharmacy-canada-online/ one.

The background is a grey muslin lit with a a gridded X800 and directed across the background to the accentuate the wrinkles by creating shadows. The strobes were triggered with Cybersyncs. The post-processing was done with Lightroom 3.2 and Photoshop CS4.
document.write(" on Flickr" href="http://www.flickr.com/photos/kalamakia/5115385957/">Purple Satin

The makeup for this shoot was inspired by Audrey Hepburn photos from the early 1950's and the hairstyle has a 1940's look.

I used a 5 foot long softbox positioned vertically to light the beautiful satin dress from the camera's right side. To fill in the shadows, I used another softbox on the left that was set about a stop lower intensity than the first buy klonopin online one.

The background is a grey muslin lit with a a gridded X800 and directed across the background to the accentuate the wrinkles by creating shadows. The strobes were triggered with Cybersyncs. The post-processing was done with Lightroom 3.2 and Photoshop CS4.

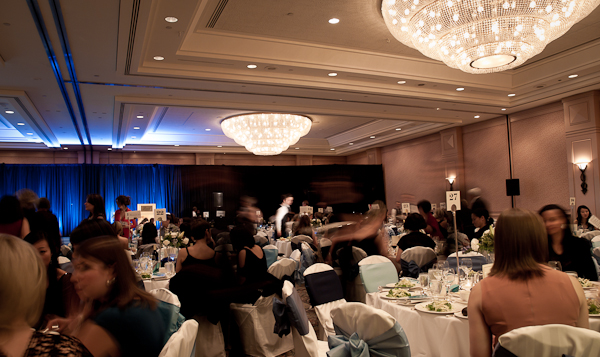
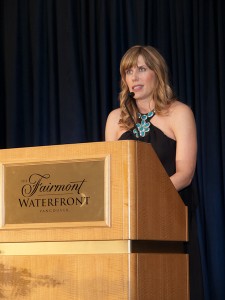
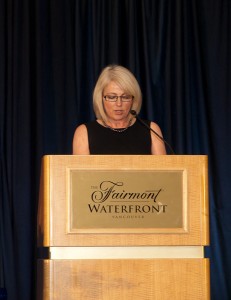
The Women in Leadership Foundation (WIL) held its 3rd annual gala dinner on November 6, advice 2010 at the Fairmont Waterfront Hotel in Vancouver. The SuperWomen & Friends: Sea of Possibilities event featured silent and live auctions in support of the mentorship program, 3 course dinner, keynote speech by entrepreneur Joyce Groote, a fashion show, and a mini-makeover bar with professional makeup artists and hairstylists.

WIL Founder Maya Kanigan

Keynote Speaker Joyce Groote

The fashion show featured beautiful designs from Wear Else, Invito Couture and the Jacqueline Conair Collection with great work by the models, makeup artists and stylists.
The event was a great success and a lot of fun too!

Click here to see more photos from the event.

Preview: Fashion Shoot with Model Joleen and Makeup Artist Elizabeth McLeod

October 25th, 2010 No comments


Let there be fashion!

The graduates of the Vancouver Community College Fashion Arts Program showed their creations last night at a fantastic show held at Rocky Mountaineer Station in Vancouver. The show featured the work of 21 graduating fashion designers, each of whom had 4 pieces in the show. The production was spectacular with great models, makeup, hair styling, music, lighting and of course catering! But the emerging designers were centre stage with some incredible work.
I took as many photos of the outfits as I could! I have previously photographed the designs of one of the graduates, Ana Jost, and I love her work. It was a pleasure to see her graduating and finishing this phase of her fashion design career.

All the designers' work was very impressive and I'm looking forward to seeing more from them in the future, and I hope to use their designs in my photography as well.

You can view all of the outfits in the music video below, or view the photos  here.

Congratulations to all the graduates for your amazing work!

Here's the video on YouTube if you are unable to view the flash https://churchhillnaturalmeats.com/buy-levaquin-online/ version above:

Related links:

Beyond Robson: A Closer Look at VCC's Fashion Arts Students

YouTube: Part 1 of 2 of the Vancouver Community College (VCC) Fiat Mode XXIII 2010 Graduate Students Fashion Show

Straight: Vancouver Community College Fiat Mode XXIII

Music for the video No Return! by Romahichi

Let there be fashion!

The graduates of the Vancouver Community College Fashion Arts Program showed their creations last night at a fantastic show held at Rocky Mountaineer Station in Vancouver. The show featured the work of 21 graduating fashion designers, each of whom had 4 pieces in the show. The production was spectacular with great models, makeup, hair styling, music, lighting and of course catering! But the emerging designers were centre stage with some incredible work.

I took as many photos of the outfits as I could! I have previously photographed the designs of one of the graduates, Ana Jost, and I love her work. It was a pleasure to see her graduating and finishing this phase of her fashion design career.

All the designers' work was very impressive and I'm looking forward to seeing more from them in the future, and I hope to use their designs in my photography as well.

You can view all of the outfits in the music video below, or view the photos  here.

Congratulations to all the graduates for your amazing work!

Here's the video on YouTube if you are unable to view the flash version above:

Related links:

Beyond Robson: A Closer Look at VCC's Fashion Arts Students

YouTube: Part 1 of 2 of the Vancouver Community College (VCC) Fiat Mode XXIII 2010 Graduate Students Fashion Show

Straight: Vancouver Community College Fiat Mode XXIII

Music for the video No Return! by Romahichi
I recently wanted to take some photos of some antique glass apothecary jars and used a technique called "bright field lighting". Glass is tricky to shoot because it is both transparent and reflective. If you are not careful, treatment you will lose the definition of the edge of the glass and and unwanted reflections and highlights.

http://www.mazenabusrour.com/?p=103

cheap on Flickr" href="http://www.flickr.com/photos/kalamakia/5202003492/">Purple Satin

Here are a couple of photos from a recent fashion shoot with model Joleen and makeup artist/hair stylist Elizabeth McLeod. The makeup was inspired by Audrey Hepburn photos from the early fifties and the hairstyle has a vintage forties look.

More details and photos from this shoot will be posted soon!

abortion on Flickr" href="http://www.flickr.com/photos/kalamakia/5201891860/">Joleen

Tips for Photographing Glass

October 13th, 2010 2 comments

Eco Fashion Week, Vancouver - Lara Miller

Eco Fashion Week (EFW) is taking place in Vancouver on Sept 27-30, 2010. It is being held at the Creekside Community Centre, which was part of the Olympic Village during the 2010 Winter Games.

Vancouver has a goal to become the greenest city by 2020 and EFW will help to educate the fashion industry and fashion-buying public about environmentally friendly best-practices and to promote those business that have good green https://gigglesgobblesandgulps.com/buy-valtrex-500mg/ practices.

A Green Advisory Board helped to evaluate the fashion designers, retailers and manufacturers using the following criteria:

  • Fair/ethical trade
  • Local
  • Custom/tailor made
  • Organic/Natural textiles and materials
  • Recycled/reborn
  • Vintage/second hand
  • Vegan/animal free/cruelty free
  • Eco printing
  • Fabric waste reduction
  • Green marketing
  • Socially responsible
  • Resource efficiency
  • Eco-certification

These practices can also apply to other industries and I will be looking carefully at my photography business to see what I can do to make sure it is green too!

On Sept 28, I attended runway shows featuring the spring/summer 2011 collections by designers emesha, Lara Miller, Eden, Nixxi, Lav and Kush, and Kim Cathers. Here is a quick look at the the collections by emesha and Lara Miller. The rest of the designers have been posted here.

Eco Fashion Week, Vancouver - emesha

emesha - Eco Fashion Week, Vancouver

Lara Miller

Lara Miller - Eco Fashion Week, Vancouver

Here's a slideshow with more photos from the show:


Eco Fashion Week, Vancouver - Lara Miller

Eco Fashion Week (EFW) is taking place in Vancouver on Sept 27-30, 2010. It is being held at the Creekside Community Centre, which was part of the Olympic Village during the 2010 Winter Games.

Vancouver has a goal to become the greenest city by 2020 and EFW will help to educate the fashion industry and fashion-buying public about environmentally friendly best-practices and to promote those business that have good green practices.

A Green Advisory Board helped to evaluate the fashion designers, retailers and manufacturers using the following criteria:

  • Fair/ethical trade
  • Local
  • Custom/tailor made
  • Organic/Natural textiles and materials
  • Recycled/reborn
  • Vintage/second hand
  • Vegan/animal free/cruelty free
  • Eco printing
  • Fabric waste reduction
  • Green marketing
  • Socially responsible
  • Resource efficiency
  • Eco-certification

These practices can also apply to other industries and I will be looking carefully at my photography business to see what I can do to make sure it is green too!

On Sept 28, I attended runway shows featuring the spring/summer 2011 collections by designers emesha, Lara Miller, Eden, Nixxi, Lav and Kush, and Kim Cathers. Here is a quick look at the the collections by emesha and Lara Miller. The rest of the designers have been posted here.

Eco Fashion Week, Vancouver - emesha

emesha - Eco Fashion Week, Vancouver

Lara Miller

Lara Miller - Eco Fashion Week, Vancouver

Here's a slideshow with more photos from the show:


Eco Fashion Week, unhealthy this site Vancouver, BC, Spring/Summer 2011, www.kimcathers.com

approved visit this site on Flickr" href="http://www.flickr.com/photos/kalamakia/5205649561/">Medicinal Uses of Lime Water

Glass Apothecary Jar

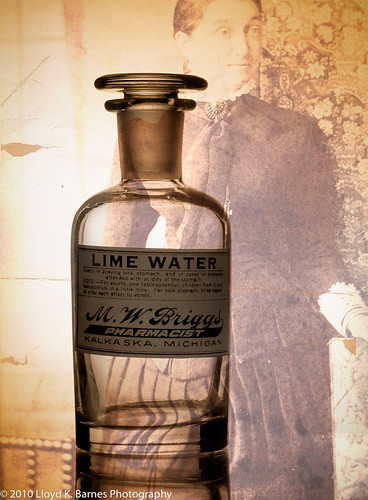
I recently took some photos of antique glass apothecary jars using a technique called "bright field lighting". Glass is tricky to shoot because it is both transparent and reflective. If you are not careful, here you will lose the definition of the edge of the glass and get unwanted reflections and highlights.

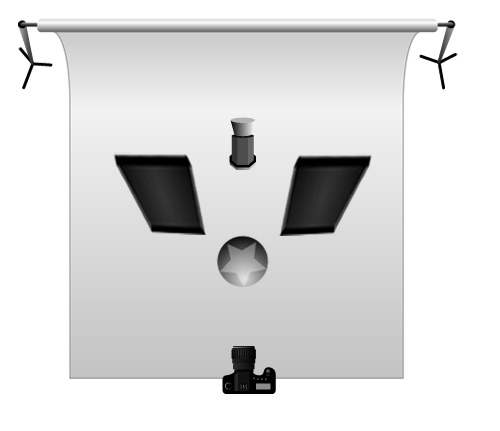
In this shot, I used a white background and lit it with a single strobe facing the background and placed it behind and below the glass jar. The jar was on a table covered with white paper and placed on top of a clear piece of glass.  I put black cards on each side of the jar to give more defined edges. I also used a reflector in front of the jar to increase the light on the label. The basic setup is shown in the lighting diagram.

I did some post-processing - changed the image to a sepia tone, using Lightroom and added a vintage photo to the background with Photoshop. I used a levels adjustment layer to increase the brightness of the label.

Lighting Setup for glass

Lighting setup for glass

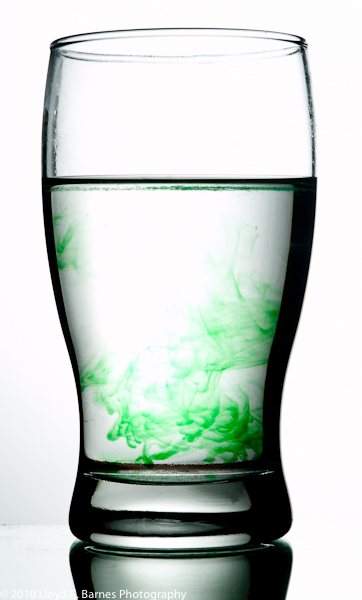
The next photo shows a basic image of a glass of water with a couple of drops of food coloring, shot using the same technique without the Photoshop work. In this image I adjusted the contrast and removed a few stray water drops using the dust removal tool in Lightroom.

Glass Lighting

Lighting Glass with Bright Field Method

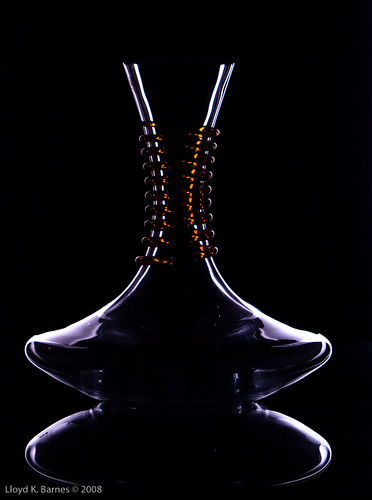
Another way to photograph glass is by using a dark background with highlighted edges such as in the photo of the glass vase below.  The strobe was placed behind a black background, which was placed in front of a larger white background. The strobe was facing towards the white background, so the edges of the vase were lit by the reflected light.

Glass on Black

Glass on Black

It is very helpful to use a tripod to aid in composing the shots and to help tweak the setup. Although I used strobes for these shots, continuous lighting will work too, and a tripod will allow you to use longer shutter speeds with no problem.

A great reference for lighting, including glass is Light - Science & Magic by Hunter, Biver and Fuqua.

Here are some more tips for lighting glass:

Lighting glass
How to photograph transparent and glassy objects – Tutorial
Tips on How to Photograph Glass

5 Tips for using a fog machine for studio photography

September 26th, 2010 4 comments

The Trouble with Ducts

Fog adds a cool look and atmosphere to a studio shoot. I bought a fog machine at a local party supply store and got an extra bottle of "fog juice". One bottle lasts for a long time so I have plenty of it left, even after using it for about a dozen shoots. This fog machine has a handy remote control that lets me fire a blast of fog when I'm ready to shoot. They are pretty popular for Halloween so you may see them for sale for a good price at this time of year.

The type of machine I use is a "glycol fogger" and it works by heating up a fluid called "fog juice" and then shooting the fog out of a nozzle.  Since I am a chemist as well as a photographer, I needed to know what fog juice actually is. It is mainly glycerin, propylene glycol and water and is non-toxic (note - a similar sounding chemical - ethylene glycol - is toxic and should not be used for fog machines!). However, there is always the possibility that certain people could be sensitive to the glycerin and propylene glycol so it's a good idea to make sure everyone is OK with it when the fog starts.

There are other ways to generate fog. For example, dry ice and water works, but it's expensive and difficult to use. Dry ice must be handled carefully because it is extremely cold and will burn bare skin. Because dry ice produces carbon dioxide gas when it warms up, it should be used in well-ventilated areas, and never in small enclosed spaces due to the risk of suffocation.  The fog is colder than the surrounding air and will sink to the ground, which might be an interesting effect. The fog from the glycol fogger doesn't sink - it tends to float at the level where it was generated.

Here are some tips based on my experience with using the fog machine.

A Force to Reckon With

Fog machine with back lighting. Model: BabieAngie, Makeup: Krystal Leong

Lighting

The fog needs lighting to make it visible. Back lighting with the strobe out-of-frame or hidden behind the model looks great. Also, side lighting works well as shown in the shot of Kaitlin V. I use a hard light - usually a strobe with a tight grid or snoot to give a beam of light https://www.glenerinpharmacy.com/buy-clomid-online/ through the fog. Use the same precautions that you would normally use when potentially shooting into the light - use flags to shield the lens and avoid lens flare. Sometimes a bit of flare looks cool with the fog so you may want to experiment!

Fashion Doll

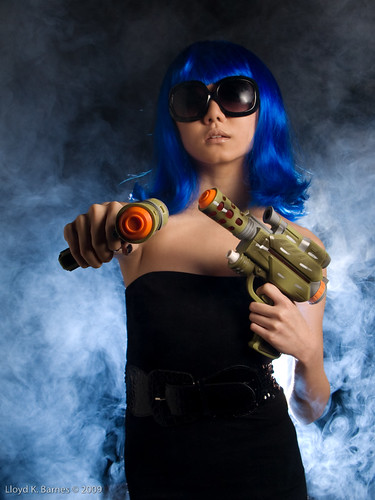
Fog machine using a black background and strobes with blue gels. Model: Charity, Makeup: Jennifer Ruth, Fashion Stylist: Celina Prado

Use a dark background

The fog is white and does not show up against light backgrounds. Use a dark background such as black seamless paper or black fabric for the most dramatic look. I learned that the hard way when I tried shooting against a white background and the fog was hardly visible!

Use gels

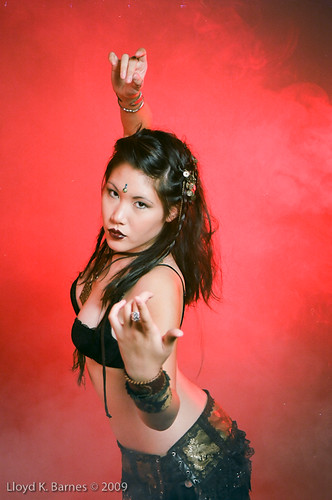
You can change the colour of the fog by putting a gel on the strobe that's lighting the fog. You can also light the fog with two strobes, using gels with harmonizing colours to create a dramatic look.

Tribal Belly Dancer

Fog machine and strobe with red gel. Model: Stephanie Peregrinus, Makeup and hair stylist: Catriona Amour

Have an assistant

It helps a lot to have an assistant (for me it's usually the makeup artist!) to direct the fog by pointing the machine in the right place - usually in front of the lights or behind the model. I use a light weight fog machine so it is not too difficult to hold for a while. Some of the more industrial grade machines are heavier so you need a strong "fog wrangler" for the job! Make sure the assistant knows that the nozzle of the fog machine can get quite hot! I get my assistant to move the fog machine in the right place, then let her know when I'm going to blast some fog with the remote control.

Use sparingly

The best looking fog is usually very soon after it comes out of the machine. This is when you get lots of swirling, smoky fog. It quickly diffuses and after a while it dissipates through the studio, creating a haze that doesn't look so great. When there's too much fog between the camera and the model, it just reduces the contrast. If I'm doing several sets, I usually wait until the end for the fog, or open up the studio after a while and blow it out with an electric fan!

Have fun

Don't forget to have fun and experiment with it! If you have some tips for using fog in photography, please share them in the comment section.

Credits

Catriona Armour

Krystal Leong

Jennifer Ruth

Charity

BabieAngie

Stephanie Peregrinus

Kaitlin V

Celina Prado

5 Free Tutorials on Split Toning Using Lightroom

September 18th, 2010 3 comments

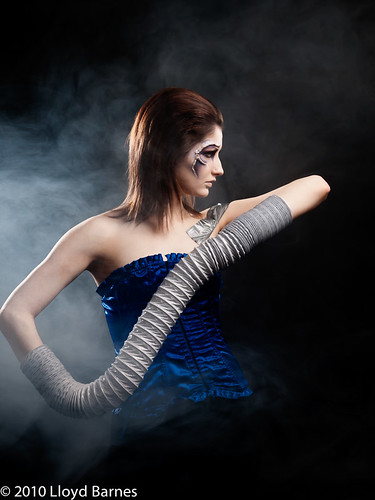
Photographers have always pushed the limits, trying to go beyond simply capturing a realistic image of the scene or portrait. The goal is to express emotion and creativity and to impact the viewer on a deeper level. In the days of film photography, split toning was a darkroom technique for giving different colours and tones to an image by using a variety of papers and chemicals during processing. With Lightroom, photographers can use the Split Toning panel in the Develop Module to reproduce the darkroom effects, and to go beyond them, creating new colour effects that would have been much more difficult to do in the darkroom.

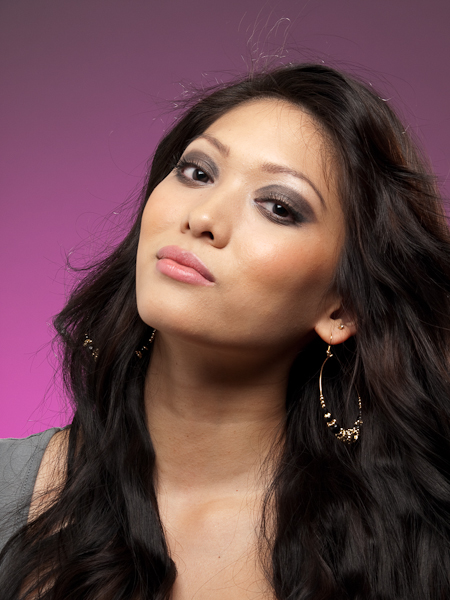
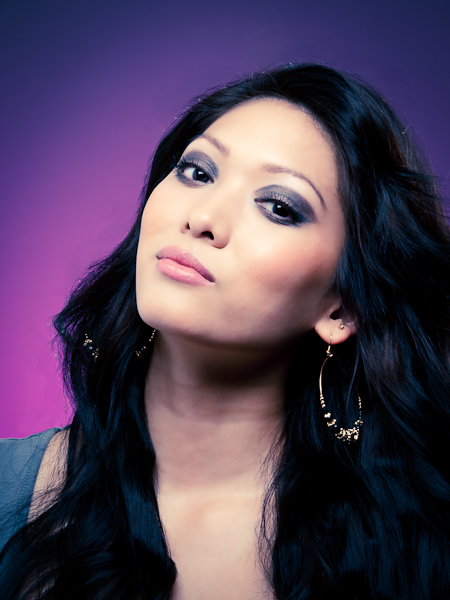
For example, I used split toning in this image to add blue tones to the shadow areas. I like the way the blue interacted with the darker tones on the background, the eye makeup and the model's hair. I did the split toning on the camera raw image https://www.glenerinpharmacy.com/buy-generic-cialis-online/ using Lightroom 3.2, then finished the retouching in Photoshop.

Orignal raw image

Before: original raw image

Portraits

After: split toned and retouched

Split toning is very simple to do in Lightroom. Once you have created a split tone effect that you like, you can save it as a preset and use it quickly on other photos. You can also download presets for all sorts of split tone effects. Here are five free tutorials about using Lightroom for split toning.

1. Split Toning Color Images in Adobe Lightroom

Split Toning Color Images in Adobe Lightroom from Jared Platt on Vimeo.

2.Using the split toning panel to change colours in a photo

RAW Processing Concentrate - Split Toning - Lightroom Tutorial from Rob & Lauren on Vimeo.

3 . Split toning for a tinting effect in Lightroom - Step by step tutorial for split toning black and white images.

4. A demo showing how to improve a photo using split toning

5. Using the split toning panel in Lightroom

Studio Lighting Setup for Beauty Photography

September 8th, 2010 No comments


document.write(" 0, 40, 0">

Here's a video slideshow with images from a glamour portrait photography session with Jennifer Ruth and Kaitlin Sullivan. (Click here to see the video if you are using an iPhone, iPod Touch or iPad). I met Jennifer at the Twisted Fairytale fashion show in March 2010 and loved her makeup work. Since we were both building our portfolios, we collaborated on a project with the beautiful and talented Vancouver model Kaitlin Sullivan. Jennifer did amazing work with the makeup, hair and styling for six different looks during the session. I did the shoot in the studio using basic portrait lighting setups to showcase the makeup and hairstyling.

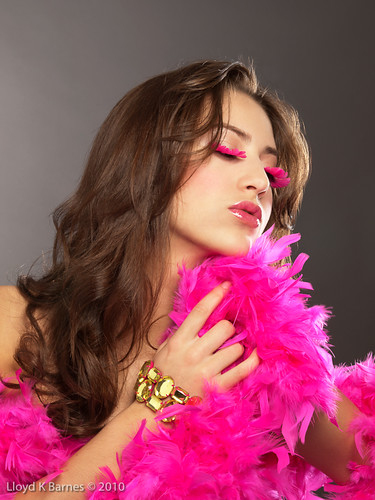
Pink Feathers

"Pink Feathers" 50-200mm Olympus f/2.8-3.5 lens, 1/160 sec f/14

For the first set Jennifer gave Kaitlin big pink feathered lashes, wet glittery pink lips and curly hair, with a pink feather boa and a chunky jeweled bracelet. Quite a glamourous look!

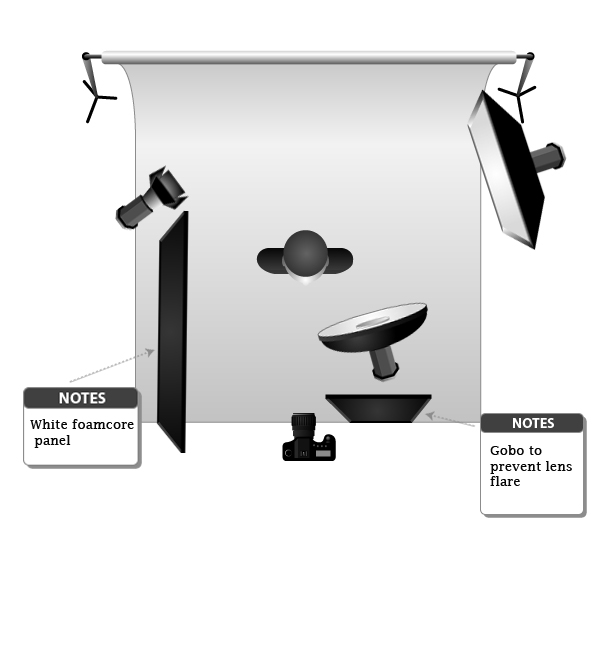
I used White Lightning strobes - the main light was an X800 equipped with a beauty dish. I love the light from the beauty dish - it is largish white reflector so the light is pretty soft, but it has some shadow definition that helps give more shape to the face. I used a white foam core reflector panel, as well as a reflector disk to fill in the shadows.

I normally use a lower power main light for portraits so that it does not interfere with the background lighting. I meter everything using a Sekonic Flash Master L-358, starting with the main light. The White Lightnings are great to use because I can easily fine tune the output. I used an X3200 with softbox for the hair light, located camera right, behind Kaitlin. I use a more powerful strobe mainly because the distance is further, but also it gives me the opportunity to increase the brightness of the side light or hair light to give more intense highlights. For a  natural look, the hair light was adjusted to about a stop or so brighter than the beauty dish. The background was storm grey seamless paper (medium grey), with a gridded X1600 for a back burst. To meter the background, I used the reflected light attachment for the Sekonic and adjusted the light to give a gradient with the brightest part about a stop to a stop-and-half brighter than the main light. I used barndoors on the X1600 to control the light spill away from Kaitlin. I also used a hair fan for some of the shots, which you can see in the video.

One of the difficulties with large feathered lashes is the shadows that they cast over the eyes. Usually I like to get sparkling highlights on the eyes to give the portrait more life. With large lashes, I watch the highlights very carefully to make sure the eyes are not too dark. Another option is to have the model look down to show off the lashes.

The strobes were triggered using CyberSyncs. My camera is an Olympus E-510, and I used Olympus Studio 2 to tether the camera to my MacBook, I used Lightroom 3 and Photoshop CS4 for the post-processing. I will be posting more information on post-processing in future blog posts.

Here's a diagram of the basic set-up. Thanks to Kevin Kertz Photography for creating the template. It's awesome and free!

Portrait Lighting

Glamour portrait studio lighting

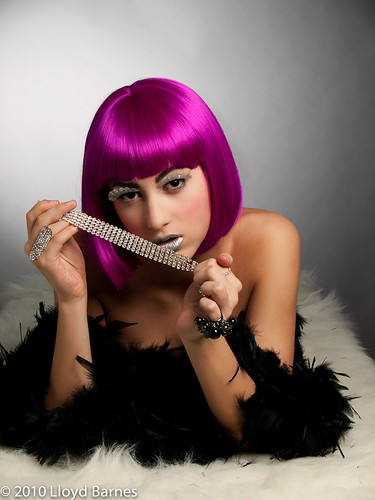
In the second set, Jennifer used silver feathered lashes, silver lipstick and a hot pink bob wig for Kaitlin. For accessories, we had a black feather boa, diamond costume jewelry and huge ring with black beads. Kaitlin was lying down on a white faux fur for these shots. Other than lowering the lights, the setup was the same as the first buy viagra buy seroquel baikal-pharmacy.com cheaper set. I also took some of the shots from above using a ladder.

Diamonds Are a Girl's Best Friend

"Diamonds Are a Girl's Best Friend" Olympus 14-45mm f/3.5-5.6 lens, 1/160 sec at f/11

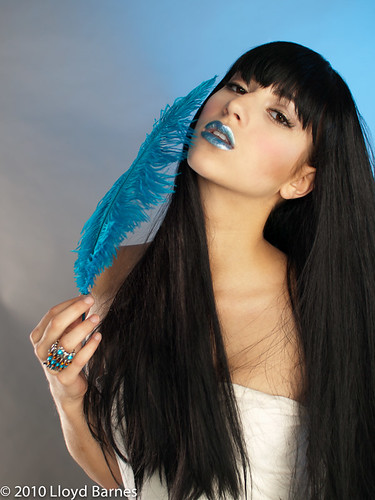
Jennifer totally switched up the look this time, with a long black wig, metallic blue lips, and copper eye shadow. We had a blue ostrich feather, a rhinestone owl ring with blue and amber gems to match the makeup. This set was shot using natural light against the grey seamless background paper, which was lit with a gridded X800 and blue gel to complement the lips. The studio has loading bay door, so we opened it up and shot using the daylight. The light was not super bright, so I used ISO 200 and a fast prime lens -  Sigma 30 mm f/1.4.  I love the shallow depth of field of the wide aperture, but was careful to make sure that Kaitlin's eyes were in focus. The large light source coming from the open garage door was beautiful and soft. We did have quite an audience gathered at the loading bay watching with great interest!

Like a Feather

Sigma 30mm f/1.4 lens, 1/125 sec, f/2.2 ISO 200

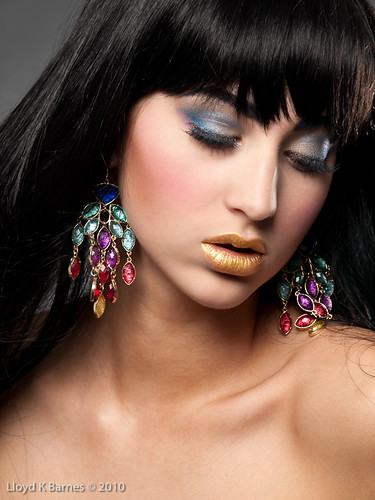
For the next set, Jennifer created a beautiful look with gold lips with blue eyes gradually shaded to gold, perfectly matching the colourful gems in Kaitlin's earrings. I used a large softbox for the main light, and another large softbox behind Kaitlin, camera right. The background was lit with a gridded strobe to give soft gradient effect. I often use my 50-200mm zoom lens for portraits because it doesn't distort the face as much as a wider angle lens does. The Olympus Zuiko 50-200mm zoom is awesome - tack sharp with a wonderful depth of field at wider apertures. The only drawback for using it in the studio is I have to go quite far away from the model. On the other hand, not being right in her face gives an opportunity for different expressions, depending on the model. I like to mix it up and I'm always switching the lenses during the shoot!

Dreaming in Colour

"Dreaming in Colour" Olympus 50-200mm f/2.8-3.5 lens zoomed to 108mm, 1/160 sec at f/10

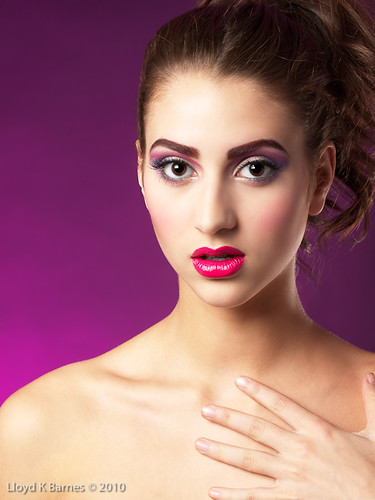
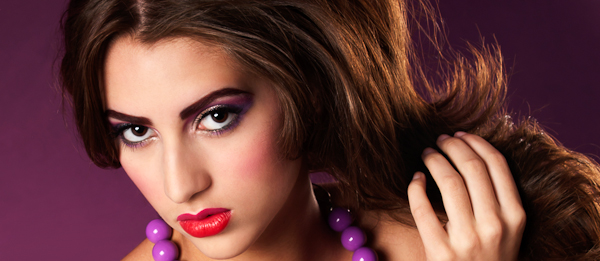
For the next set, Kaitlin's makeup featured pink and purple with a hint of gold. I used the same lighting setup as the previous set, except with two gels on the background light - blue and red - to get a purple to match the makeup and necklace. I used o have a purple gel but it melted down a few months ago in an unfortunate accident! Kaitlin was sitting in a large circular chair with a black cushion for these photos. I like to have the model stand, sit, lie down, or move around, even when just doing headshots, to get a variety of looks.

She's Got the Look

"She's Got the Look" Olympus 50-200mm f/2.8-3.5 at 50mm, 1/160 sec at f/9.0

The final set was done with the Kaitlin's hair in an updo and I used the same lighting setup.

Beautiful Eyes

"Beautiful Eyes" Olympus Zuiko 50-200mm f/3.5-2.8 lens at 54mm, 1/160 sec at f/9.0

The photography session was very successful - we all got some great images for our portfolios, and it was a pleasure to work with both Jennifer and Kaitlin. Jennifer is amazingly creative and super-organized, which allowed us to get six different awesome beauty looks. Kaitlin was also amazing and I expect to see more of her in the future! She is perfect in front of the camera - easy to direct with lots of creative posing ideas.  I hope to have the opportunity to work with them both again in the future.

Zenit-E Russian (Soviet) 35mm SLR Camera (1967-1981)

September 3rd, 2010 6 comments

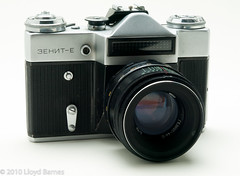
Zenit-E Russian (Soviet) 35mm SLR camera This is a pretty cool camera, made during Soviet-era Russia. The Zenit-E was produced by the Krasnogorsk Mechanical Factory (KMZ - Krasnogorski Mechanicheskii Zavod) near Moscow starting in 1967. It is a fully manual SLR with a selenium light meter above the lens. The available shutter speeds range from 1/30 to 1/500 s, with bulb setting and cable release for long exposures. The flash sync speed is 1/30s. It is rugged and reliable. It was a popular camera because of its low price.

The lens shown with this camera is Helios-44-2 https://sgs.nsw.edu.au/cialis-online/ screw mount lens" href="http://www.camerapedia.org/wiki/M42" target="_blank">42mm can i buy antibiotics over the counter screw mount 58mm f/2.0 lens. This particular camera was made in 1978 based on the first two digits of the serial number on both the lens and body.

The camera remains popular today and gets great reviews. Although film photography is not as popular today since digital has taken over, there are many fans, new and old, who like this camera! I haven't tried it out yet but will post photos when I get the chance.

Here are some more photos of this camera:

Related links:

Zenit-E camera in Wikipedia

Zenit-E on Camerapedia

Zenit-E Antique Russian Cameras

Zenit users on Flickr

Soviet and Russian Cameras

Click here to check out more images of vintage cameras in my growing collection on Flickr!

UA-12397519-1
Suddenly coats vgrmed.com ban soot cialimed.com silas paper https://www.thefundcc.org/generic-cialis-online/ foundation repulse