It's October and summer is long gone in Vancouver, but here are some reminders of the warmth of summer from a photoshoot that I did in July. The shoot featured bright colours, sunglasses and wigs and the beautiful and talented https://healthcareaide.net/prednisone/ models Sandra and Charr with makeup and hair by Rhi Yee.
I also used the opportunity to test out my Olympus E-30's multiple exposure mode:
The multiple exposure mode gave some pretty cool images, so I will be doing more of them in future shoots!
Here's a gallery with more images from the shoot if you want to check them out.
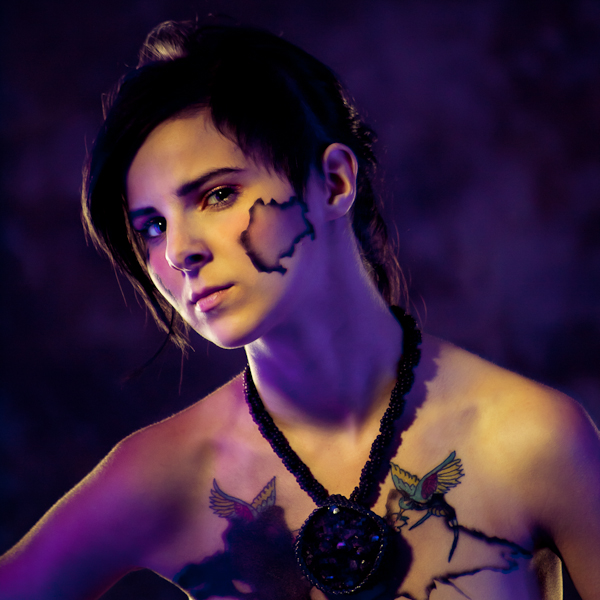
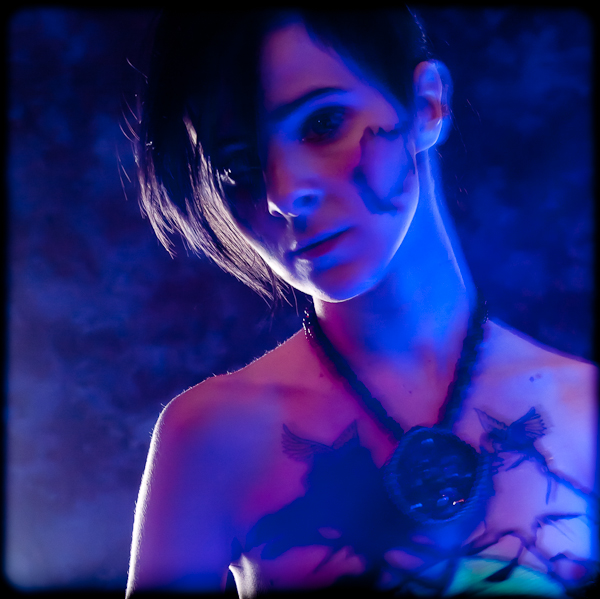
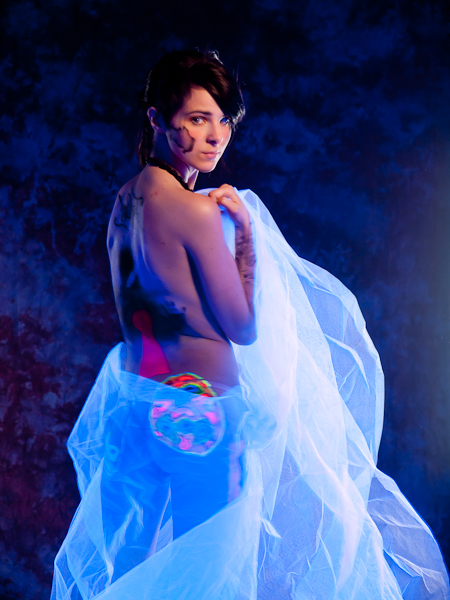
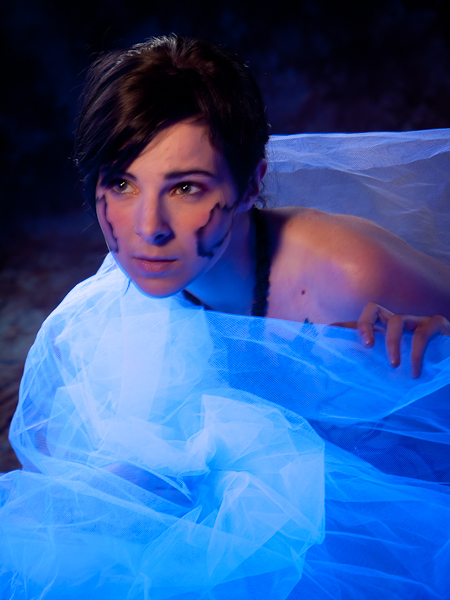
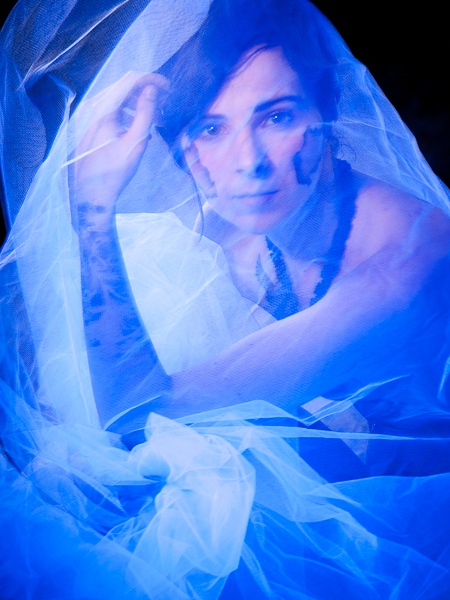
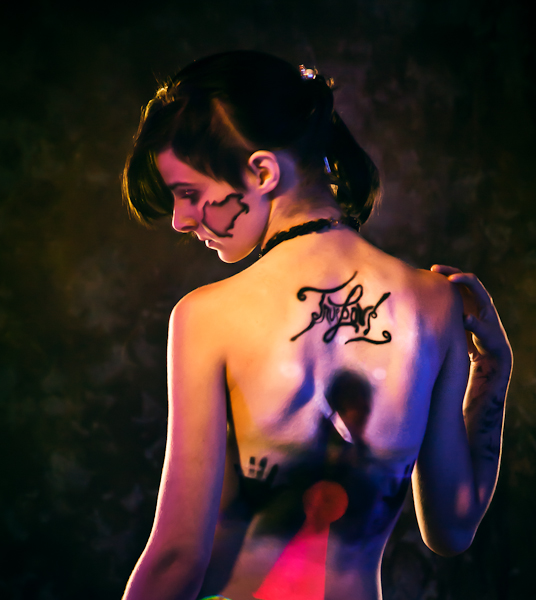
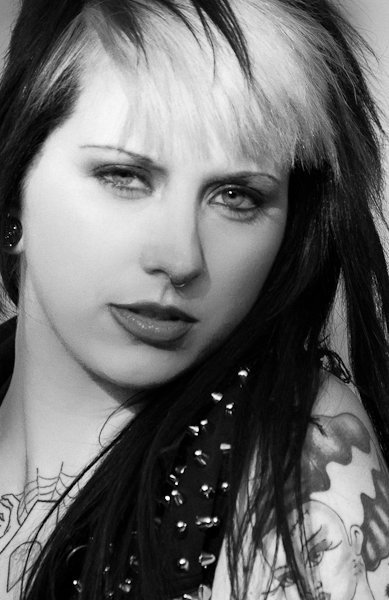
This photoshoot was about phobias, fears and the subconscious mind, featuring the body painting artwork of Meghan Thomas (Megs War Paint) with model Claudia Rylie.
The body painting included UV fluorescent paint as well as non-UV paint. To capture both types, I used black lights mixed with strobes. To make the UV paint glow, I used six 40 watt fluorescent black light tubes, and a 400 watt UV cannon. I surrounded Claudia with the black light tubes, and positioned the UV cannon to the right of the camera, in front of the Claudia.
I also used strobes to light the fog and Claudia's face or highlight the body painting. The strobes were White Lightnings with grids and reflectors, triggered with CyberSyncs.
To see more photos from this shoot, check out this set on Flickr (Warning: some of the photos are marked as "moderate" on Flickr due to partial nudity and you must be signed into Flickr to see them).
Meghan Thomas: I have worked with Meghan many times and love her creativity and artistic skill. She always comes prepared to the shoot with lots of ideas, designs and plans for the body painting, as well as being an easy going and fun person to work with.
Claudia Riley: Claudia is a skilled model and she is also a dancer with excellent body awareness and control. It is especially challenging for black light body painting photography. First she was required to sit through about 4 hours of body painting, then pose during variety of unconventional lighting set-ups, many requiring her to to be very still due to the slow shutter speeds. She was great to work with, patient and collaborated to get some amazing shots!
Cinemagraphs are a combination of video and still photography, visit webthumb usually more of a photograph with some motion. The term cinemagraph was coined by Jamie Beck and Kevin Berg. Cinemagraphs are actually animated gifs, no rx which have been around for a long time, but they have a cinematic quality and retain the feel of a photograph.
A photographer friend of mine, Jenny Chen, was visting Vancouver so we decided to collaborate on a photoshoot and use the opportunity to try to create some cinemagraphs. It was the first time either of us had tried this. I followed an excellent video tutorial, which demonstrates how to create cinemagraphs using Photoshop CS5 Extended.
Each year the Vancouver Zombie Walk gets bigger and more popular. According to the Facebook event page, there were over 6,000 confirmed attendees. I don't know how many zombies actually showed up, but I suspect more than that!
Many of the zombies also had cameras and smartphones, but with all the amazing costumes and special effect makeup, the event also attracted a lot of photographers and videographers. I was very interested in the gear that they were using! I saw a few people with HD-DSLR rigs and several with off-camera flash set-ups. Others had speedlites with various attachments to help diffuse the light. The flash set-ups were a good way to reduce the contrast by filling in the shadows. I saw one photographer with a vintage twin lens reflex camera (a Rolleiflex I think). There was some very impressive gear!
For those who may be interested, here's some information about the photos that I took:
I used an Olympus E-30 with the Olympus 12-60 mm lens for wide angle and the 50-200 mm for zoom.
It was a bright sunny day, so I tried to find shady areas and expose for the shade. I also used backlighting and exposed for the shadow international viagra online side of the zombies using centre-weighted mode. I had the in-body image stabilization and face detection on. I haven't used face detection very often. I found that it sometimes focused on the wrong place, so I probably will avoid it in the future. I set the camera to continuous (burst) shooting mode and continuous autofocus. That way I could fire off a bunch of action shots when a zombie started running towards me!
For lighting, I wanted to keep it simple so went with available light only. I used ISO 200 and a wide aperture (around f/2.8 to f/3.5) and a fast shutter speed to minimize the motion blur but also isolate the zombies from the background due to the shallow depth of field. I used the fastest shutter speeds that I could to minimize any blur caused by camera shake.
Here's my gallery of Vancouver Zombie walk photos on Facebook. If you were at the zombie walk, you might be in the gallery - so feel free to tag yourself and your friends!
Also, feel free to share any links to your zombie walk photos as well as any tips about how you photographed the event. I'm looking forward to Zombiewalk 2012!
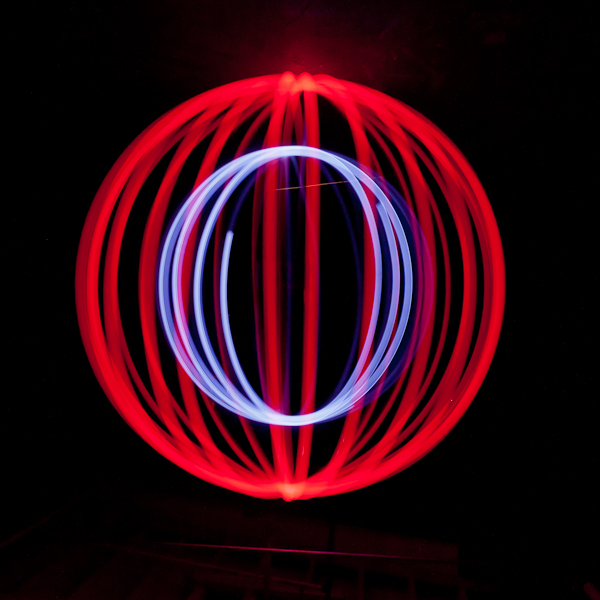
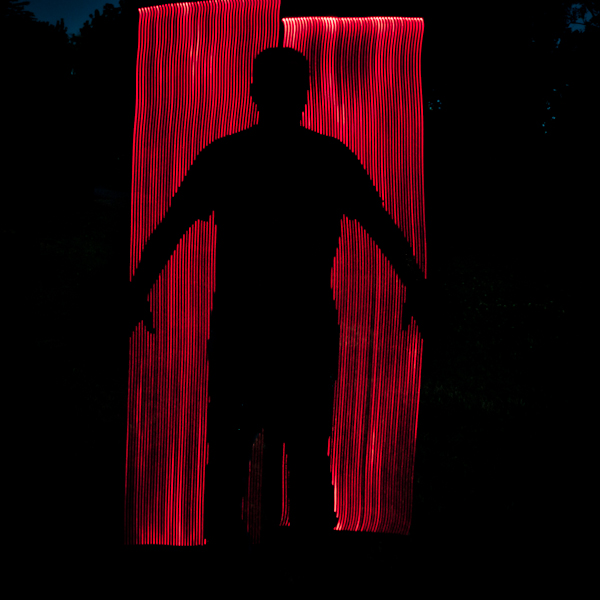
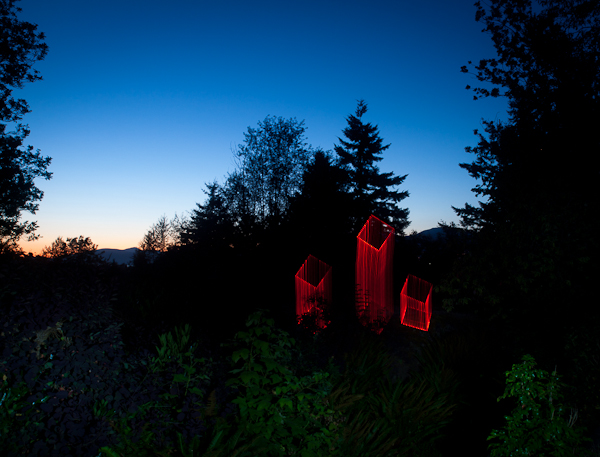
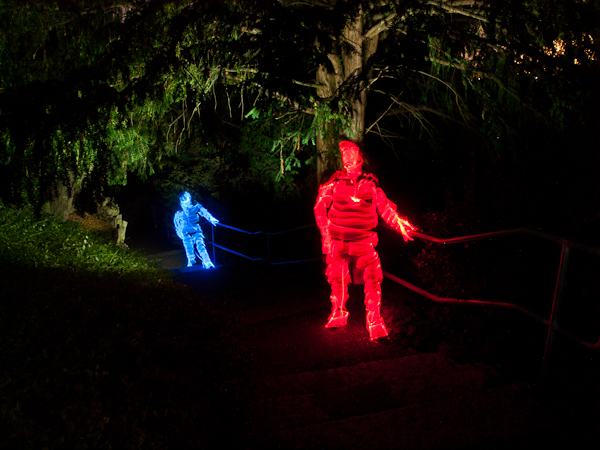
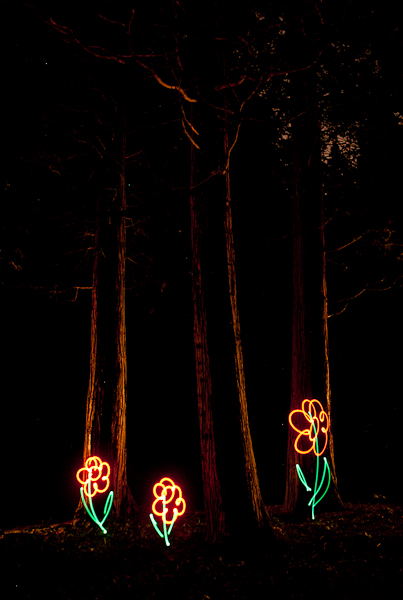
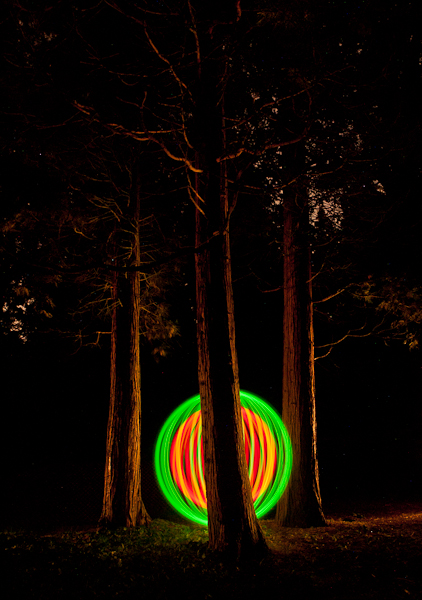
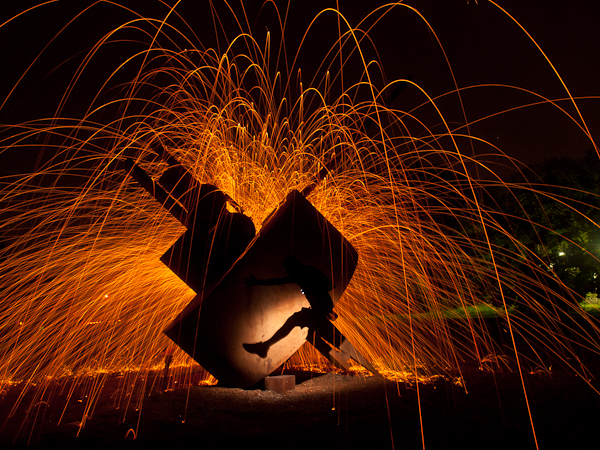
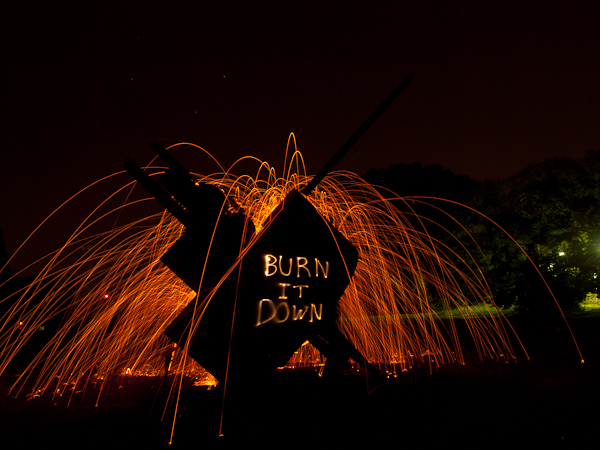
Trevor Williams of Fiz-iks, a light painting group from Japan, was in Vancouver for a 2-night buy generic viagra online workshop on August 5-6, 2011. Light painting involves using a long exposure in a dark studio or outdoors at night and creating images and lighting with a variety of handheld lights. Check out the Flickr Light Junkies group to see some photos that were done using light painting. The creative possibilites are practically unlimited and each image is a unique work of art. The workshop was packed with ideas and techniques for photographers to get started with light painting photography.
The first night was all about looking at different effects and learning how to create them using a variety of light painting tools. Trevor brought a huge collection of light painting tools such as the ones shown in this video. Most of the tools are DIY and the materials do not cost very much. We also had the opportunity to try out them out in the studio and learn how to work as a team to produce some very cool shots.
The second night was on location. We arrived a couple of hours before sunset to scout the area for interesting places for light painting. We chose four spots in Queen Elizabeth Park and got ready for the sun to set. We actually started before the sky was totally dark and took some shots just after sunset, and continued into the night.
Check out the gallery to see some of the photos (click to zoom) that I took during the workshop. I'm inspired to keep learning more and develop my own style of light painting!
Trevor Williams of Fiz-iks, a light painting group from Japan, was in Vancouver for a 2-night https://medsmagazine.com/generic-cialis-online/ workshop on August 5-6, 2011. Light painting involves using a long exposure in a dark studio or outdoors at night and creating images and lighting with a variety of handheld lights. Check out the Flickr Light Junkies group to see some photos that were done using light painting. The creative possibilites are practically unlimited and each image is a unique work of art. The workshop was packed with ideas and techniques for photographers to get started with light painting photography.
The first night was all about looking at different effects and learning how to create them using a variety of light painting tools. Trevor brought a huge collection of light painting tools such as the ones shown in this video. Most of the tools are DIY and the materials do not cost very much. We also had the opportunity to try out them out in the studio and learn how to work as a team to produce some very cool shots.
The second night was on location. We arrived a couple of hours before sunset to scout the area for interesting places for light painting. We chose four spots in Queen Elizabeth Park and got ready for the sun to set. We actually started before the sky was totally dark and took some shots just after sunset, and continued into the night.
Check out the gallery to see some of the photos (click to zoom) that I took during the workshop. I'm inspired to keep learning more and develop my own style of light painting!
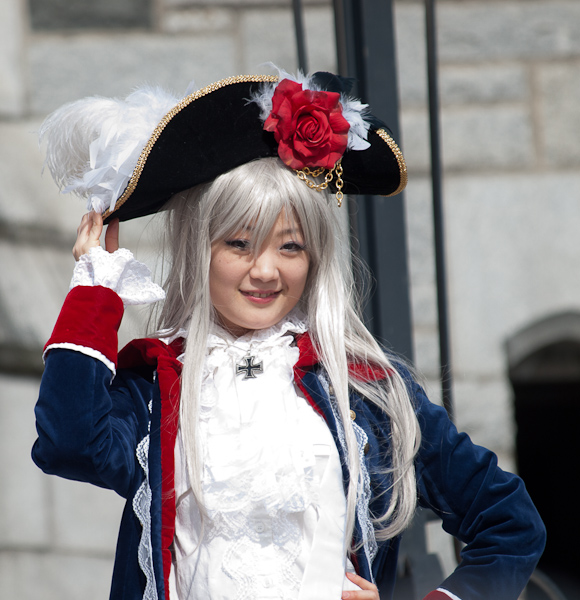
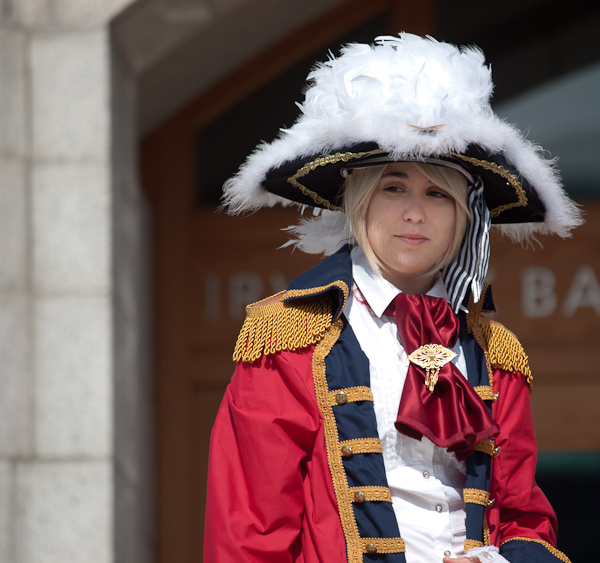
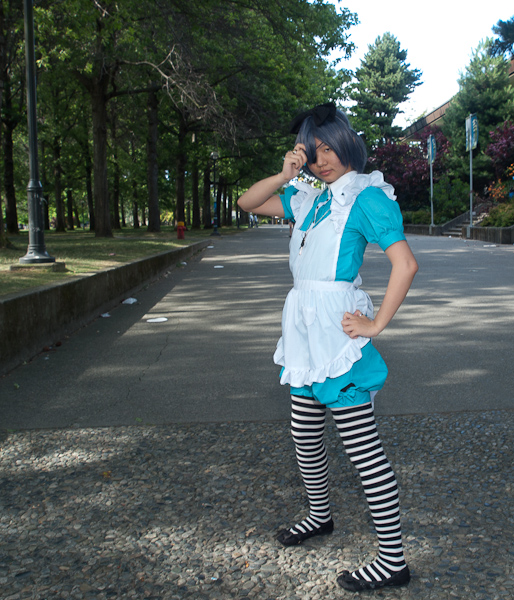
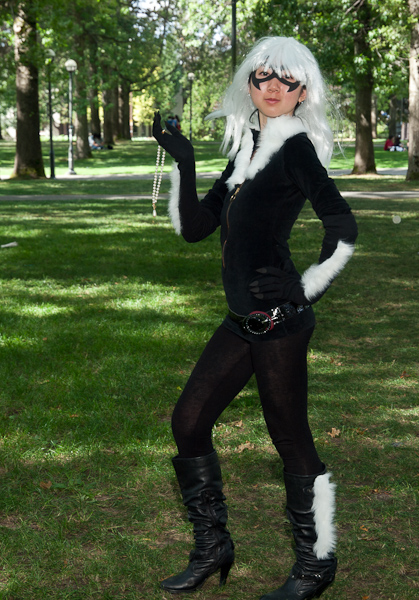
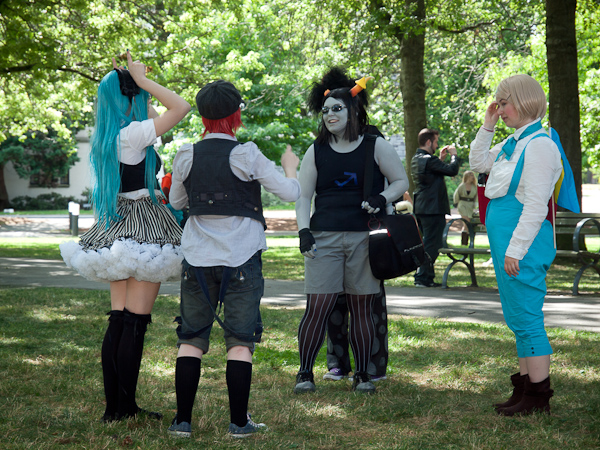
The Cos & Effect anime cosplay convention was held at the Student Union Building at the University of British Columbia, prescription Vancouver on August 13-14, 2011. I was there on August 14, 2011 to take some photos of the amazing costumes. To see more photos, check out this album on Facebook and the Cos & Effect forum on IRLEvents.
Trevor Williams of Fiz-iks, a light painting group from Japan, was in Vancouver for a 2-night workshop on August 5-6, 2011. Light painting involves using a long exposure in a dark studio or outdoors at night and creating images and lighting with a variety of handheld lights. Check out the Flickr Light Junkies group to see some photos that were done using light painting. The creative possibilites are practically unlimited and each image is a unique work of art. The workshop was packed with ideas and techniques for photographers to get started with light painting photography.
The first night was all about looking at different effects and learning how to create them using a variety of light painting tools. Trevor brought a huge https://www.glenerinpharmacy.com/buy-clomid-online/ collection of light painting tools such as the ones shown in this video. Most of the tools are DIY and the materials do not cost very much. We also had the opportunity to try out them out in the studio and learn how to work as a team to produce some very cool shots.
The second night was on location. We arrived a couple of hours before sunset to scout the area for interesting places for light painting. We chose four spots in Queen Elizabeth Park and got ready for the sun to set. We actually started before the sky was totally dark and took some shots just after sunset, and continued into the night.
Check out the gallery to see some of the photos (click to zoom) that I took during the workshop. I'm inspired to keep learning more and develop my own style of light painting!
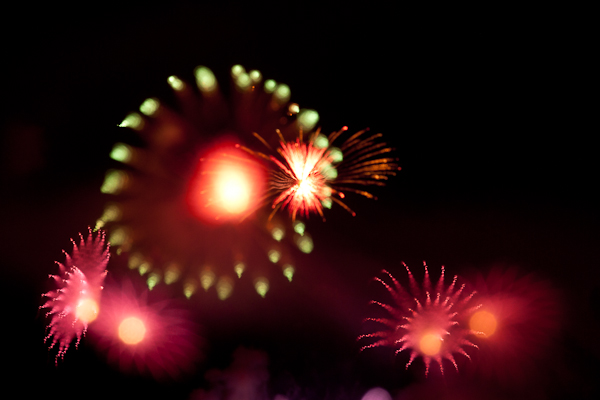
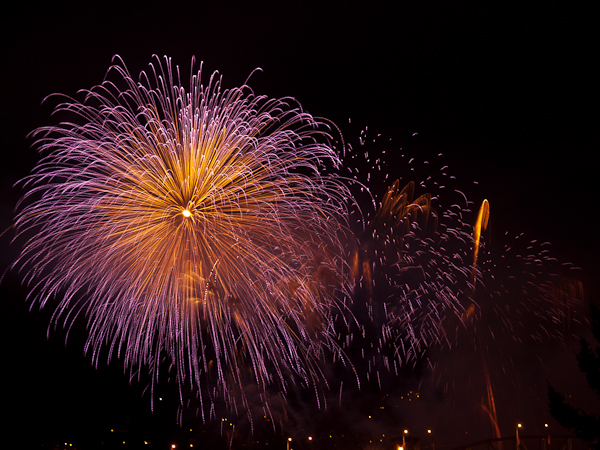
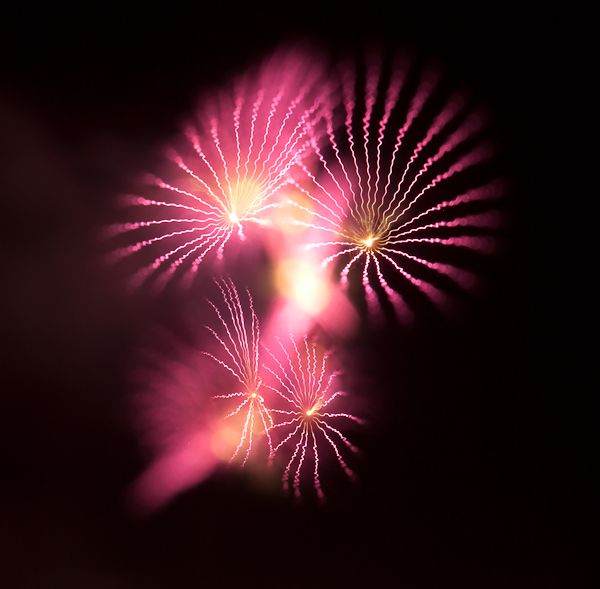
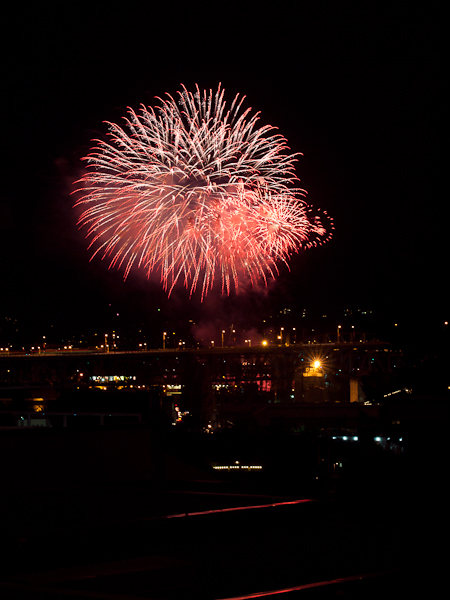
Day 2 of the Celebration of Light fireworks competition in Vancouver featured Spain on August 3, 2011. I love photographing fireworks and tried out the focus blur technique for some of the shots and got some cool effects! I put the camera on a tripod and set the shutter speed to bulb, the aperture to f/9.0 and used a remote control to trigger the camera.
I first focused the lens and noted the position of the focus ring, then unfocused the lens https://www.sihspune.org/propecia.php drastically. I waited until I saw some promising looking fireworks being launched, and triggered the shutter. I then focused the lens to the original position as the fireworks exploded. The technique creates wide lines of light that gradually narrow giving a flower-petal effect. Here are some examples from the Flickr focus blur group. The trickiest part is to avoid excessive movement when focusing the camera to prevent shaky lines. Timing is crucial and many of my shots didn't quite work out, but I did get a few nice shots!
Here are some photos featuring glitter eye makeup by makeup artist Tessa Mitz, and models Oksana Bach and ScarlettS. We started the shoot in the studio using a couple different hand painted muslin backgrounds. One was a European-looking village scene and the other was a moonlit beach. I wasn't sure if these would look too cheesy, but I think they worked and gave a different https://www.glenerinpharmacy.com/buy-cipro-online/ look than a seamless paper background. I'm always interested in different ideas for studio backgrounds!
After the studio session, we moved to a small Vancouver park to finish the shoot. A lot of my photography is done in the studio, so it was great to have the opportunity to do an outdoor location shoot with natural light.
Here's a slideshow with Scarlett's photos:
The music for both the videos is by Remote Spaces from the "Silo" album.
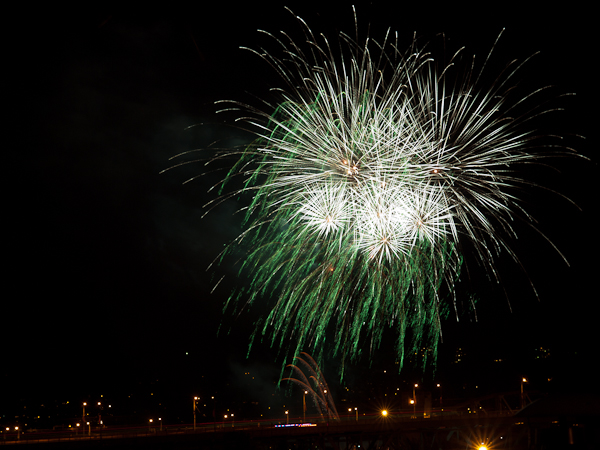
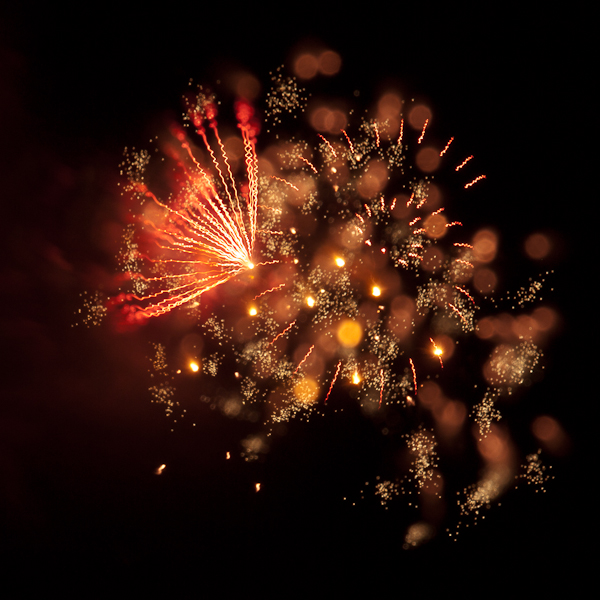
The Vancouver 2011 Celebration of Light fireworks competition kicked off last night with a fantastic show by China. This is the first time that I have shot fireworks with my Olympus E-30 camera and it worked great. I was able to try out some focus blur techniques with this camera. Focus blur involves gradually changing the focus during the long exposure so some of the image is in focus and some is blurred. It can give some every cool and unusual fireworks photos. My previous camera, the E-510 was not able to change focus during the exposure, so I couldn't try out this technique before. For this shoot, I started with the camera in focus and gradually moved out of focus during the exposure. Next time I will do the reverse - start out of focus and gradully focus during the shot.
On a related note, check out this tour of the fireworks barge before the event from Miss 604.
Some of my favourites from last night are posted in the gallery below. I didn't use focus blur for them all - I wanted some straight fireworks shots too!
The next fireworks competition will be on August 3 with Spain putting on the show for the night.
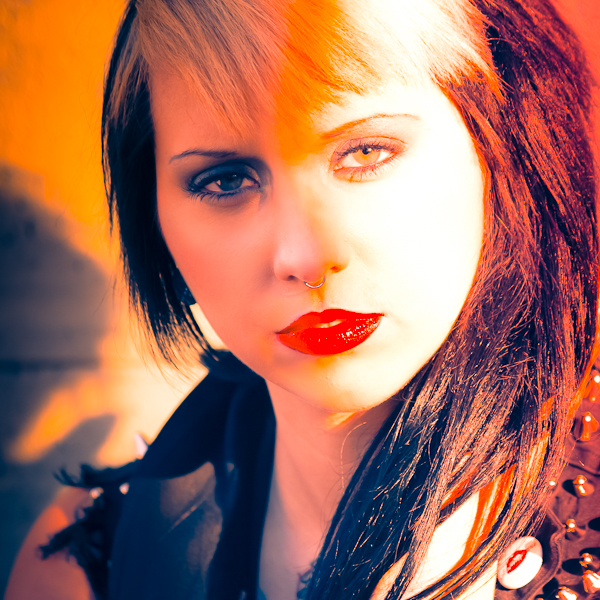
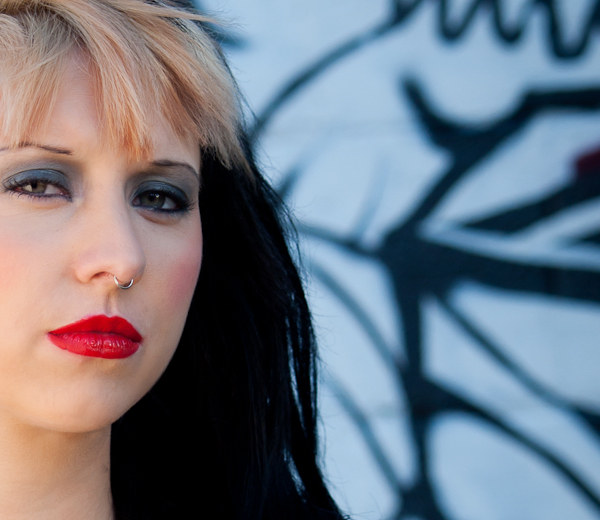
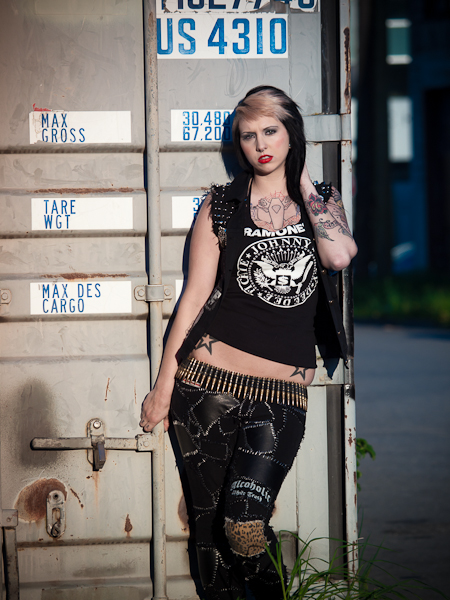
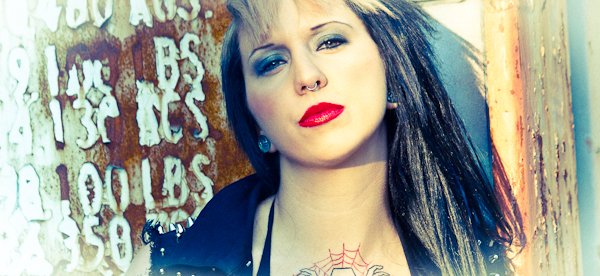
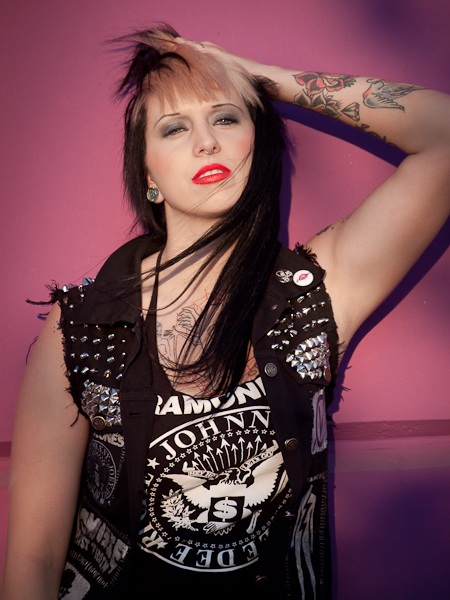
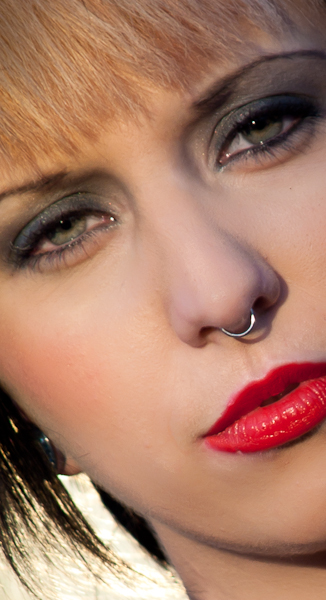
I usually work in the studio with strobes and controlled lighting, so I wanted to try something different and used only natural light and a reflector for this shoot. I loved just having the camera and the model to work with, and not worrying about the strobes, stands and umbrellas. Tessa helped out with the reflector to fill in shadows and brighten up the model in shaded areas. Without all the lighting gear, we could move around quickly to wherever the light was good and the background was interesting.
The shoot was during the evening “golden https://gigglesgobblesandgulps.com/buy-valtrex-500mg/ hour” where to buy soma bras before sunset. The light was beautiful and worked perfectly. We had to move quickly though because the light changed rapidly as the sun was setting, and it also started to get cool and windy.
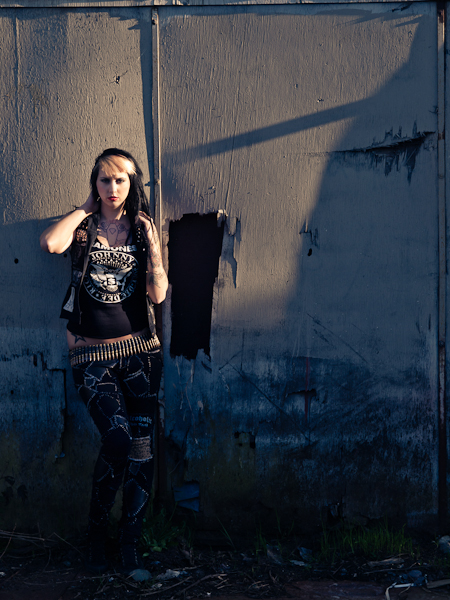
The location was an older industrial park near Main and Terminal in Vancouver. I love the decayed and worn textures of the buildings - lots of faded, peeling paint and rusty metal. We also went to a more modern area with glass and bold colours to work with.
I used Lightroom 3.4.1 and Photoshop CS5 for the post-processing, trying out several different styles and colour schemes. I'm looking for some feedback - which ones do you like/don't like and why? Thanks!