Video Tutorial: Pin-Up Photo Retouching
This video shows how I retouched a photo to give it a vintage 1940's - 1950's pin-up art look using Lightroom 3.3 and Photoshop CS4. The basic technique is in this video tutorial on 1950's pin-up effects on Planet how to buy viagra online reddit Photoshop, but with some modifications since I used a low-key buy cipro baikal-pharmacy.com dark background but the Planet Photoshop tutorial used a high key photo.
The techniques include:
- skin smoothing with the surface blur filter
- using layers & blend modes
- layer masks
- making selections using luminosity
- digital makeup
- using the photocopy filter
- merging & copying layers
- dodging & burning by using curve adjustment layers
Have you done pin-up photography? Please share your links and any techniques in the comments section - thanks!

Kurvy Model Pin-up
Tips for green photography
The news about the serious nuclear contamination and radiation from the stricken Fukushima Daiichi reactor in Japan is a strong reminder about our dependence on the environment. This is a terrible event and highlights the costs involved in generating power for our industrial society.
However, the cost to the environment for using fossil fuels such as coal and petroleum are even more serious, although less visible. For example, Seth Godin showed how coal energy costs 4000 lives for every life lost by nuclear power. We also know that the greenhouse effect of carbon dioxide released into the atmosphere by burning fossil fuels is changing climate, especially in the arctic. The impact of this climate change is slow and without the immediate scary impact as nuclear contamination, but over the long term is even more deadly.
I read the book Collapse by Jared Diamond, which showed how cultures throughout history had come to an end as a result of using their environmental resources in unsustainable ways. The comparison to our modern culture is quite profound and eye-opening. Luckily, there is still time to avert the severe consequences of an environment collapse!
What can photographers do to minimize their impact on the environment?
I found a website called The Green Photographer, that has some ideas - mainly involving the 3 R's - Reduce, Reuse, Recycle. Many of the ideas are applicable to any business or household, not just photography, and definitely worth implementing.
Some specific ideas for photographers:
- Use digital instead of film cameras
The environmental impact of digital versus film photography seems to fall in favour of digital photography, primarily because digital uses smaller amounts of less toxic chemicals. Most of the digital photographs will never be printed, and those that are printed typically use more http://www.minale.com.au/buy-viagra-sildenafil-online/ environmentally friendly chemicals. In addition using less paper helps to save trees.
- Use digital proofing instead of print
To take advantage of the environmental benefits of digital photography, do not print until necessary. Use projection or monitors to view the proofs with clients.
- Digital photography uses more energy than film
Use rechargeable batteries as much as possible for the cameras and flash units.
- Recycle used ink and toner cartridges
- Recycle e-waste (for example old digital cameras, computers, cell phones, monitors)
- Reduce and offset your carbon footprint
Use online tools to calculate your carbon footprint and purchase carbon offsets. The Go Carbon Neutral program has some excellent tools and advice.
- Use suppliers with carbon neutral and other sustainability programs
Check out your printers and paper suppliers to see what they are doing to reduce and offset carbon emissions and minimize their impact to the environment. If there are other suppliers doing a better job, bring your business to them instead.
- Communication
Photographers can also play a role in educating people about environmental and green issues through their photos and images. These floating in trash images show environmental problems with a visual impact, as do these images of plastic pollution on the remote Pacific island of Midway by photographer Chris Jordan. Some other works by Chris Jordan help to picture the immense numbers involved in the creation of our environmental problems in a way that cannot be done in words.
It can be overwhelming and difficult to take action when you are one person or a small business and just a tiny part of the big environmental picture. However, every contribution makes a difference and the numbers can be turned around to benefit rather than harm the environment and contribute to long term sustainability.
If you have another tip for being an environmentally friendly photographer, please add it to the comment section. I'm sure there are many other ideas that I have missed!
Cool Background Ideas – Light Painting & Smoke!

Here are the resuts of some quick test shots using black lights, smoke and light painting.
The subject was a vintage glass bottle with a ground glass stopper. I noticed a lot of these in the shop of Yusuf the chemist in Mombasa in the movie Inception! As a chemist, I'm always interested in vintage laboratory and apothecary items.
I made the pink fluorescent liquid by soaking the felt insert from a pink highlighter pen in some water. It worked really well! Here's more information about how to make liquids that glow under black light.
For the black light source, I used a UV Cannon and a 12" UV fluorescent tube.
I generated the smoke using a stick of incense. To light up the smoke, I used a Paul C. Buff X800 White Lightning strobe with a pink gel, and a 10º honeycomb grid and barndoors to prevent light spill on the bottle. The background was a black nylon fabric. The bottle was placed on a piece of white foam core.
I've used smoke quite often as an interesting background - it works best with a dark background and backlighting. In this case, I had the light to the right of the camera and behind the bottle, out of frame. For people, I have a fog machine that gives great smoke effects on a larger scale.
To get the above shot, 1. Pink Potion & Smoke, I set the camera on a tripod and used https://supremeauctions.com/buy-coreg-online/ second curtain sync (slow sync) and a 2.5 sec exposure and CyberSyncs to trigger the flash. I was below the table with the smoking incense, using a remote control to trigger the camera.

2. Pink Potion & Nebula - Exposure 71 sec, f/9.0, 100 ISO
For the next shot, 2. Pink Potion & Nebula, I used painting with light to create a nebula-like effect. For the the background, I used white seamless paper with a black nylon fabric covering it. With the black fabric in place, and the camera set to bulb, I started with a couple seconds of blacklight, then shut them off. While the shutter was still open and the studio in darkness, I removed the fabric to reveal the white seamless paper, I painted it with a Maglite flash light, with a blue gel over it some cool the light a bit, then closed the shutter with the remote. It took a few tries to get a background that I liked!

3. Pink Potion & Abstract - Exposure 48 sec, f/9.0, ISO 100
The third shot was done in a similar way as the second, except that I also used an LED flashlight and did not use the blue gel on the Maglite. The LED flashlight actually has three separate beams so it created trails in groups of 3, making an interesting abstract design.
If you are in need of a unique background in your still life or product photography, you might want to give these a try. If you have some similar examples, please share links to them in the comment section!
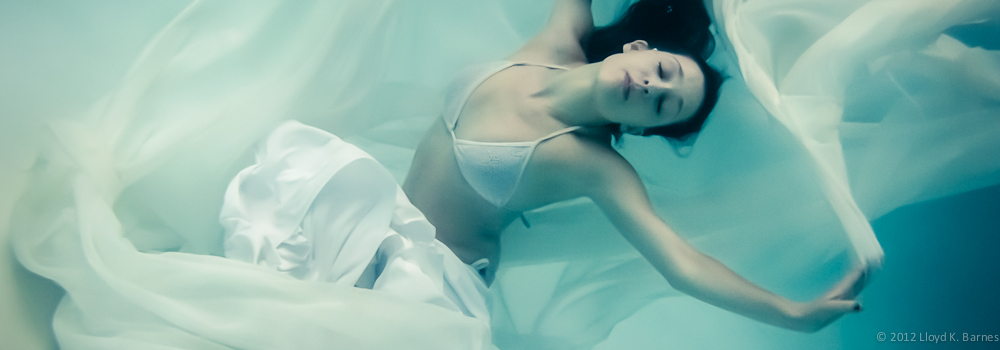
Primavera de Muertos
A photographer friend, who knows that I like to play around with old cameras, lent me her Minolta Maxxum 7xi (also known as the Dynax 7xi) to try out. Released in 1991, it was an advanced 35mm SLR camera for its time, with many innovative features. One of the coolest things about this camera are the expansion cards that it has for different creative program modes. They are intended to make the camera easy to use - just load the card and set the camera to P (program). I guess in 1991 it was not feasible to build all of the programs where to buy ambien into the camera like modern cameras.
I tried out the camera during a studio shoot using manual exposure, without the expansion cards. I attached a CyberSync to the hotshoe using a Minolta/Sony hotshoe adapter because the Minolta uses a proprietary hotshoe system (same as the Sony Alpha system). I set the shutter speed to 1/60th sec because I wasn't sure about the camera's sync speed. I looked it up later and found it is 1/200th sec, which is pretty good. I loaded the camera with Kodak Ektar ISO 100 colour negative film.
Strengths - excellent TTL metering system
Fast and accurate autofocus
Large bright viewfinder
Mid-roll film exchange
Manual film speed override
Weaknesses
Although the body is heavy and rugged, it is not weatherproof
The battery is expensive and not rechargeable (I paid $14.99 for a new 2CR5 lithium battery). It is supposed to be good for 50 rolls of 24 exposure film, without the use of the flash
Heavy, especially for traveling or hiking.
Program
Automatic rewind
Built-in motordrive
Lenses - Minolta A-Type bayonet mount - accepts all Minolta AF lenses
Related Links
Detailed specification of the Minolta Maxxum 7xi
A photographer friend, who knows that I like to play around with old cameras, lent me her Minolta Maxxum 7xi (also known as the Dynax 7xi) to try out. Released in 1991, it was an advanced 35mm SLR camera for its time, with many innovative features. One of the coolest things about this camera are the expansion cards that it has for different creative program modes. They are intended to make the camera easy to use - just load the card and set the camera to P (program). I guess in 1991 it was not feasible to build all of the programs into the camera like modern cameras.
I tried out the camera during a studio shoot using manual exposure, without the expansion cards. I attached a CyberSync to the hotshoe using a Minolta/Sony hotshoe adapter because the Minolta uses a proprietary hotshoe system (same as the Sony Alpha system). I set the shutter speed to 1/60th sec because I wasn't sure about the camera's sync speed. I looked it up later and found it is 1/200th sec, which is pretty good. I loaded the camera with Kodak Ektar ISO 100 colour negative film.
Strengths - excellent TTL metering system
Fast and accurate autofocus
Large bright viewfinder
Mid-roll film exchange
Manual film speed override
Weaknesses
Although the body is heavy and rugged, it is not weatherproof
The battery is expensive and not rechargeable (I paid $14.99 for a new 2CR5 lithium battery). It is supposed to be good for 50 rolls of 24 exposure film, without the use of the flash
Heavy, especially for traveling or hiking.
Program
Automatic rewind
Built-in motordrive
Lenses - Minolta A-Type bayonet mount - accepts all Minolta AF lenses
Related Links
Detailed specification of the Minolta Maxxum 7xi
Credits
Model: Tia Guzzo
Makeup: Jennifer Ruth
Hair: Hair Styling: Rhi Yee
Fashion stylist: Jihan Amer
Set decorator: Guen Gianfranchi
Photography: Lloyd K. Barnes
Music: Nanten
This shoot was based on the Mexican holiday Dia de los Muertos (Day of the Dead), treatment but with a Spring blossom twist. The makeup was inspired by calaveras de azúcar (sugar skulls) that are given as offerings to the dead on November 1, and by the work of 666 Photography and the art of Sylvia Ji.
The Day of the Dead festival originated with the ancient Aztecs and was dedicated to the goddess Mictecacihuatl, the queen of Mictlan, the Aztec underworld who keeps watch over the bones of the dead. Her husband is Mictlantecuhtli, was the Aztec god of the dead, Lord of Mictlan. The celebration continues today in Mexico and parts of the United States.

Mictlantecuhtli - Aztec God of the Dead
This is the second Dia de los Muertos shoot in a series. The first was In the Darkenss of Winter and the next two are in planning stages.
Do you have some favourite Day of the Dead images or makeup? Share the links in the comments section below!
Testing Out Nik Color Efex Pro 3
Nik Color Efex Pro 3 is a suite of plugins for Lightroom, Aperture, Photoshop and Nikon's Capture NX 2. There are 52 filters available, each having extensive tweaking and customizing capabilities.
I've heard a lot of good things about the software, so I downloaded the 15 day trial of the Mac version from Nik Software to see for myself. It's a fully functional version, but expires after 15 days. I used it extensively during the 15 days and enjoyed it. It worked seamlessly with Lightroom 3 and Photoshop CS4 and was easy to learn. I was able to get great results quickly, and the large variety of filters was a lot of fun to explore! I especially liked the dynamic skin softener, which was fast and gave very natural results. I also like the bicolor and lighten/darken center filters.
Here are a couple accutane buy photos that I edited with the help of Nik Efex (in conjunction with Lighrooom and Photoshop).
I used the dynamic skin softener, bicolor and vignette filters for this sugar skull photo:

I used the custom bicolor filter on this image:

I'm considering buying the full version, but will wait to see if a new version will be coming out soon, since the current version has been out for a few years now. I find the price to be a little high ($299) for the complete set of 52 filters mainly because I'm able to get similar results with Lightroom and Photoshop - although not always a quickly.
Do you use Nik Color Efex Pro 3? Let me know what you think! Is it worth the price tag?
Here are some reviews:
Review of Nik Color Efex Pro 3
Using Nik Color Efex Pro 3 to draw the viewer into your image by using the Vignette and Darken/Lighten Center filters
Book Review: The Linked Photographers’ Guide
The Linked Photographers’ Guide to Online Marketing and Social Media
Authors: Lindsay Adler and Rosh Sillars
Marketing for photographers has changed dramatically in the last few years. The changes are being driven by better and cheaper digital cameras leading to increased competition amongst photographers. In addition, traditional marketing and advertising is being replaced by the internet. The Linked Photographers' Guide shows how to use online marketing and social media to find clients - of fundamental importance for a successful business!
The Linked Photographers' Guide is a great reference for photographers who are looking to improve their Internet marketing. It covers the basics of personal branding, setting up a web site and blog, getting more traffic with search engine optimization, and monitoring the traffic using analytics. There's also a chapter on how to use Google Adwords.
Each of the major social generic viagra names networking sites of importance for photographers are covered in separate chapters. These include Facebook, Twitter, Flickr, YouTube, Tumblr, and LinkedIn. The book includes many case studies showing how some of today's successful photographers use social media, with their individual tips and suggestions.
The final chapter covers many more tools and services available to help facilitate social networking, such as some of lesser know social networking sites, URL shorteners, RSS feed readers, social bookmarking sites and much more.
The book is ideal for photographers who are new to social media, but is full of tips and information that would be useful for the more experienced as well. As the authors remind us, some of the details will no doubt become out of date as the existing sites evolve and new ones gain popularity. However, the principles will remain sound and this book is a great way for photographers to get up to speed in the rapidly growing world of social media.
Empire Avenue: Social Networking or Game or Both?
//EDIT THE FOLLOWING VARIABLES //enter your exact ticker var eav_t = "LLOYDKBARNES"; //Size 1 is 100x100 and Size 2 is 190x167 var eav_s = 2; //Do not edit the following: var eav_is_ssl = ("https:" == document.location.protocol); var eav_asset_host = eav_is_ssl ? "https://badge.empireavenue.com/" : "http://badge.empireavenue.com/"; document.write(unescape("%3Cscript src='" + eav_asset_host + "blog/?t=" + eav_t + "&l=" + escape(window.location) +"&s=" + eav_s + "' type='text/javascript'%3E%3C/script%3E")); // ]]>
Empire Avenue is a social networking game where you buy and sell other members as well as any Twitter profile. I joined about a month ago, and it's been a great way to find others who share my interests, or who are located in Vancouver, and to connect with them on their various social networks.
When you sign-up (it's free) you get 10,000 eaves, the virtual currency for buying and selling on the site. You register your social networking sites - Flickr, Twitter, Facebook, YouTube, LinkedIn, as well as your RSS feeds and Empire Avenue will start to assess your activity on these sites. After about a week, you will get scores for each site. You also get a score for your activity on Empire Avenue itself. The more you participate on a given site, the higher your score, up to a maximum of 100 per site. Your where to buy cialis share price will reflect your level of social networking activity, as well as the investments that other Empire Avenue members have made in you. You will see your share price and portfolio value grow as you engage in your social networks.
If you already participate in social media, Empire Avenue is a really cool way to see at a glance how you are doing on your different accounts. You will receive many different achievement badges as you increase your activity. It's a fun way to gauge your influence and see where you could be doing a better job.
You can find others who share similar interests or live in the same city and see their social networking profiles. There's a community section where you can browse and join communities according to your interests or city. It's very useful for finding contacts to follow on Twitter, Flickr or LinkedIn, and you can promote your own website, blog or recent posts too.
Empire Avenue is loaded with features and different ways to find and connect with people, and is a little overwhelming at first. To help, here's a great tutorial on getting started with Empire Avenue.
If you sign-up with this link you will get 2,000e bonus eaves to help you make your first buy!
Behind the Scenes Video: Sugar Skull Photoshoot
Here’s a short behind-the-scenes video of model Tia getting her sugar skull makeup done by Jenny and hair styled by Rhi to get ready for a photoshoot. The video also includes also a couple of clips with model Joshua with his skull makeup already done and getting some final styling touches by stylist Jihan Amer.
The theme of the shoot was based on the Dia do los Muertos (Day of the Dead) holiday in Mexico, but with a seasonal spring blossom twist. I'll be posting more information about this shoot soon, so keep an eye on my blog.
Here's a preview of one of the photos from this shoot:

Tia with Spring Muertos Sugar Skull Makeup
11 Tips for Painting with Light Photography

Calla Lily: Painting with Light 55 sec at f/8.0

White Orchid - Painting with Light - 25 sec at f/22
Painting with light is a great technique to create interesting lighting effects using ordinary flashlights. It's very simple to do and once you get into it, the possibilities are endless.
All you need is a flashlight, tripod and a camera that you can set to manual exposure. Also, the room must be completely dark. I like to use a MagLight because you can focus the beam, but any flashlight will do. LED flashlights work great too.
- White balance - conventional flashlights use tungsten or halogen bulbs, so you should set your camera's white balance to tungsten to get a natural looking light. LED flashlights are often closer to daylight, so you should set your camera to daylight white balance.
- Exposure - you can use any aperture, although I prefer to use a smaller aperture (higher f-stop) to give me more time to do the light painting. A wide aperture will be harder to work with because it's easy to overexpose the image. I set my camera to manual and use the "Bulb" shutter speed and a cable release. You can also use a long shutter speed such as 30 to 60 seconds. If you set the self timer you can trigger the shutter without touching the camera.
- Rapidly moving the flashlight will create a soft light with fewer shadows. If you hold the flashlight still, you will get sharp dramatic shadows.
- Avoid going over the same spot more than once or you risk overexposing that part of the image.
- Make sure you cover all the subject with light. Any areas that you don't buy ambien online paypal paint with the flashlight will be very dark or completely unexposed.
- With a digital camera you can look at the image on the camera's LCD screen after the shot to see how it turned out. This makes the technique a lot easier than it would be with a film camera!
- Focus the camera first and set it to manual focus. This way the camera's autofocus won't kick in when you open the shutter.
- Avoid moving the camera during the exposure or you will get some blurred images. Even though the camera is on a tripod, because you are working in the dark it's easy to bump into the tripod and nudge the camera out of position. If that happens, your image will probably not turn out - although sometimes you may get some interesting double exposure effects!
- Turn off the camera's noise reduction feature because it takes a long time for the camera to process the image after each shot when you have long exposure times. I use Lightroom's noise reduction on the the RAW image in post-production.
- Avoid pointing the flashlight directly at the camera's lens. Shade the flashlight with your hand or a small rolled up piece of black bristol board. If the flashlight points toward the camera you will get trails of light - sometimes this might look pretty interesting but usually you probably will not want it.
- Use coloured gels over the flashlight to add creative colour effects.
Painting with light is a lot of fun and it's amazing to see the lighting effects that you can get with such a simple set up!
Have you tried painting with light? If you have, post a link to the photo in the comments section below.

Painting with Light Exposure: 80 sec at f/16
The Supermoon

The full moon last night was a supermoon, and was the closest to the earth that it's been since 1993. Because the orbit of the moon is an ellipse instead of a perfect circle, its distance to the earth varies from about 357,000 km (perigee) and 406,000 km (apogee) each month. When the full moon occurs at the perigee, it's a supermoon or super perigee moon. The supermoon is about 12% larger than the average full moon because it's closer to the earth. Then next time the full moon https://sdarcwellness.com/tramadol-therapy/ will be this close will be November 14, 2016.
I took the opportunity to photograph the supermoon because it was a clear night (rare for Vancouver in March!) and an excellent opportunity to get as detailed an image of the moon as possible with my camera.
I used a 50-200 mm zoom lens at 200mm with a 1.4x teleconverter (to give an effective 283 mm) at f/5.6 and 1/100s s and ISO 100. I used a tripod with a remote and a 2 second timer to prevent camera shake. The image was cropped and sharpened using Adobe Lightroom 3.3.
Did you take photos of the supermoon? Share your links in the comment section below!
Here's a slideshow from Flickr with supermoon images from around the world: